
Overview
The Warehouse To Warehouse Transfer helps you manage the transfer of inventory between warehouses. When such a transfer request is created, the From Warehouse is the warehouse you are transferring the items from. The Destination Warehouse is the warehouse you are transferring the items to. In contrast to the One Way Transfer, a Warehouse to Warehouse Transfer requires you to specify both an In and Out warehouse location. The Interim Warehouse will store your items while they are in transit until the transfer is complete.
Warehouse To Warehouse Transfer Module
The Warehouse To Warehouse Transfer module is located within Skustack’s Transfers tab.
Search Transfers
There are three modes for searching transfers:
- Search By ID – Search for a specific Transfer ID.
- Search By Tracking – Search for a transfer by a specific Tracking number.
- Search All – Search for all transfers and filter by Status:
- All
- Pending
- Requested
- Partially Picked
- Fully Picked
- Shipped
- Partially Received
- Received
- Rejected
To search for transfers, select any of the above filter methods and tap Go.
To filter out fully received transfers, enable the Exclude fully received transfers checkbox.
Create Transfers
To create a transfer request in the Skustack app, follow the steps below:
- Navigate to Transfers > Warehouse to Warehouse Transfer.
- Tap the + icon to initiate a new transfer.
- Enter a Title for the transfer.
- Select the From Warehouse, or the warehouse from which the product will be sent.
- Select an Interim Warehouse where the inventory will be stored while in transit.
- Select the Destination Warehouse where the inventory will be received.
- Tap Create.
- Tap the + icon to add products.
- Scan the SKU/UPC/Serial to open the product dialog and tap OK.
- Scan units to add to the quantity or enter your desired quantity manually.
- Tap Add.
- The transfer request will now be listed as Pending.
- The three dots menu in the upper right corner of the screen leads to additional actions such as:
- Print Product Barcodes – Triggers the printer connected to your device to print labels with the products barcodes.
- Take Photo – Snap a photo and associate it with a transferred SKU, either by selecting it from the list or by scanning its License Plate Number, UPC code, or FNSKU code. The image will be saved in the transfer request documents.
- Add Photo from Gallery – Select an image from your device’s Gallery and associate it with a transferred SKU, either by tapping on a product from the list or by scanning its License Plate Number, UPC code, or FNSKU code. The captured image will be saved in the transfer request documents.
- Notes – Tap to add a custom entry for the transfer.
- When the transfer request is ready to be confirmed, tap the checkbox icon at the top of the page and select Set Requested.
- The transfer will now be listed as Requested.
Manage Transfers
To manage existing transfers to the Destination Warehouse, follow the steps below:
- In the Warehouse to Warehouse Transfer module, tap the Search icon and set the Mode to Search By ID, Search By Tracking, or Search All (default).
- Open the required Transfer.
- (Optional) To build a Pallet for all products in your Requested transfer, tap the Pallet icon. Once your pallet is generated, tap the same icon again to print its label.
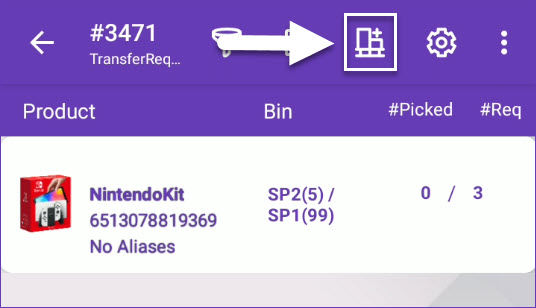
- Tap or scan a product to pick it. To reveal a product’s full alias, press and hold its ID.
- You can also select Replace to pick a replacement product.
- Enter the Bin From. Note that the bin field will only be displayed if your From warehouse is bin-enabled.
- Adjust the Pick Qty or scan a product.
- Tap Pick.
- Continue with all items in the transfer.
- The transfer will now be listed as Fully Picked.
- When all items have been picked, tap the checkbox icon at the top of the page and select Set Shipped. The Set Shipped status can be changed to Set Unshipped by selecting the enclosed checkbox icon ✔.
Receive a Transfer
To receive a transfer request in the Skustack app, follow the steps below:
- On your device, log into the Destination Warehouse.
- In the Warehouse to Warehouse Transfer module, tap the Search icon and set the Mode to Search By ID, Search By Tracking, or Search All (default).
- Select the desired Transfer.
- The three dots menu in the upper right corner of the screen leads to additional actions such as:
- Print Product Barcodes – Triggers the printer connected to your device to print labels with the products barcodes.
- Take Photo – Snap a photo and associate it with a transferred SKU, either by selecting it from the list or by scanning its License Plate Number, UPC code, or FNSKU code. The image will be saved in the transfer request documents.
- Add Photo from Gallery – Select an image from your device’s Gallery and associate it with a transferred SKU, either by tapping on a product from the list or by scanning its License Plate Number, UPC code, or FNSKU code. The captured image will be saved in the transfer request documents.
- Notes – Tap to add a custom entry for the transfer.
- Tap on a product.
- Enter the Bin To. Note that the bin field will only be displayed if your Destination warehouse is bin-enabled.
- Adjust the Pick Qty with the amount you are receiving.
- Tap Receive.
Manage Warehouse Transfers
The Skustack Admin portal lets you easily search for existing Warehouse Transfers, as well as create new ones.
Search Warehouse Transfers
To search Warehouse Transfers, follow the steps below:
- Navigate to the Skustack Admin portal at https://xx.skustack.com (replace “xx” with your server ID or team name).
- Enter your login credentials.
- On the left, select Transfer > Manage Warehouse Transfers.
- Configure your Default filters to make sure that the results display exactly what you need.
- Click Search. Each filter you apply gets highlighted. If a filter is gray or not displayed at all, it’s not active.
- To manage the columns in the grid, click the three dots icon on the top right and select Customize Columns. You can:
- Reorder columns by dragging them up or down in the list;
- Hide columns by clicking the Trash icons;
- Add columns by clicking Add column.
- To arrange the data in a different order, use the Sort by menu.
- To save your filtering and sorting options, click Save view, enter a Name, and click Save.
- Click the + icon at the lower right-hand corner to create a new transfer, or select a transfer from the grid and access the Actions menu to either Export To Excel, Cancel, or Delete it.

Create Warehouse Transfers
Inventory transfers can be created per product or for multiple products simultaneously.
Individually
- Navigate to Products > Open a product > Toolbox > Warehouse > Transfers > Edit.

- Click the + icon (Show me where!).
- Enter the warehouse you want to transfer from and the warehouse you want to transfer to. Then, enter the number of units to transfer, a transfer reason, inventory cost (optional), and click Transfer.

In Bulk
- Navigate to Transfer > Manage Warehouse Transfers.
- Click on the green + icon in the lower right-hand corner.
- Populate the Title and Company fields.
- Select the warehouse from which the product will be shipped.
- Select an interim warehouse through which the product will be transferred.
- Select a destination warehouse where the product will be stored.
- (Optional) Add Notes.

- Click on the blue arrow icon to continue.
- Add products to your request. This can either be done manually or through a file upload.

- Add the desired quantities in the grid, and click Finish.

- A success message will indicate that the transfer is created and the request will now be listed as Pending. Alternatively, you can create transfers with a Pending status using a file import.

- Click View Transfer Details.
- When the transfer request is ready to be confirmed, access the Actions menu and click Set Requested.
- When the items are ready to ship, access the Actions menu and click Set Shipped. The inventory will transfer over to the interim warehouse.
- To edit the shipped quantity, set the transfer to Unshipped, edit the quantity, and set it as Shipped again.
- When the transfer is ready to be received, access the Actions menu and select Receive Shipment. This will transfer the inventory quantities to the destination warehouse.
Warehouse Transfers related to Amazon FBA Removals
FBA Removal transfers are received through a separate module within Skustack. Learn more about that here.