
Overview
Removal orders are requests from your fulfillment partners, such as FBA and WFS, to return inventory to your warehouse for various reasons. You can seamlessly manage such requests via Skustack’s Removals module. Once a removal task has been placed in the fulfillment partner’s system, a Warehouse Inventory Transfer will be generated in Skustack. These inventory transfers are named after the removal order ID and can be received in a few simple steps. This process allows you to track the inventory’s movement history meticulously.
Removals Module
The Removals module is located within Skustack’s Fulfillment tab. Here you can search and receive FBA and WFS removals in your warehouse.
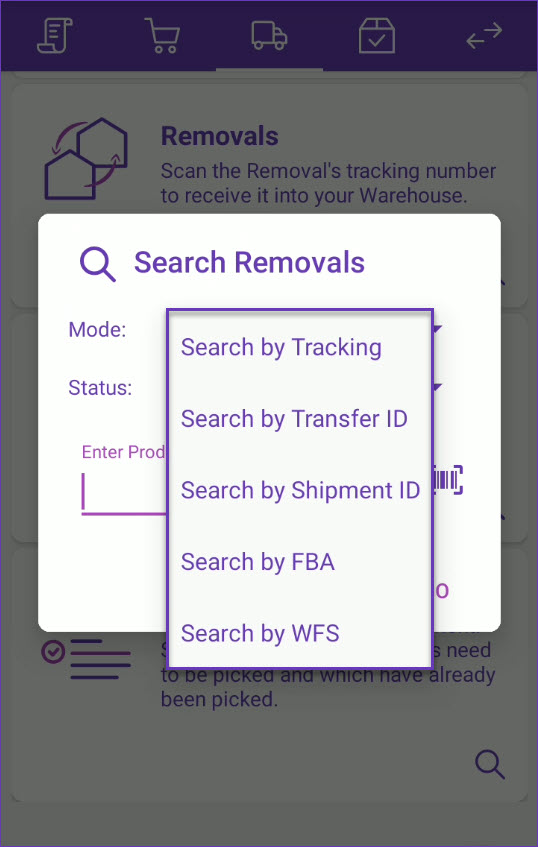
You can search for Removals in one of the five modes, described below:
- Search by Tracking – Opens a single Removal using its tracking number.
- Search by Transfer ID – Opens a single Removal using the transfer ID.
- Search by Shipment ID – Opens a single Removal using its tracking number.
- Search by FBA – By default, opens all FBA Removals in Skustack. In this mode, you can filter by removal Statuses (described below) and search for a specific SKU/UPC, if required.
- Search by WFS – By default, opens all WFS Removals in Skustack. In this mode, you can filter by removal Statuses (described below) and search for a specific SKU/UPC, if required.
- Status – Defaults to all. The available options are:
- All
- Shipped
- Partially Received
- Received
- Rejected
- SKU/UPC – Filter by specific product or UPC.
- Status – Defaults to all. The available options are:
Manage Removals
You can use your Skustack device to receive existing FBA and WFS Removals:
- Navigate to Fulfillment > Removals and open the required Removal.
- Swipe down to see the status of the request and the number of units received.
- To filter the return products by status, tap on the Filter icon.
- Swipe an item to the left to reveal shortcuts to other actions:
- Bins – Displays all bins in which this item’s units are stored.
- Info – Directs you to the Product Info module.
- Labels – Prints labels for the product.
- Disassemble – Select this action to disassemble kits, if any are received.
- The three dots menu in the upper right corner of the screen leads to additional actions such as:
- Select Product Identifiers – Here you can choose product identifiers to display – UPC, Aliases, and Product Name.
- Print Product Barcodes – Triggers the printer connected to your device to print labels with the product’s barcodes.
- Take Photo – Adds a photo of the item to the transfer documents.
- Notes – Tap to add a custom entry for the transfer.
- Scan the SKU/UPC, or select the item on the screen. You can also scan Amazon’s LPN (License Plate Number) for the item. The product dialog will open.
- Scan/enter a bin, or select from the list of suggested bins.
- Scan units to add to the received qty оr adjust the quantity manually.
- If the Lot Number workflow is enabled for your company and the product is set as expirable, you must select a Lot Number before receiving it. Tap on More Lot/Expirys to view existing or add new lots.
- Tap Receive. When all items in the removal are received, a success message will display at the top.
Related Settings
| SETTING | DESCRIPTION |
| Validate serial globally | Client setting. Enables serial number validation in Skustack. Learn more about serial number validation and relevant configuration settings here. |
| Require serial scan if necessary | Skustack’s Warehouse Management setting. When enabled, will force the user to scan serials for products that are set to require serial scan when receiving. |
| Use Receiving Bin | Skustack’s Warehouse Management setting. When enabled, only allows receiving into the Receiving bin. |