Overview
A label printer can be connected to Skustack to print PickList confirmation labels, product labels, bin labels, and FBA box barcodes.
Compatible printer models: Zebra ZQ630, Zebra ZQ610, Zebra ZQ600, Zebra ZQ500, and Rongta RPP320. Thermal printers integrated with your Shipbridge installation can also be utilized via Skustack.
Label Printer Configuration
Label printers can be connected to Skustack via Bluetooth, WiFi and RTC.
Before you can connect a Zebra Label printer:
- Click the following link to download Setup Utilities.
- Make sure to grab the correct driver files and also push the correct Firmware version to the printer if you are having issues printing.
Bluetooth Connection
To connect the printer via Bluetooth:
- Enable Bluetooth on your Android device.
- Turn on your printer.
- Go to the Bluetooth page on your Android device.
- Scan for devices.
- Find the device you want to pair and select it.
- A pairing request will display on the Android device.
- The pair request password for the RPP320-E is ‘0000’. (four zeros).
- After this, you should see the device move to the Pair Devices section.
- Your Bluetooth printer is now paired with the Android device.
Next, navigate to the Skustack app and select this device as your primary printer. To do that:
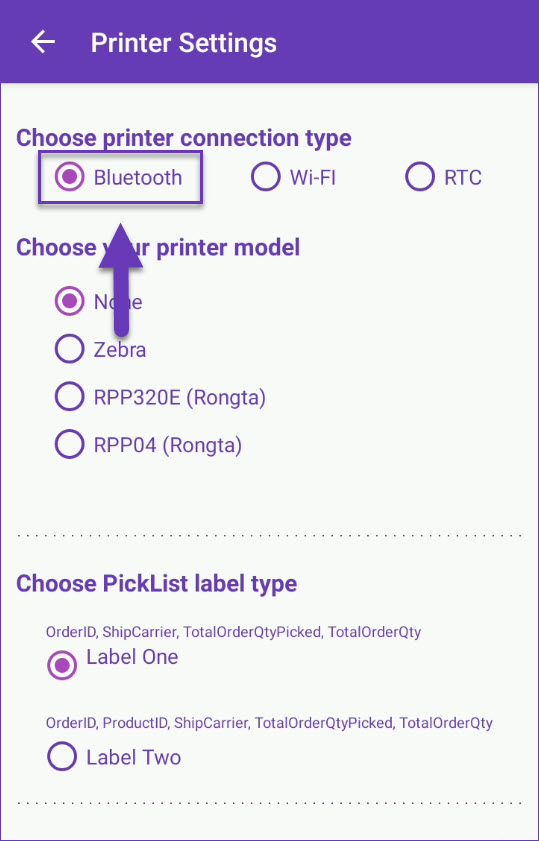
- Go to Settings > Printer and select Bluetooth as a connection type.
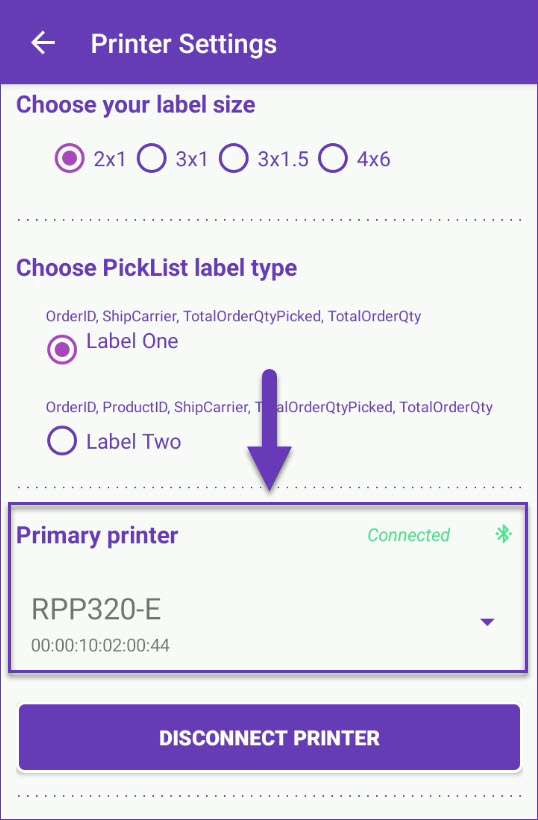
- Choose your label size and picklist label type.
- Select the primary printer from the dropdown (only paired devices will show in this list).
- Tap Connect Printer.
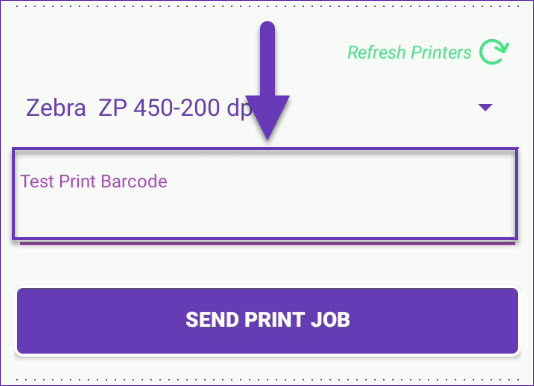
- Enter a test value in the Test Print Barcode field and tap Send Print Job to ensure that the device is connected and printing successfully.
An alternative way to connect the device is to:
- Go to Settings > Bluetooth.
- Tap the Enable toggle to turn on Bluetooth on the device.
- Scan for available devices.
- Tap Assign as primary printer.
- Tap Connect.
When using the RONGTA printer, it is recommended to calibrate the device. To do that and feed a complete test label:
- Press and hold the feed button for 3 seconds.
WiFi Connection
To connect a Zebra printer via WiFi:
- Enable the WiFi on your device.
- Turn on your printer.
- From your installed Zebra Setup Utilities, navigate to Configure Printer Connectivity and select Wireless.
- Obtain the printer’s IP address.
- Go to Settings > Printer and select WiFi as a connection type.
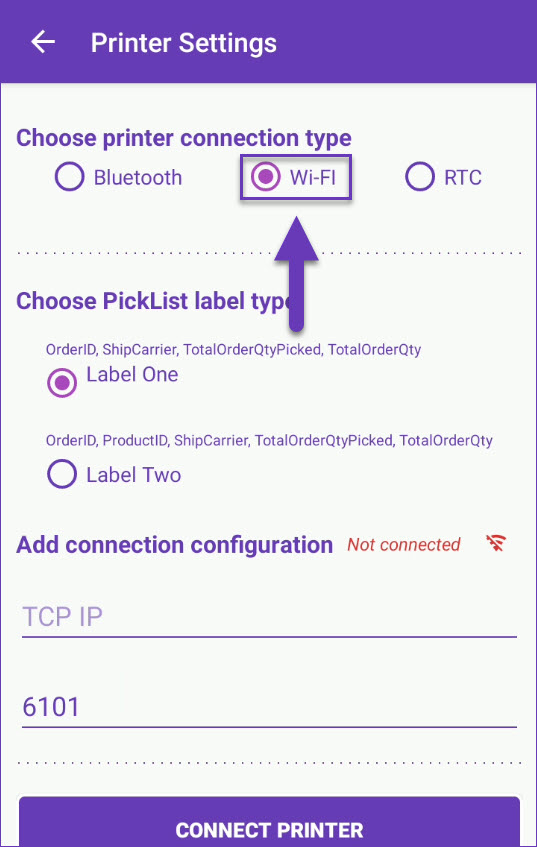
- Choose your label size and picklist label type.
- Enter the printer’s IP address and Port.
- Tap Connect Printer.
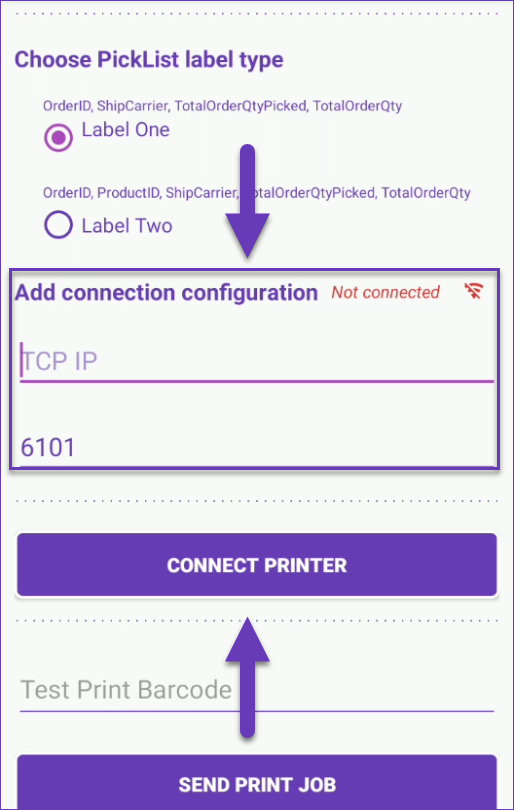
- Enter a test value in the Test Print Barcode field and tap Send Print Job to ensure that the device is connected and printing successfully.
RTC Connection
The RTC (Real Time Connect) feature enables you to link your Skustack device to a printer configured in your Shipbridge installation.
To establish an RTC connection, your Shipbridge integration with Skustack must be configured and App Setting EnableRealTimeConnect must be enabled.
To connect to RTC printers:
- Turn on your printer and log into a Shipbridge installation that is configured with it.
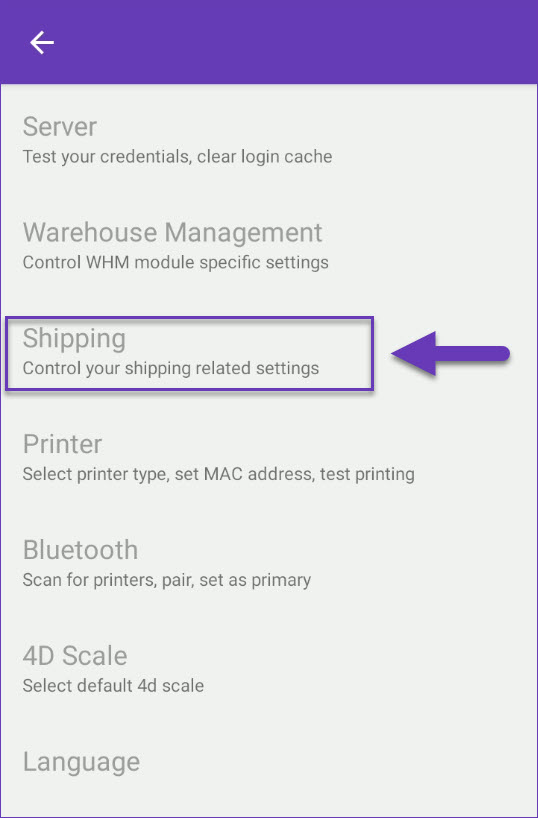
- Navigate to Settings > Shipping to choose the appropriate Shipbridge installation.
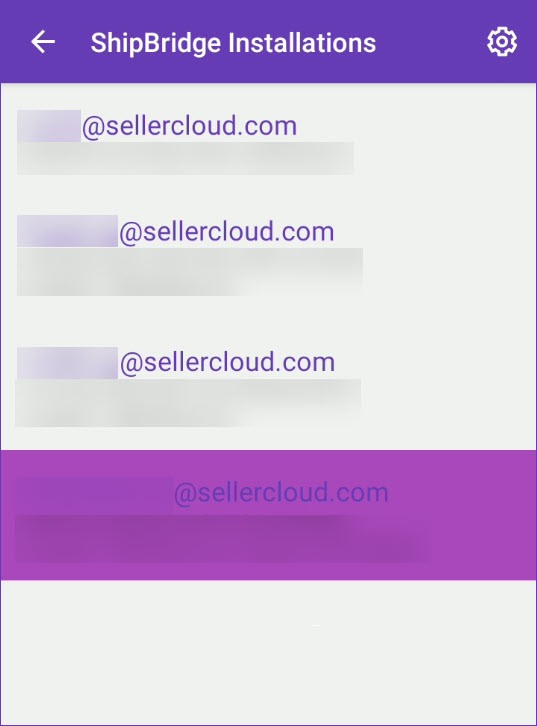
- Tap on the installation that you intend to use.
- Return to Settings and tap on Printer to select RTC as a printer connection type.
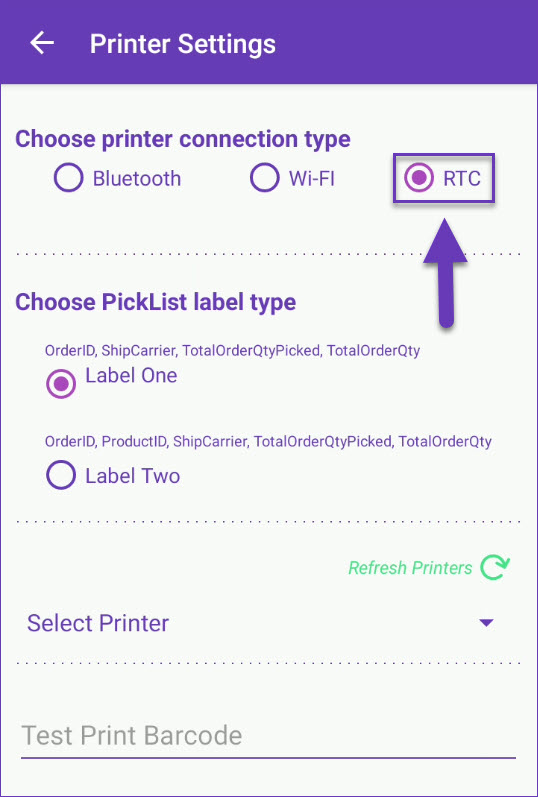
- Choose a Picklist label type.
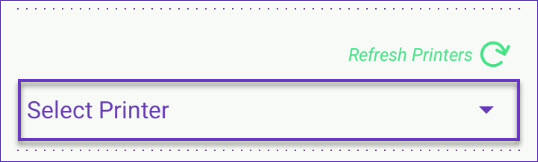
- Select the primary printer from the dropdown (only paired devices will show in this list). To reload the list of paired devices, tap on Refresh Printers.
- Enter a test value in the Test Print Barcode field and tap Send Print Job to ensure that the device is connected and printing successfully.