Overview
The Skublox Integration with Skustack gives you the ability to organize your warehouse processes with a variety of sorting methods, such as the Receive To Light method. Receive To Light combines the Cross-Dock and Pick-To-Light workflows – it allows you to receive items from a vendor and immediately sort them onto a Skublox lightwall for pending orders. This process aims to reduce the time and expenses linked with storage while optimizing the product sorting processes.
Receive To Light Module
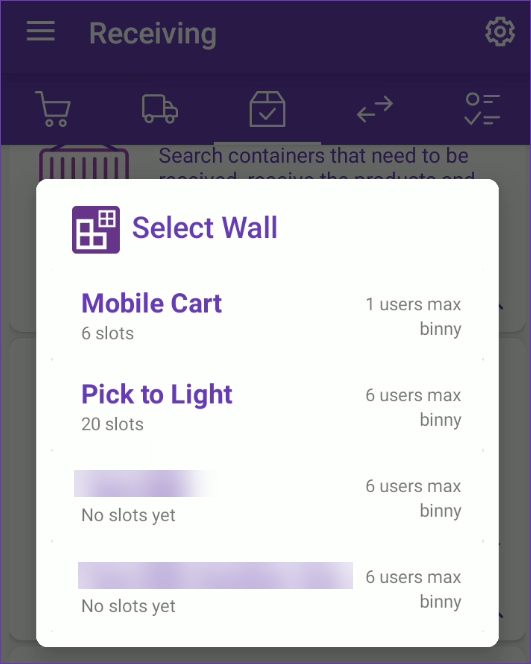
The Receive To Light module is located within Skustack’s Receiving tab. Here, you can view all of your warehouse Bin-to-Light walls and select which one to use to receive PO products and directly sort them for order shipping:
- Navigate to Receiving > Receive To Light and select the wall on which you want to sort.
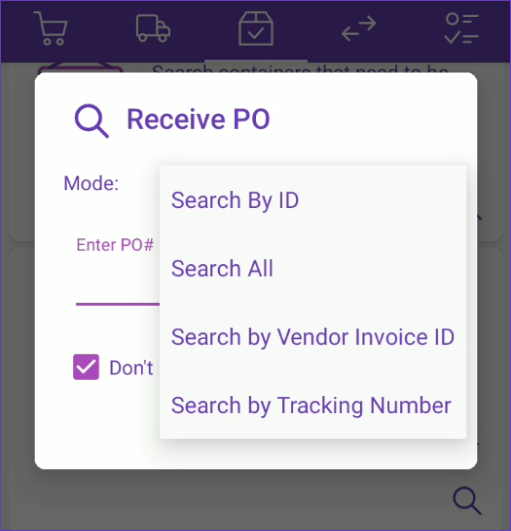
- Select your desired Search Mode and tap Go:
- Search By ID – Enter the ID of the purchase order that you want to work on.
- Search All – Use this option to search for all POs. You can narrow the search results further by selecting a Vendor from the dropdown list or by entering a specific SKU/UPC.
- Search by Vendor Invoice ID – Enter the respective Vendor invoice number.
- Search by Tracking Number – Search by adding or scanning a tracking number.
- When you open the PO that you want to work on, you’ll see a prompt to search for a Picklist by its ID. Alternatively, you can tap on Find PickList and select the required one from the list. Once your applicable picklist is chosen, tap Save to assign it to the PO.
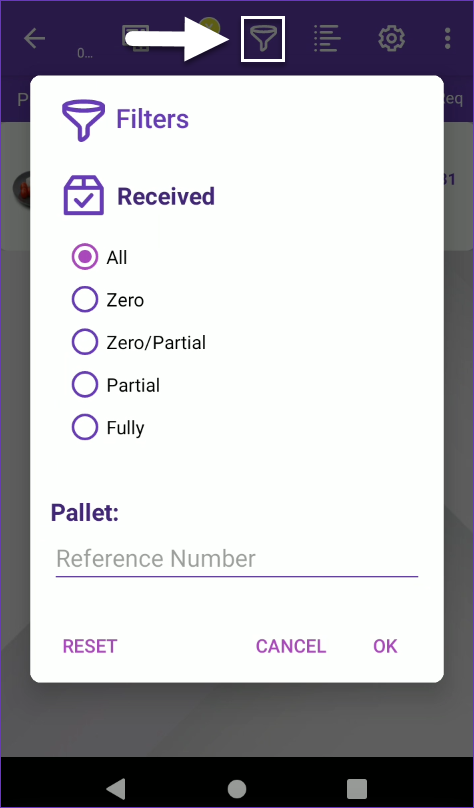
Allow backorder picklist printing must be enabled for this workflow! To enable this setting, navigate to Skustack’s Warehouse Management settings > Receiving.If multiple orders are linked to the same PO and different picklists are generated for them, you may have to repeat the process for each Picklist ID. Picklists must be processed one at a time. - A green checkmark will indicate when the picklist is saved successfully and you can start receiving your products. Tap the Filters icon, to narrow down the product list by either Received status or Pallet Reference Number.
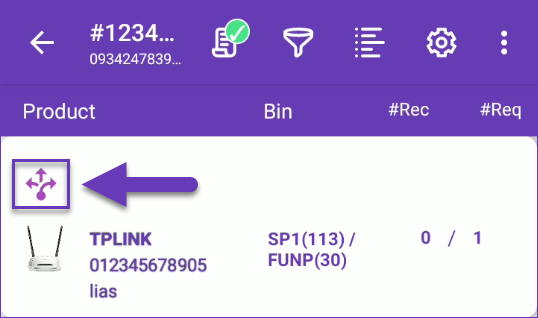
- Swipe left on an item to reveal shortcuts to other actions:
- Bins – Here you can find all the bins where the product is stored.
- Info – This will reveal the product info module.
- Dimens – Set product dimensions or get a 4D scale reading.
- Labels – You can print product labels for each item.
- Scan or tap on a product and select a receiving bin. If there is cross-dock quantity on the PO item, a cross-dock icon will display on that row. Long-press on the icon to see the cross-dock details.
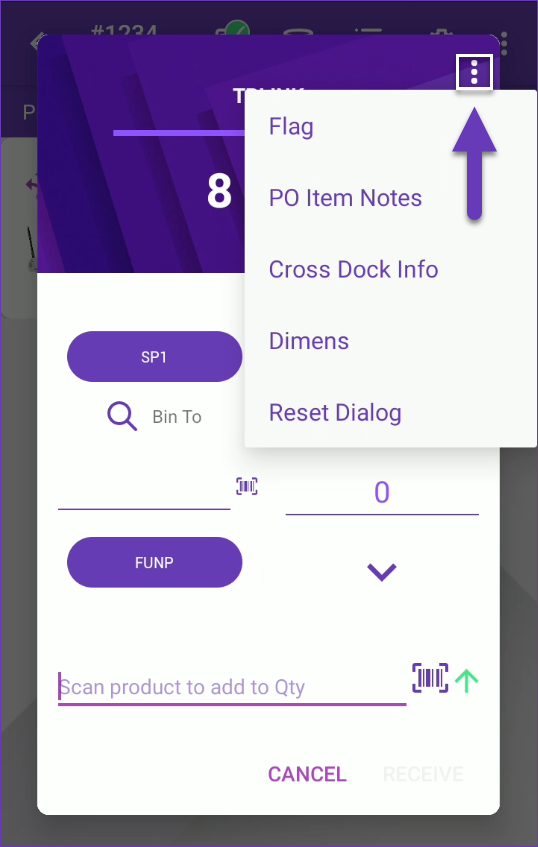
- The three dots menu in the upper right corner leads you to the following options:
- Flag – This action allows you to view and add product flags.
- PO Item Notes – Tap to see the PO item notes.
- Cross Dock Info – If there is a cross-dock quantity for this item, the amount can be checked here.
- Dimens – This option allows you to check and set the product dimensions, including shipping dimensions. If a 4D Scale is integrated with Skustack, you can pull real-time dimensional readings directly from your default scale.
- Reset Dialog – Use this option to remove selected data from the receiving dialog.
- Tap Receive.
- The appropriate order slot on the chosen wall will illuminate, and you’ll be prompted to scan its CRC barcode to confirm the sorting of the units.
- Once scanned, the slot will appear as Sorted in the Skublox Hub.
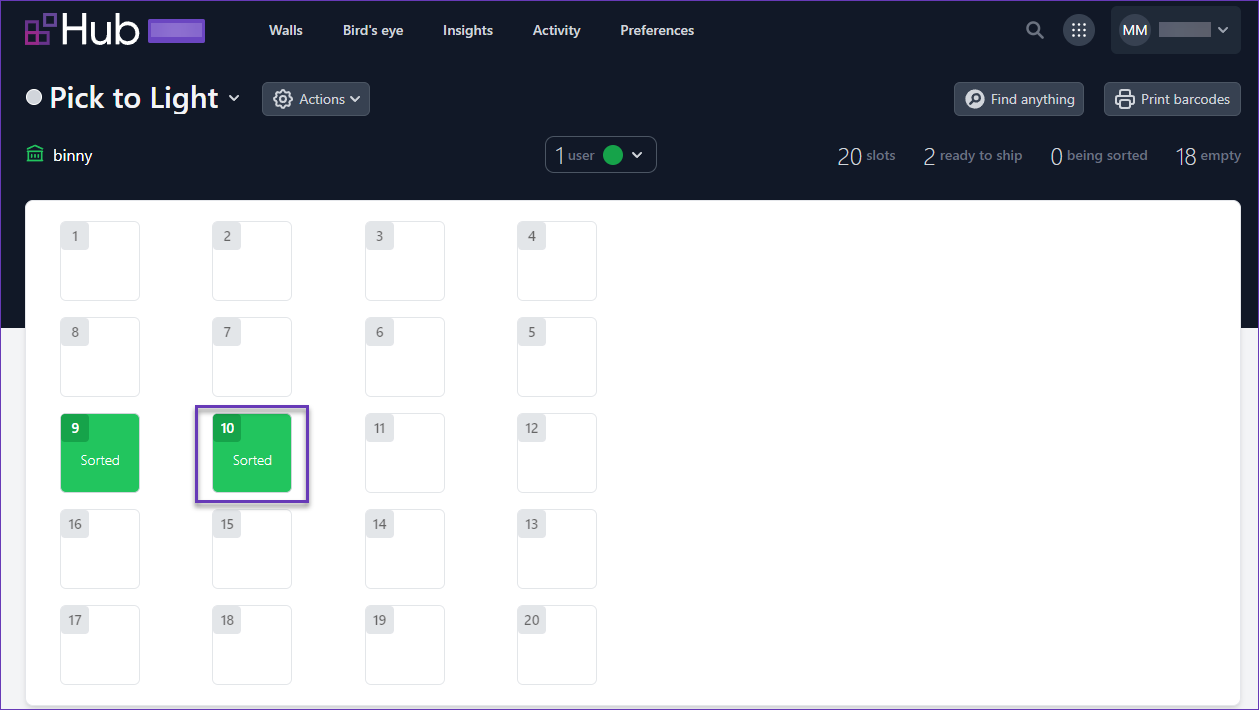
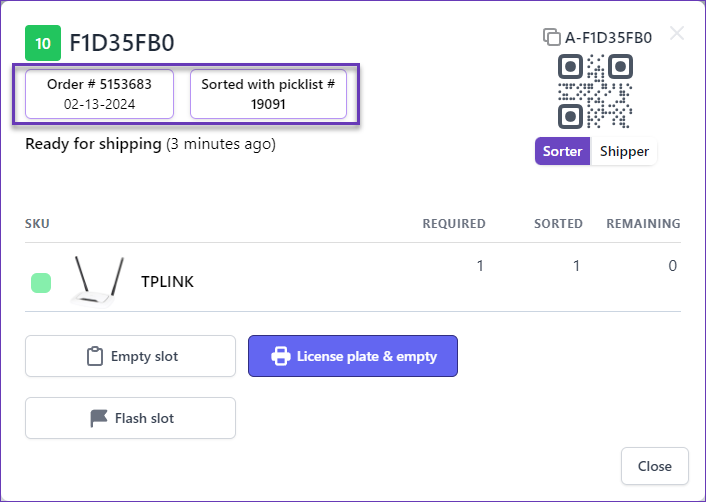
- Click on the sorted slot to view its details, print the License plate, and empty the slot.
Additional Actions
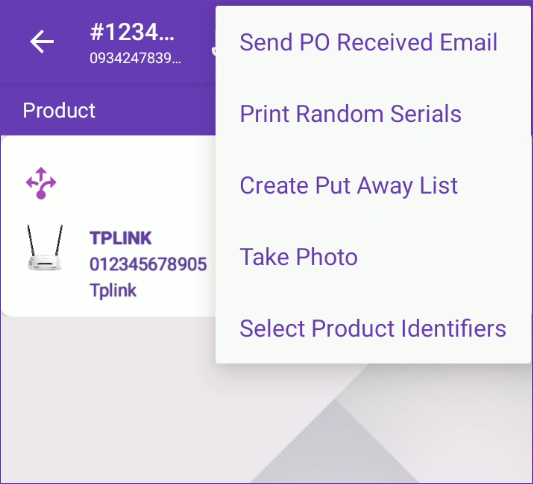
Tap the three dots menu in the upper right corner of the receiving PO workflow to perform the following actions:
- Send PO Received Email – Send a confirmation email when the PO is received.
- Print Random Serials – Print labels with random serial numbers before the PO items are received.
- Create Put Away List – Create a PutAway list from the receiving session.
- Take Photo – Use your Skustack device to take a photo and attach it to the respective PO Documents.
- Select Product Identifiers – Tap and choose the product identifiers:
-
- UPC
-
- Aliases
-
- Product Name