
Overview
Pallets are typically used as a base for assembling, storing, and transporting goods within a warehouse or during shipment, allowing you to stack and handle them as a single unit load. Skustack’s Pallet feature streamlines your operations and improves overall efficiency, allowing you to manage items by the pallet and eliminating the need for individual unit processing. Within the Skustack system, pallets are treated as distinct groups of units that are not associated with specific bins upon creation.
Creating Pallets individually is only possible through the Skustack application, while importing Pallets in bulk can be done through the Skustack Admin.
Manage Pallets
From searching and creating, to editing, deleting, printing labels, and scanning throughout various operations and activities, the Skustack application empowers you to manage your pallets effortlessly.
Create Pallets
Creating a Pallet with product quantities and lots that are not currently in your inventory may be necessary before receiving PO pallets in your warehouse. This step serves as preparation ahead of the arrival of the PO, enabling the swift and easy receipt of items by the Pallet.
To create a Pallet:
- Navigate to the Products > Manage Pallets.
- Tap the + icon to create a new Pallet.
- Either Generate or enter a ReferenceID. If you choose to generate a new ID, the Pallet will be generated with the present date.
- Once you have a ReferenceID, you can choose to build a pallet:
- From an existing bin by checking the Select all bin contents to build pallet. All of the bin contents will be associated with the created Pallet.
- Tap the Bin ID field and either enter it manually or scan the bin.
- Tap Build and confirm your action by clicking Continue.
- A Pallet Label will be printed automatically.
- Through the option Scan items to build pallet, which allows you to directly scan products to add to the Pallet, including lot and serial info when applicable.
- Tab Build.
- Drag the header to expose the + sign and tap it, or scan the items that you wish to include in the pallet.
- Select the desired quantity and tap Add.
- You can print a Pallet label from the print icon at the top of the activity.
- From an existing bin by checking the Select all bin contents to build pallet. All of the bin contents will be associated with the created Pallet.
Alternatively, you can build a pallet through the Manage Bins module.
- Navigate to Bin > Manage Bins and open the desired bin.
- Tap the Pallet icon in the upper right corner.
- Generate a ReferenceId and tap Continue.
- Confirm the Pallet creation and all bin contents will be added to the new Pallet.
Edit Pallets
If you want to alter an existing Pallet:
- Navigate to Product’s Manage Pallet.
- Click Search and either scan or enter the needed pallet ReferenceID. The pallet contents will be displayed.
- Select the needed product and update the respective quantity by using the up and down arrows.
- Once done, click Update.
Delete Pallets
If you want to alter an existing Pallet:
- Navigate to Product’s Manage Pallet and open the desired pallet.
- Tap the Trash can icon in the upper right corner.
- Confirm that you would like to delete the pallet.
Print Pallet Label
To print a Pallet Label:
- Navigate to Product’s Manage Pallet.
- Click Search and either scan or enter the needed pallet ReferenceID. The pallet contents will be displayed.
- Click the Print icon in the upper right corner and confirm the action. The Pallet Label will be printed out.
Scan Pallet Labels
You can also scan Pallets through various Skustack activities.
Bin Transfers
Once your pallet label is generated, you can scan it to transfer all associated units to a desired destination bin:
- Navigate to the Manage Bins module and open the bin that contains the pallet’s units.
- Scan the pallet’s label, and a Destination Bin prompt will appear on your screen.
- Enter the desired bin name and confirm the transfer of units.
- A green message will validate the successful transfer, and the quantities in both bins will be updated accordingly.
FBA Picking
You can utilize Pallets for FBA Picking activities. Keep in mind that the entire pallet will be picked for one shipment.
- Navigate to Fulfillment > FBAInbound Picklist and search for the desired SKU/UPC.
- Open the needed picklist and scan the respective Pallet.
- Select a bin to pick the pallet from and tap Continue.
PutAway Lists
Pallet labels can also be used to pick products for PutAway Lists:
- Navigate to Transfers > PutAway and select a PutAway list.
- Ensure that the list’s status is Open.
- Scan the desired pallet’s label and a Destination Bin prompt will be displayed.
- Enter the name of the bin in which you intend to put away all pallet items.
- A green message will validate the successful pallet picking.
WITR
Through WITR Create, Pick, and Receive types.
- Navigate to Transfers and initiate a transfer request.
- Add a Title and select From, Interim, and Destination Warehouses from the respective dropdown menus.
- Tap Create.
- Scan the desired Pallet and confirm that you are willing to add the pallet contents to the transfer by clicking Continue.
Pallets will not be validated against any bin inventory and will simply be added to the list.
Order Based Picking
For Order Based picking activities, you can choose a specific Pallet to pick:
- Navigate to PickList > Order Based and open the desired order picklist.
- Select an order product and scan the needed pallet.
- Scan/enter a bin to pick all items in this pallet and tap Go.
- Confirm that you want to pick the selected pallet from the specified bin by clicking Continue.
Cycle Counts
Whenever you initiate a Bin Cycle Count, you can directly scan a Pallet:
- Navigate to Bin > Bin Cycle Count and specify a bin. to
- Create a new Cycle Count.
- Scan the needed Pallet.
Such Pallets will not be validated against any bin inventory and will simply be added to the list.
Receiving POs
You can scan Pallets when receiving POs. The pallet should be set up before receiving the PO.
- Navigate to Receiving > Receive PO and open the desired PO.
- Scan the required Pallet and choose a bin to receive the pallet contents.
- Tap Go and confirm the receipt by clicking Continue.
Related Settings
| Setting | Definition |
| Enforce product pallet qty for Pallet Items | Skustack’s Warehouse Management setting. When adding an item to a pallet, the setting enforces a Pallet Qty limit as set on the product. |
Manage Pallets
The Skustack Admin portal lets you easily search for existing Pallets or create new ones, print Pallet labels, and more.
Search Pallets
To search Pallets, follow these steps:
- Navigate to the Skustack Admin portal at https://xx.skustack.com (replace “xx” with your server ID or team name).
- Enter your login credentials.
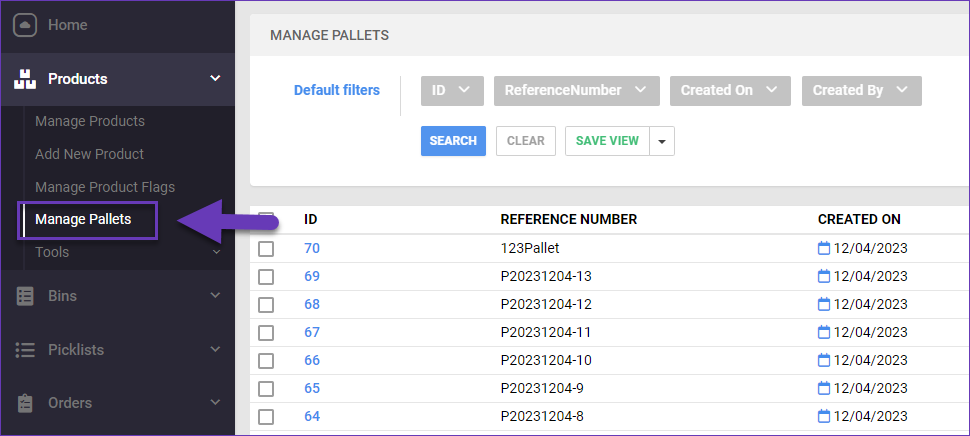
- On the left, select Products > Manage Pallets.
- Configure your Default filters to make sure that the results display exactly what you need.
- Click Search. Each filter you apply gets highlighted. If a filter is gray or not displayed at all, it’s not active.
- To manage the columns in the grid, click the three dots icon at the top right and select Customize Columns. You can:
- Reorder columns by dragging them up or down in the list;
- Hide columns by clicking the Trash icons;
- Add columns by clicking Add column.
- To arrange the data in a different order, use the Sort by menu.
- To save your filtering and sorting options, click Save view, enter a Name, and click Save.
Create Pallets
Creating a Pallet with product quantities and lots that are not currently in your inventory may be necessary prior to receiving PO pallets in your warehouse. This step serves as preparation ahead of the arrival of the PO, enabling the swift and easy receipt of items by the Pallet and eliminating the need for individual unit processing.
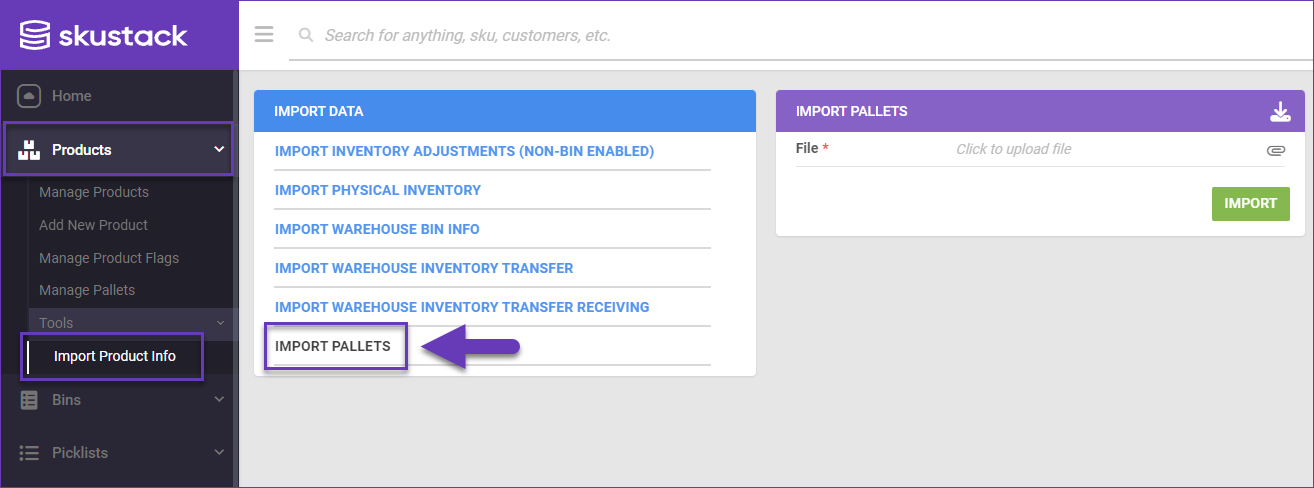
You can import Pallets in bulk using the Import Product Info tool:
- Navigate to Products > Tools > Import Product Info.
- Select Import Pallets.
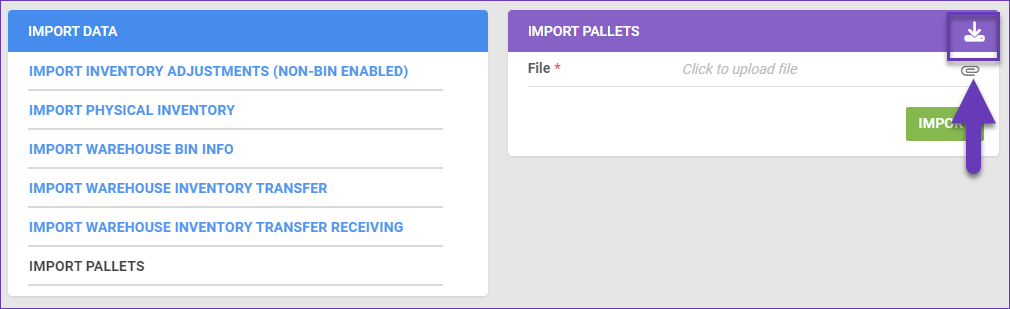
- Download a file template (available file formats are CSV, Excel, and Tab Delimited).
- Populate the file columns for each imported product:
- Pallet Reference Number (required) – Mandatory field for pallet’s unique identifier in Skustack.
- Product ID (required) – Mandatory field. Enter the desired SKUs on separate rows.
- Lot Number – Optional field for the product’s Lot number. Required only when product’s IsExpirable is True.
- Expiry Date – Optional field for the product’s Expiry date. Required only when product’s IsExpirable is True.
- Serial Number – Optional field for the product’s Scan and Ship serial numbers. Required only when product’s RequireSerialNumberScanWhileShipping is True. Accepts multiple comma-separated values.
- Qty (required) – Mandatory field. Enter the respective product’s quantity to appear in the pallet.
- Return to the Import Product Info tool, upload the file, and click Import.
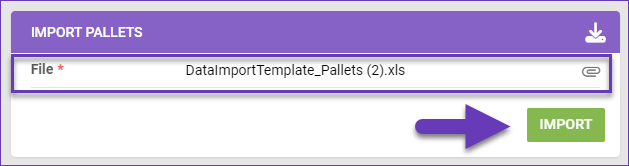
A queued job will be created where you can monitor the task’s status. Once completed successfully, the new pallet will be created and can be found in your Manage Pallets list.
Print Pallet Label
To download and print a PDF file with a Pallet Barcode:
- Navigate to Product’s Manage Pallets and open the needed Pallet.
- From the Actions icon in the upper right corner and depending on the desired outcome, select either:
- Print Pallet Item PDF (SKU Barcode)
- Print Pallet Item PDF (ASIN Barcode)
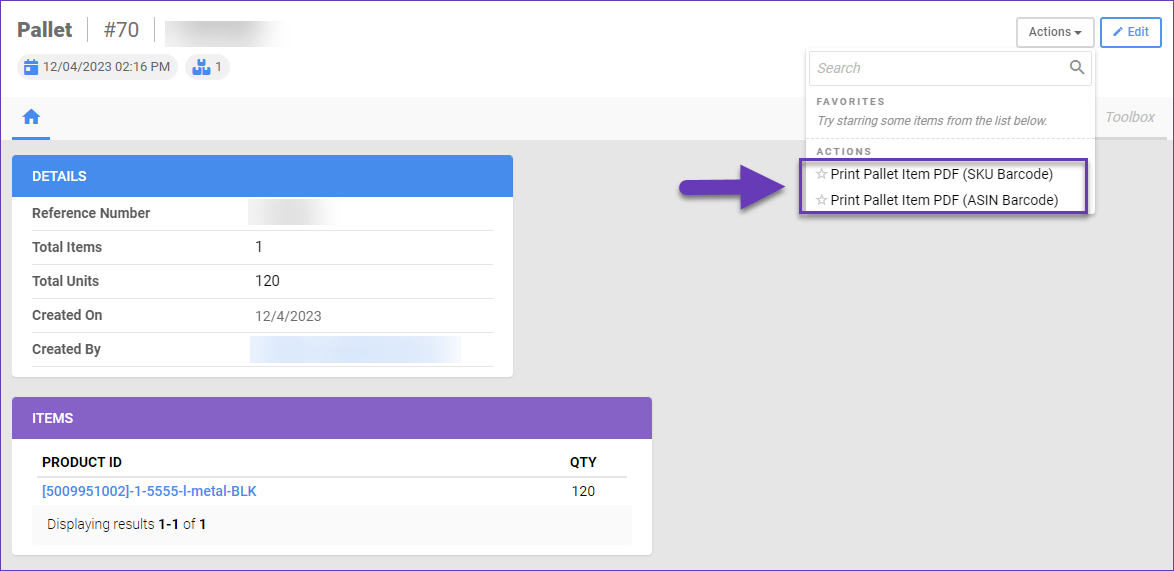
- The Pallet PDF will be downloaded and can be printed out.
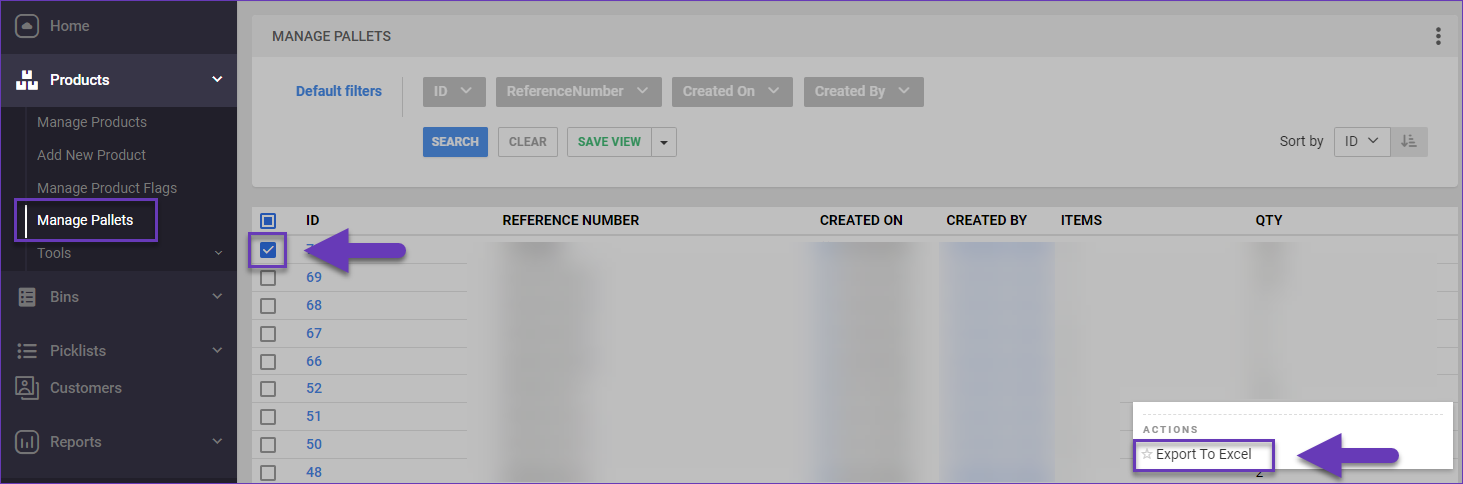
Export Pallets
To export Pallets:
- Navigate to Products > Manage Pallets.
- Select your desired pallets from the grid and access the Actions menu to export the file.
- Click on the Actions menu at the bottom right corner and choose Export To Excel. The data will be exported as a .xlsx file, which contains information on the Pallet Reference Number, Product ID, Lot Number, Expiry Date, Serial Number, and Quantity.
Related Settings
| Setting | Definition |
| Enforce product pallet qty for Pallet Items | Skustack’s Warehouse Management setting. When adding an item to a pallet, the setting enforces a Pallet Qty limit as set on the product. |