
Overview
Maintain a smooth flow of operations and use storage effectively by moving stock to primary bins, especially in high-traffic areas of your warehouse. If there isn’t enough inventory in your primary bins, you can create a Restock List to replenish your primary areas with quantity from non-primary bins. Well-stocked primary bins eliminate the need for employees to spend hours searching for items or make last-minute arrangements to fulfill orders.
Working on Restock Lists is possible through the Skustack App, while generating a Predictive Restocking Report can be done through the Skustack Admin.
This article will guide you through the management of Restock Lists in the Skustack App.
Restock Bins Module
The Restock Bins module is located within Skustack’s Bin tab and allows you to easily search for existing Restock Lists or create new ones, monitor their progress, and more.
Search Restock Lists
You can search for Restock Lists in one of two ways:
-
- Search By ID – Search by a specific Restock List ID
- Search All – Search for all Restock Lists. You can filter by:
- Status
- Defaults to all. You can choose from one of the available statuses:
- All
- Open
- Completed
- Closed
- Canceled
- Void
- Type
-
- Order Replenish
- Pick Planning
Create Restock Lists
To create a Restock List:
- Navigate to Bin > Restock Bins module.
- Tap the + icon.
- Select the type of the Restock List from the dropdown:
- OrderReplenish – an overall replenishment of all bins based on the shipped orders.
- PickPlanning – use to replenish bins before picking. This helps ensure that there is enough quantity in your primary bins to pick.
- If you are creating a PickPlaning Restock List, enter the Picklist number for which you are picking. Tap the Find PickList button and the system will show all valid picklists.
- Tap Generate.
- A new Restock List will be generated.
Manage Restock Lists
To pick inventory for a Restock List:
- Navigate to Bin > Restock Bins module.
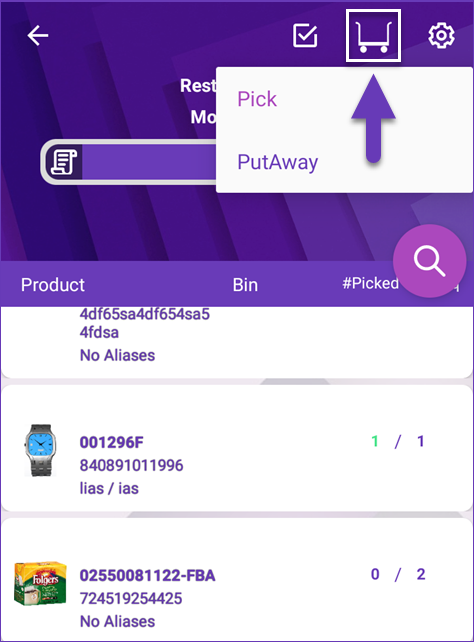
- Select your desired Search Mode > tap Go.
In the Search All mode, you can filter by the Restock List type or status (e.g., Open, Closed, etc). The Search by ID mode, on the other hand, allows you to pre-select whether you want to Pick or PutAway a specific Restock List.
- Products on the Restock List will load.
- The system will prompt you to choose an Interim Bin. You can always change the Interim Bin manually by tapping the Cart button.
- Swipe left on the items to reveal shortcuts to other actions:
- Bins – displays all bins in which the item’s units are stored.
- Info – directs you to the Product Info module.
- Scan a Product ID/UPC barcode, or tap it on the screen. The product will open.
- Start picking units for the product by either scanning the barcode of the product or manually entering Pick Qty.
- If you are scanning units, use the green Arrow next to the scan field to indicate whether products are to be added or removed from the Restock List.
- Enter the bin from which you are picking or select the suggested bin. The suggested bin may appear next to the Bin field. This suggestion is based on the following factors:
- The bin is sellable.
- The bin type is Normal or Temp.
- Primary bins will always be suggested first.
- The bin with the most or least quantity will be suggested based on the client setting PickList Bin suggestion sort qty by ASC Order.
- Tap Pick.
- The picked quantity will display next to the pick quantity.

- Once you’re done picking, tap the Checkbox icon to switch to PutAway mode. This process is similar to picking, but you select the bin into which you are putting the products away instead.
This article will guide you through the management of Restock Lists and Predictive Bin Restocking in the Skustack Admin portal.
Restock Lists
Skustack enables you to efficiently search and manage existing Restock Lists, monitor their progress, create new lists, and more.
Search Restock Lists
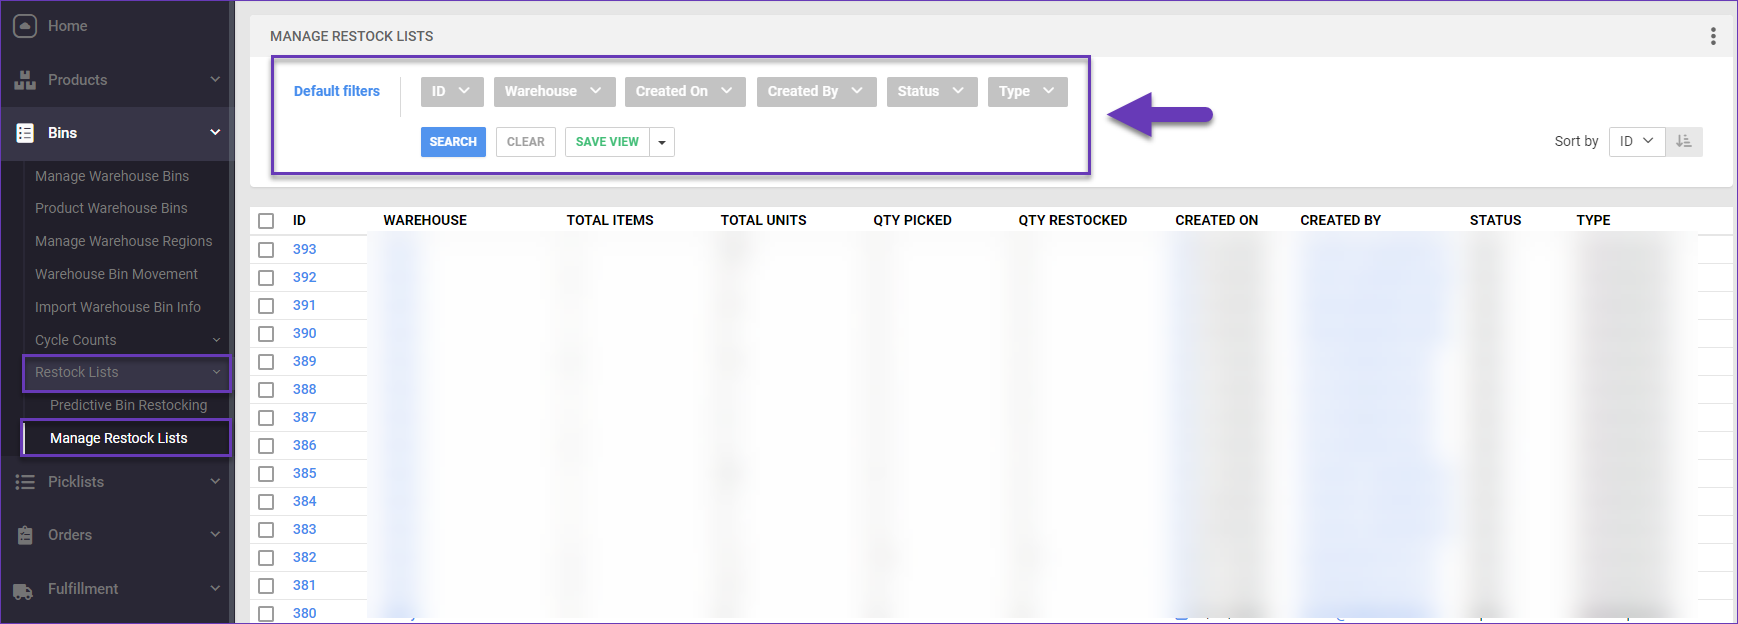
The Restock Lists are located within Skustack’s Bins section.
Utilize the available filters to search for the desired Restock Lists.
- Configure your Default filters to ensure the results display exactly what you need.
- Click Search. Each filter you apply gets highlighted. If a filter is gray or not displayed at all, it’s not active.
- To manage the columns in the grid, click the three dots icon on the top right and select Customize Columns. You can:
- Reorder columns by dragging them up or down in the list;
- Hide columns by clicking the Trash icons;
- Add columns by clicking Add column.
- To arrange the data in a different order, use the Sort by menu.
- To save your filtering and sorting options, click Save view, enter a Name, and click Save.
Create Restock Lists
The Skustack Admin empowers you to upload multiple Restock Lists via a file import. To achieve this:
- Navigate to Bins > Restock Lists > Manage Restock Lists.
- Click on the Action icon in the bottom right corner and select Download Template to export a sample sheet.
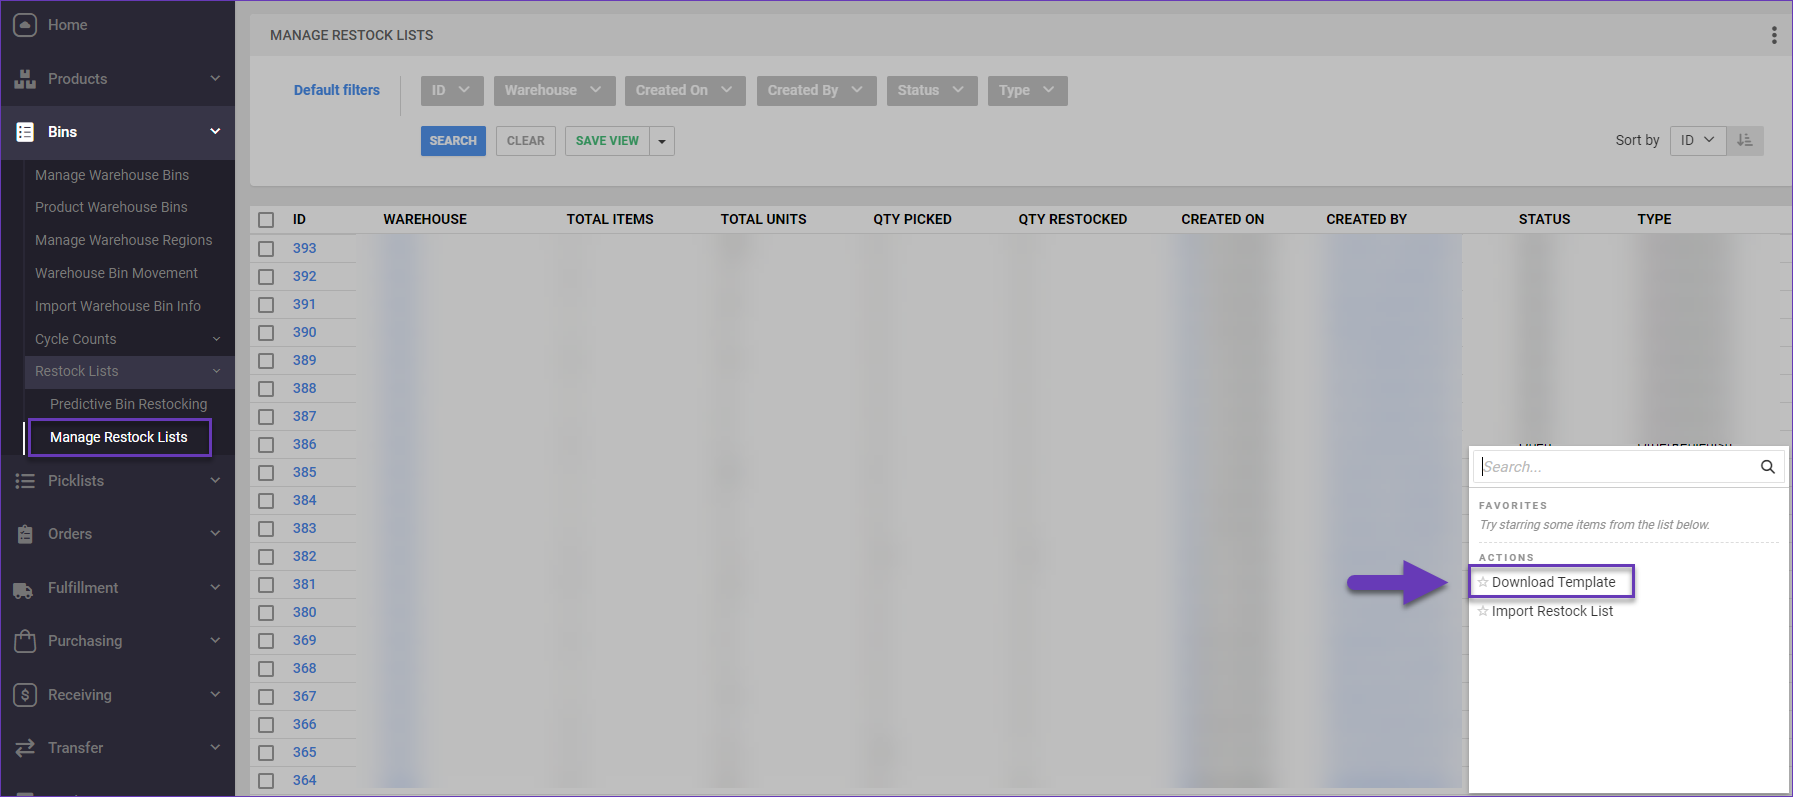 Another alternative is to choose the action Import Restock List and to click on Download Template in the following popup.
 - The downloaded template will contain the following columns:
- ProductID
- RestockQty
- WarehouseName
- PickFromBin
- PutawayToBin
- AllowInsufficientQty
- Populate the file as required, save it, and return to the Admin portal.
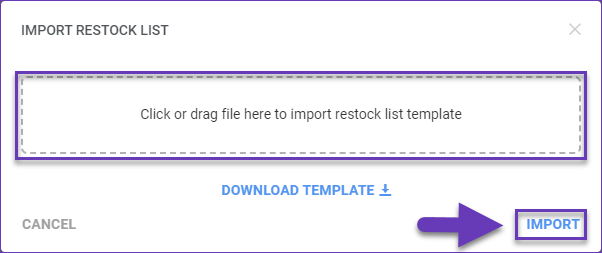
- From the Action menu, select Import Restock List.
- Click or drag the file to the specified location and click Import.
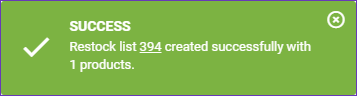
- If the file import is processed correctly, you’ll see a Success message on your screen.
Manage Restock Lists
You can manage your Restock Lists individually, or in bulk.
Individually
You can adjust an individual Restock List in the following ways:
- Navigate to Bins > Restock Lists > Manage Restock Lists.
- Open the desired Restock List.
- Click Edit.
- Check the needed product and adjust its quantity.
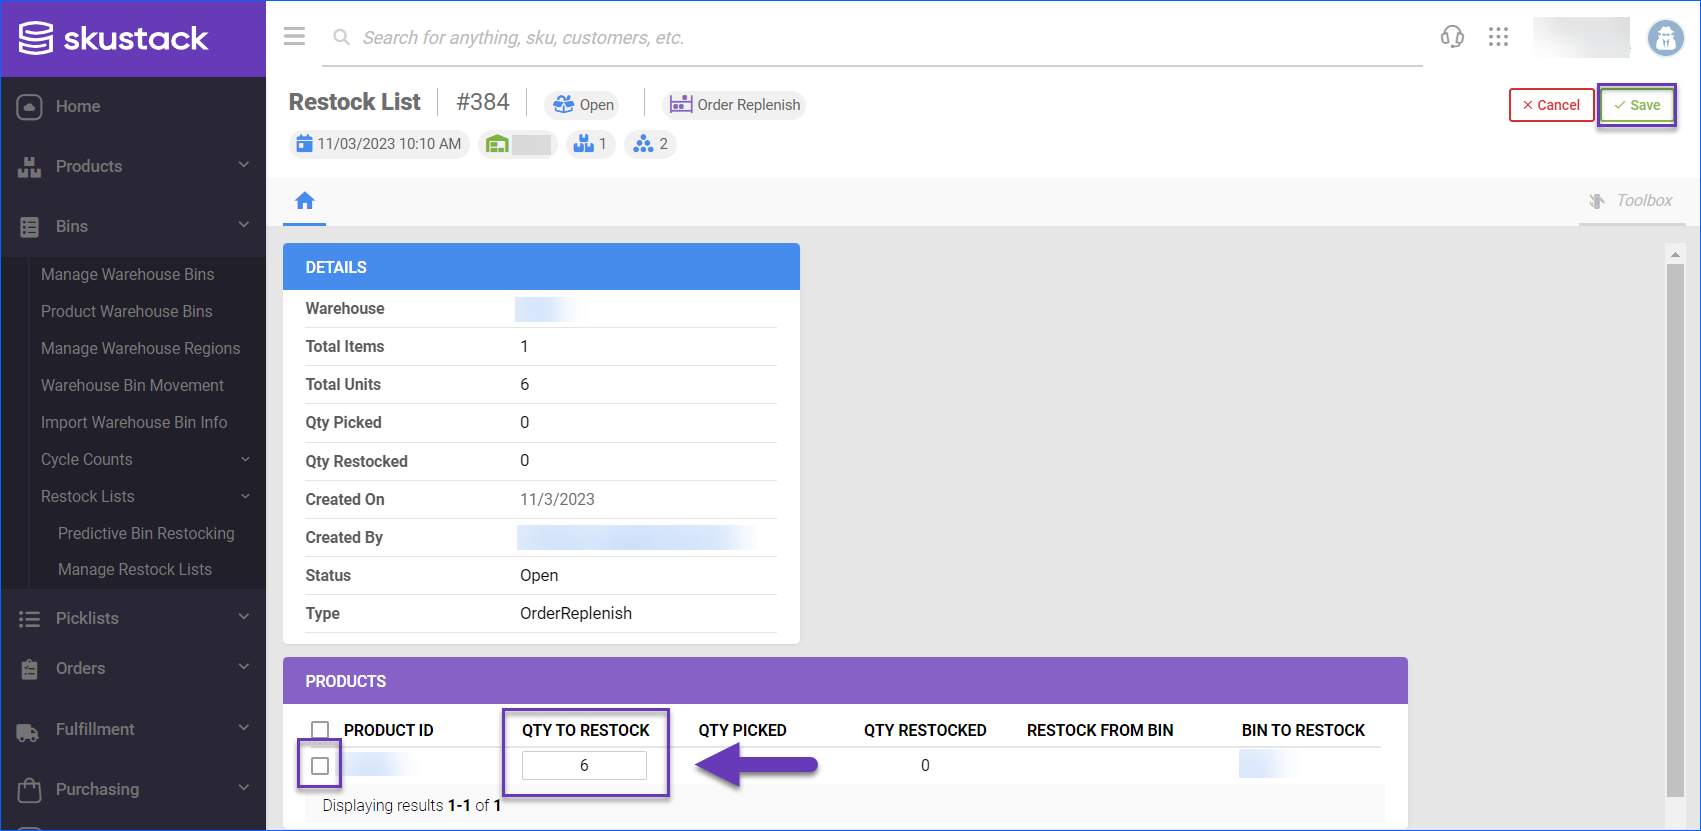
- Once done, click Save.
In Bulk
To manage multiple Lists simultaneously:
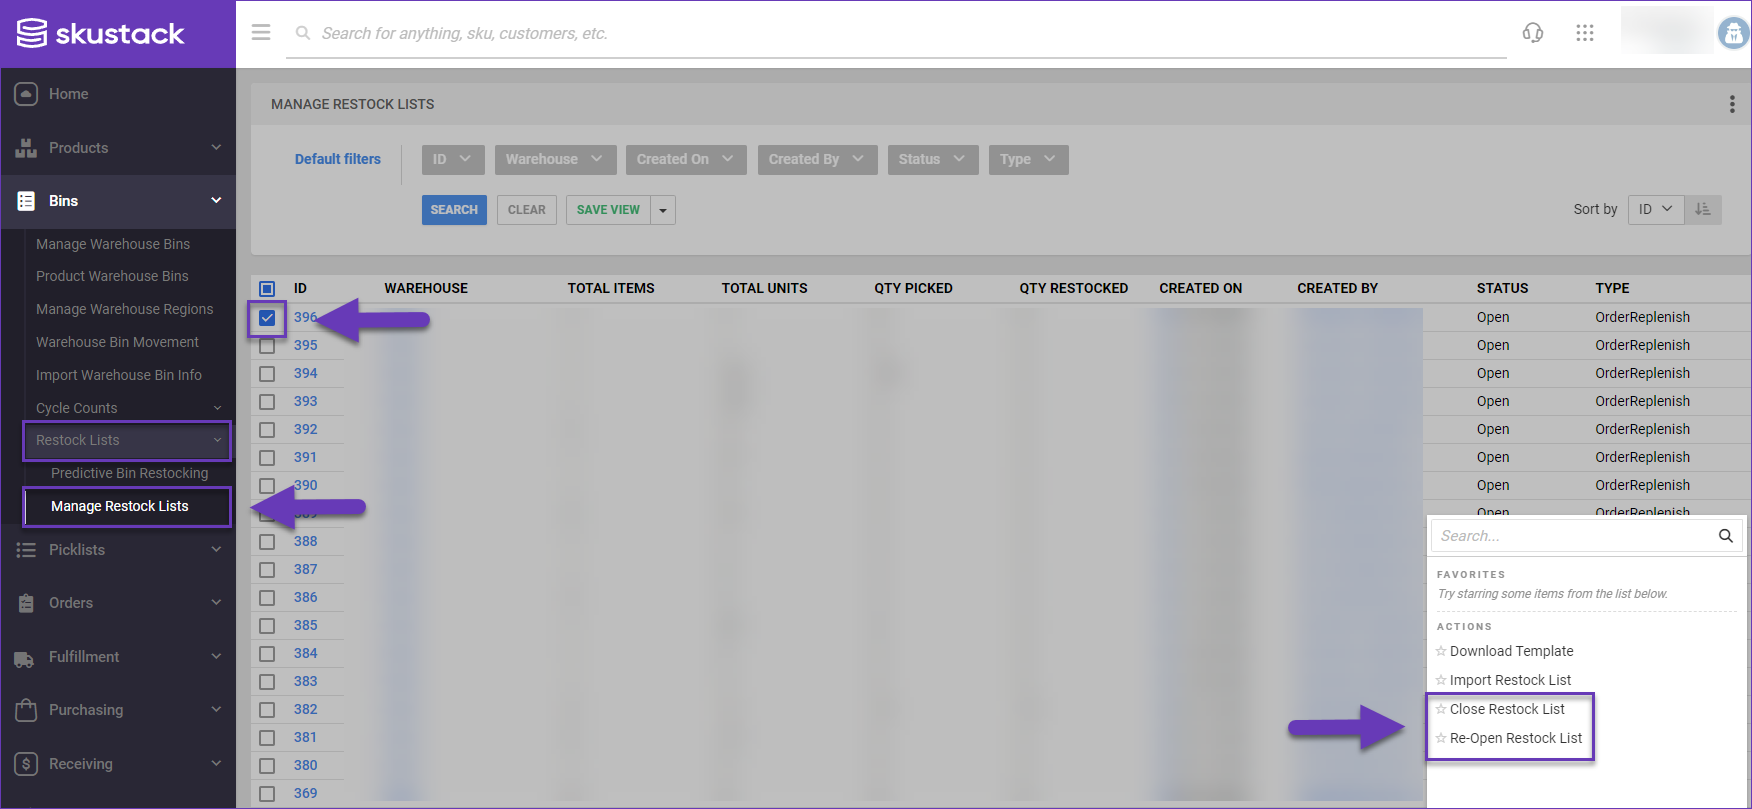
- Navigate to Bins > Restock Lists > Manage Restock Lists.
- Select the desired Restock Lists and click on the Action menu.
- Choose the appropriate Action:
- Close Restock List – With this action, you can close a Restock List, regardless of its status.
- Re-Open Restock List – This action enables you to reopen a closed Restock List.
Predictive Bin Restocking
The Predictive Bin Restocking feature in the Skustack Admin portal estimates the restock quantity for each product by analyzing the quantity sold or added to unshipped orders within a specified time frame in a specific warehouse. This predictive data isn’t just about restocking; it’s a valuable resource for creating targeted Restock Lists and identifying potentially overstocked products, providing insightful inventory management strategies.
Key Terms and Definitions
| TERM | DESCRIPTION |
| Days OF Order | Days of past product sales, from which you are basing the prediction. This generates the Sales Velocity. |
| Days TO Order | Days estimate, for which you would expect the same Sales Velocity. This estimate will be multiplied by the Sales Velocity to generate a Suggested Restock Qty. |
| Sales Velocity | Rate of sales per specified period of time. It equates to Product Qty Sold divided by Days OF Order. |
| Suggested Restock Qty | Predicted product quantity to restock. |
Product’s Suggested Restock Qty is based on the following calculation: Sales Velocity multiplied by Days To Order, minus any product quantity in the primary bin and any qty on an open Restock List.
Search for Products To Restock
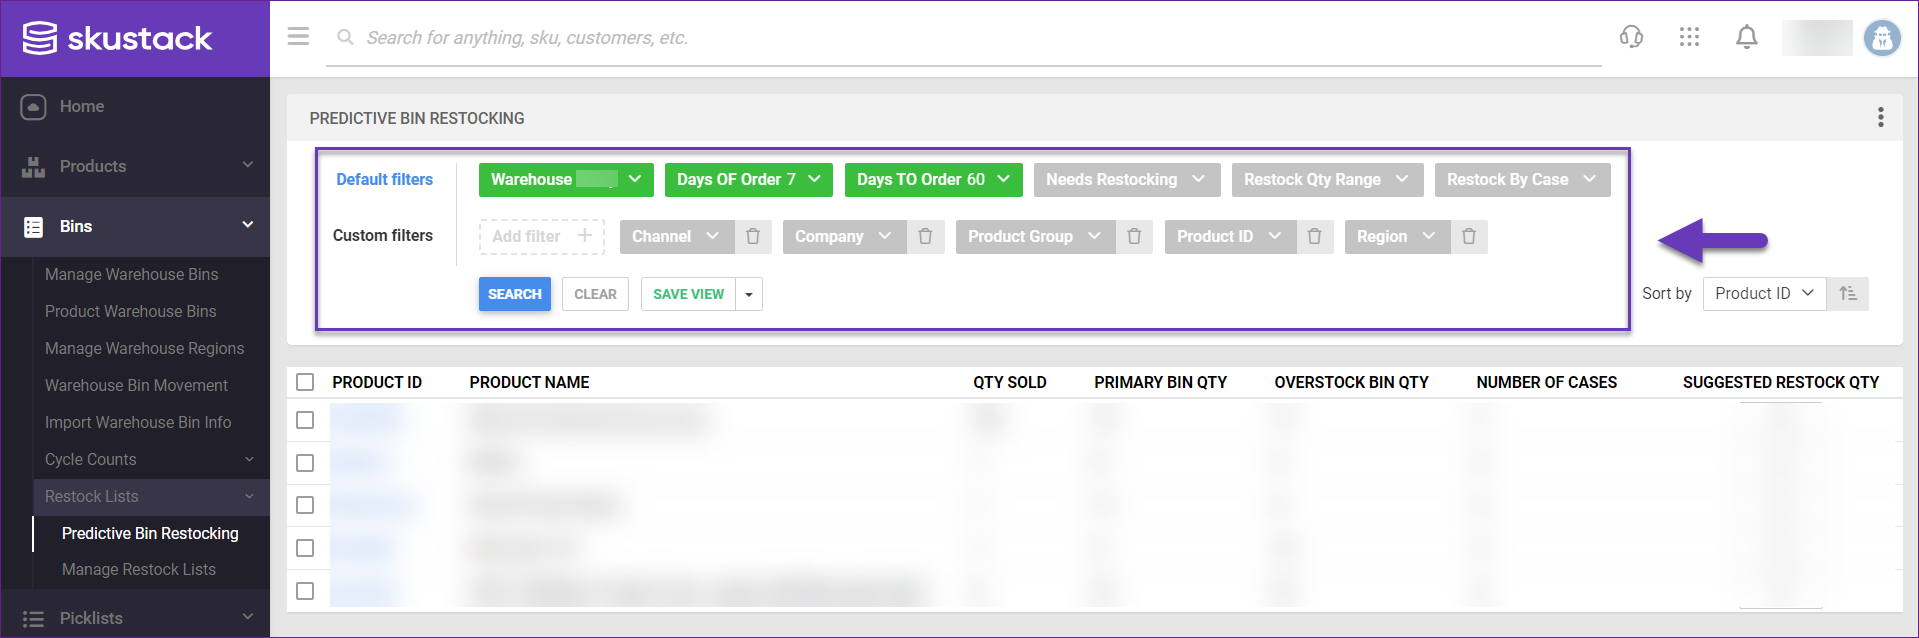
The Predictive Bin Restocking feature is located within Skustack’s Bins > Restock Lists.
Utilize the available filters to search for the desired Products to Restock.
- Configure your Default filters to ensure the results display exactly what you need. The mandatory filters are Warehouse, Days OF Order and Days TO Order. Other available filters are:
- Needs Restocking
- Restock Qty Range
- Restock By Case
- Channel (not default)
- Company (not default)
- Product Group (not default)
- Region (not default)
- Product ID (not default)
- Click Search. Each filter you apply gets highlighted. If a filter is gray or not displayed at all, it’s not active.
- To manage the columns in the grid, click the three dots icon on the top right and select Customize Columns. You can:
- Reorder columns by dragging them up or down in the list;
- Hide columns by clicking the Trash icons;
- Add columns by clicking Add column.
- To arrange the data in a different order, use the Sort by menu.
- To save your filtering and sorting options, click Save view, enter a Name, and click Save.
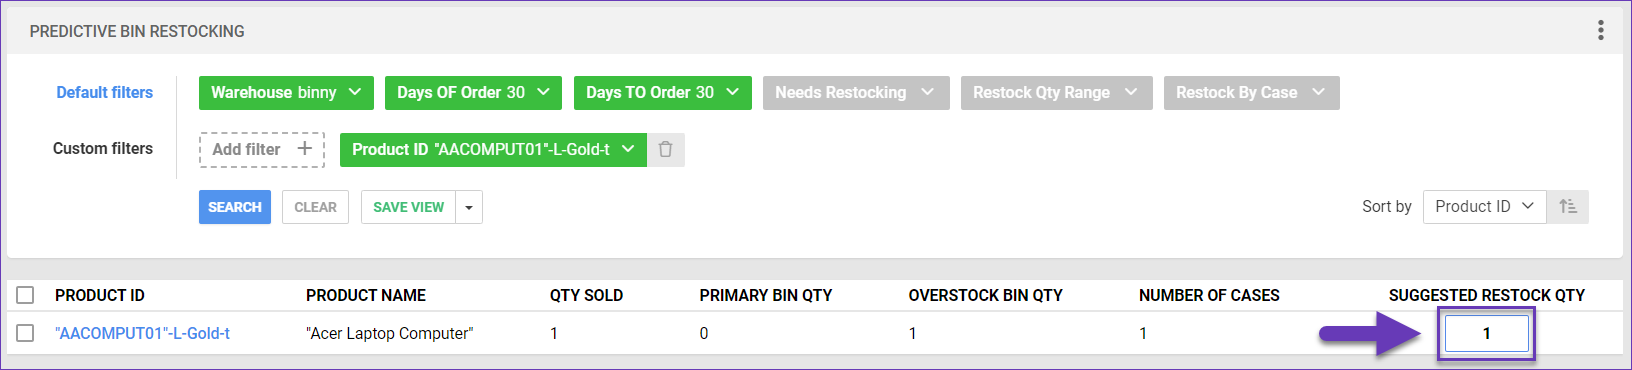
Manage Suggested Restocking
Once you have a product’s Suggested Restock Qty, you can manually amend the number, if needed.
You have the option to add the Suggested Restock Qty to a Restock List:
- Navigate to the Bins > Restock List > Predictive Bin Restocking.
- Search for the needed product to restock and check it.
- From the Actions menu, choose Add to Restock List.
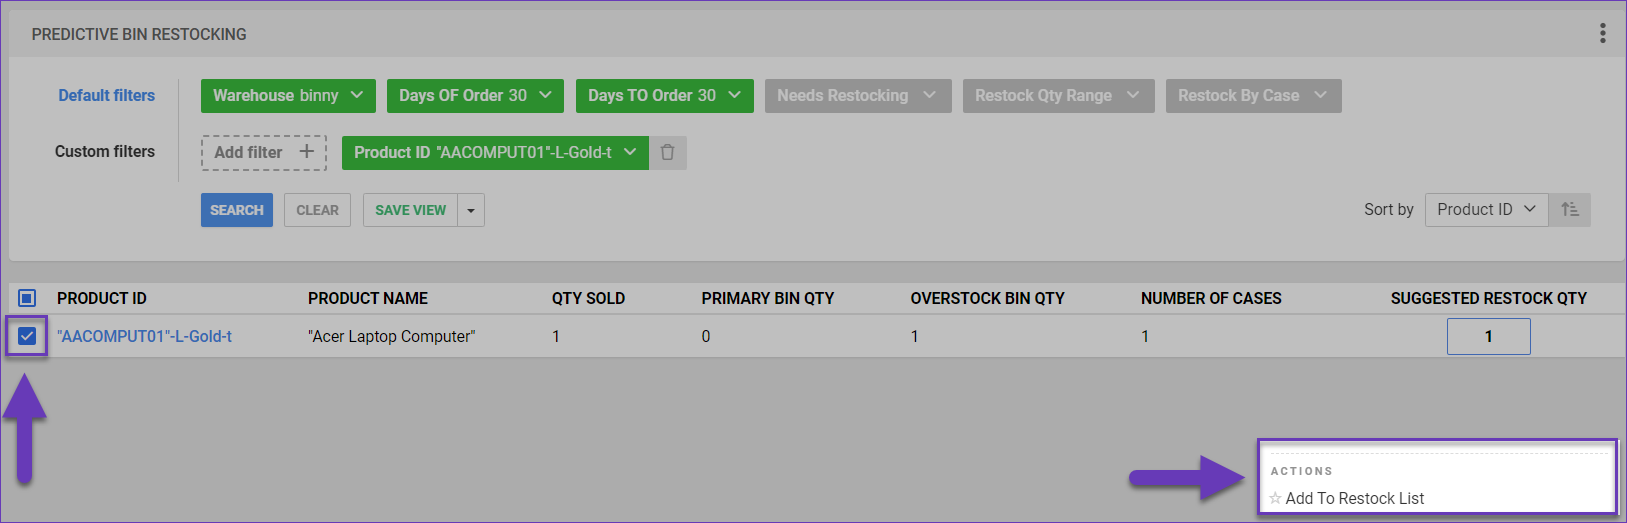
- A Success message will validate the creation of your new Restock List.
Related Settings
When adding an item to a Restock List, it will generate a suggested bin to restock. This bin is generated based on the following Client Settings:
| Setting | Definition |
| Suggested Bin To Restock Default Filter By | This setting determines the suggested bin by considering factors like the Bin Unit Capacity and the Bin and Product Dimensions. Essentially, it helps in recommending the ideal bin for restocking based on its capacity and how well it accommodates the product’s size. |
| Suggested Bin To Restock Default Sort By | This setting allows you to select either the fullest bin or the emptiest bin. |
| Suggest Bin With Other Existing Products | Defaults to True. If set to False, Skustack won’t suggest a bin if there is another product already in it. It will either suggest a bin with only that product or an empty bin. |
| Enforce restock-into bin | When managing Restock Lists, the only possible restock-into bin will be the one set on the Restock list. |
| Allow overpick restock list | If enabled, overpicking of products will be permitted when managing Restock Lists, and the restock qty will be set to the amount picked. |