Overview
The Import Warehouse Bin Info tool allows you to make Bin Quantity Adjustments for multiple SKUs simultaneously. Rather than manually updating each item and bin, you can make the necessary adjustments in a spreadsheet and easily import the file into the Skustack Admin portal to apply the changes.
Adjustment Types
There are two types of bin inventory adjustments:
- Initial Product Bin Adjustment – Use this option only when importing bin quantities for the first time.
Ensure that your file accurately represents the complete inventory in your warehouse bins. Otherwise, any SKU not included in the file will have its quantity set to 0 across all bins during the import process. Contact your onboarding representative or Sellercloud Support for assistance.
- Basic Product Bin Adjustment – Use this option for all bin quantity updates following the initial adjustment.
Import Bin Adjustments
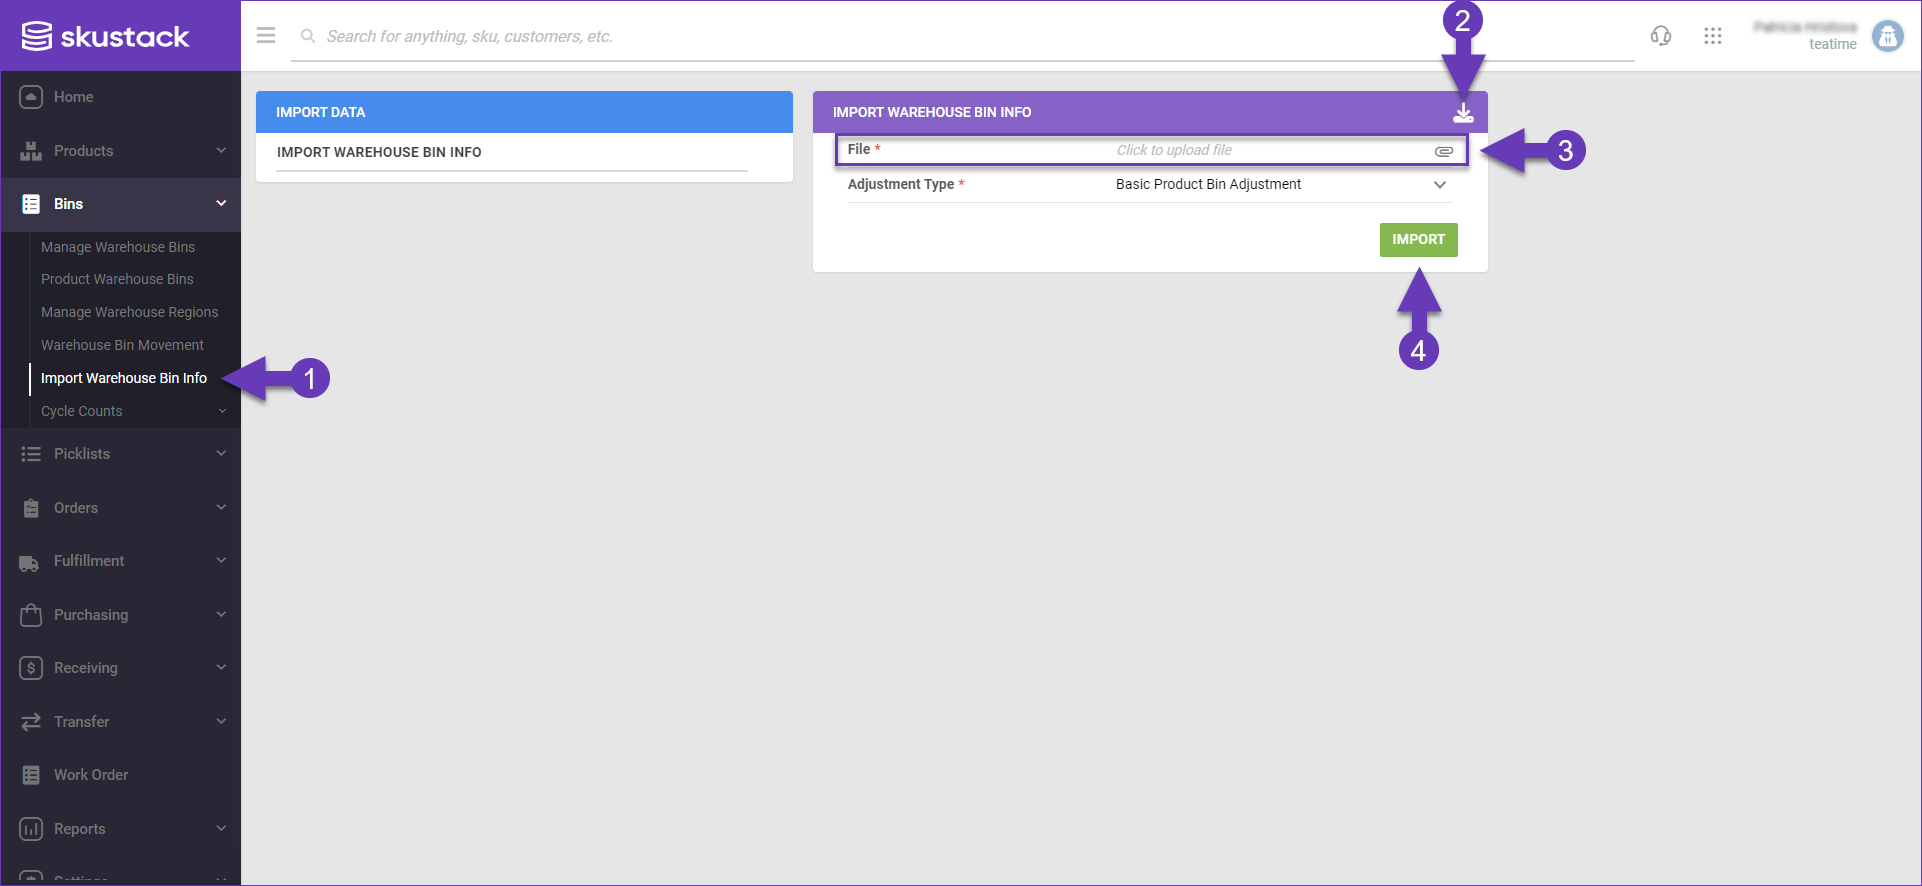
To import bin adjustments through the Skustack Admin portal:
- Navigate to Bins > Import Warehouse Bin Info.
- Click the Download icon to get a template. Choose your preferred format: Excel, CSV, or Tab Delimited, and populate the file columns with the relevant data:
- WarehouseName – The name of the warehouse where the product is stored.
- BinName – The bin where the product is being adjusted.
- ProductID – The product’s SKU.
- QtyToAdjust – The adjustment amount. Enter a positive value to increase inventory or a negative value to reduce it. For example, if you have 5 units in the bin and want to reduce it to 3, enter -2 as the adjustment.
- Reason – The adjustment reason.
- LotNumber – The unique lot number code.
- ExpiryDate – The expiry date.
 If the Lot Number workflow is enabled for your company and the product/s are set as expirable, you must include a Lot Number and Expiry Date.
 - Return to the grid and upload the file. Select the Adjustment Type you want to perform.
- Click Import.