Overview
Accurate records of an item’s weight and dimensions are fundamental for its proper warehouse management and shipping processes. With the Skustack app you can easily add and edit your product’s general, shipping, and case information.
This article is focused on how to set the different types of dimensional measurements in the Skustack app manually or via a 4D Scale.
Record Dimensions
When you create a product, it’s recommended to configure its weight and dimensions. This ensures effective planning of storage locations upon delivery, as well as accurate and efficient calculation of shipping rates during fulfillment operations.
Dimension Types
The following Dimensions Types can be added, or updated via the Skustack app:
- Product Info – The dimensions of the product itself in terms of weight, length, width, and height.
- Shipping Info – These are the product’s shipping weight and dimensions, including packaging and any additional materials used for shipping.
- Case Info – If you purchase products in cases and sell those cases as individual units, you can determine case-specific weight and dimensions.
Manual Input
To set or update dimensions manually:
- Navigate to the Product tab > Product Info.
- Scan or enter your desired SKU. The Product Info dialog for your chosen product will load.
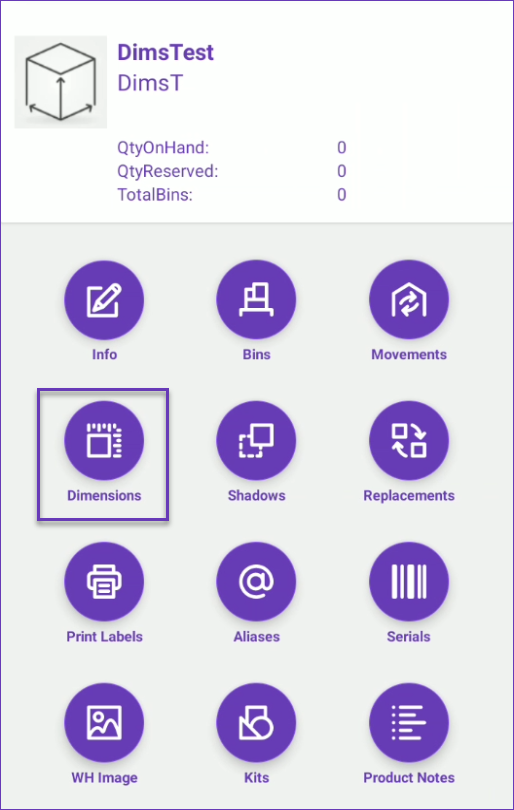
- Tap on Dimensions and select which Dimension Type to amend.
- Enter the required weight and dimensions.
You can also update the values in the Qty per Case and the Qty per Pallet fields. - Once done, tap Save. A success message will appear when the change is completed.
A red X icon next to the respective measurement indicates that it has been modified manually.
4D Scale Readings
Once a 4D Scale is integrated with Skustack, you can pull real-time dimensional readings directly from your default scale. This way with a single tap on the screen, you can verify inventory measurements with perfect precision.
To verify dimensions with your 4D Scale:
- Navigate to the Product tab > Product Info.
- Scan or enter your desired SKU. The Product Info dialog for your chosen product will load.
- Select Dimensions.
- Choose a Dimension Type to verify and place the product on your 4D Scale.
- Tap the Pull from 4D Scale icon.
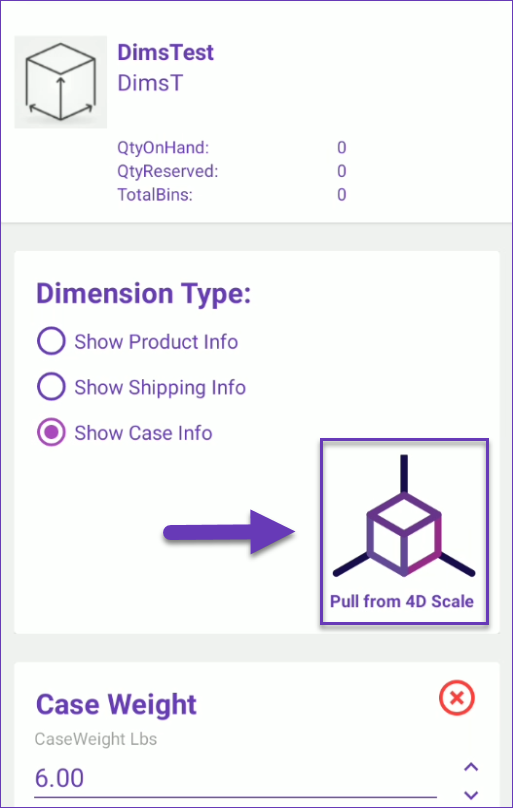
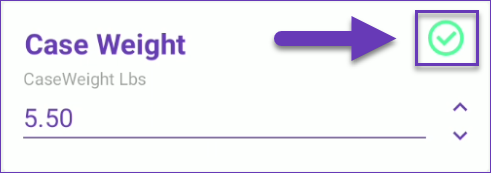
- Skustack’s default scale’s current readings will be automatically populated in the respective fields. A green check mark will appear to indicate that the measurements have been verified successfully.
 You can also update the values in the Qty per Case and the Qty per Pallet fields.
 - Once done, tap Save. A success message will appear when the change is completed.
Overview
Accurate records of an item’s weight and dimensions are fundamental for its proper warehouse management and shipping processes. With the Skustack Admin portal you can easily add and edit your product’s general, shipping, and case information.
This article is focused on how to set dimensional measurements in the Admin portal and how to verify them manually.
Record Dimensions
When you create a product, it’s recommended to configure its weight and dimensions. This ensures effective planning of storage locations upon delivery, as well as accurate and efficient calculation of shipping rates during fulfillment operations.
The Skustack Admin portal allows you to add, update, and manually verify different Dimension Types.
Dimension Types
The following Dimensions Types can be added, or updated:
- Product Dimensions – The dimensions of the product itself in terms of weight, length, width, and height.
- Shipping Dimensions – These are the product’s shipping weight and dimensions, including packaging and any additional materials used for shipping.
- Case Information – If you purchase products in cases and sell those cases as individual units, you can determine case-specific weight and dimensions.
Set Dimensions
Product dimensions can be set on the Product’s Details page:
- Navigate to Products > Manage Products and open the desired product.
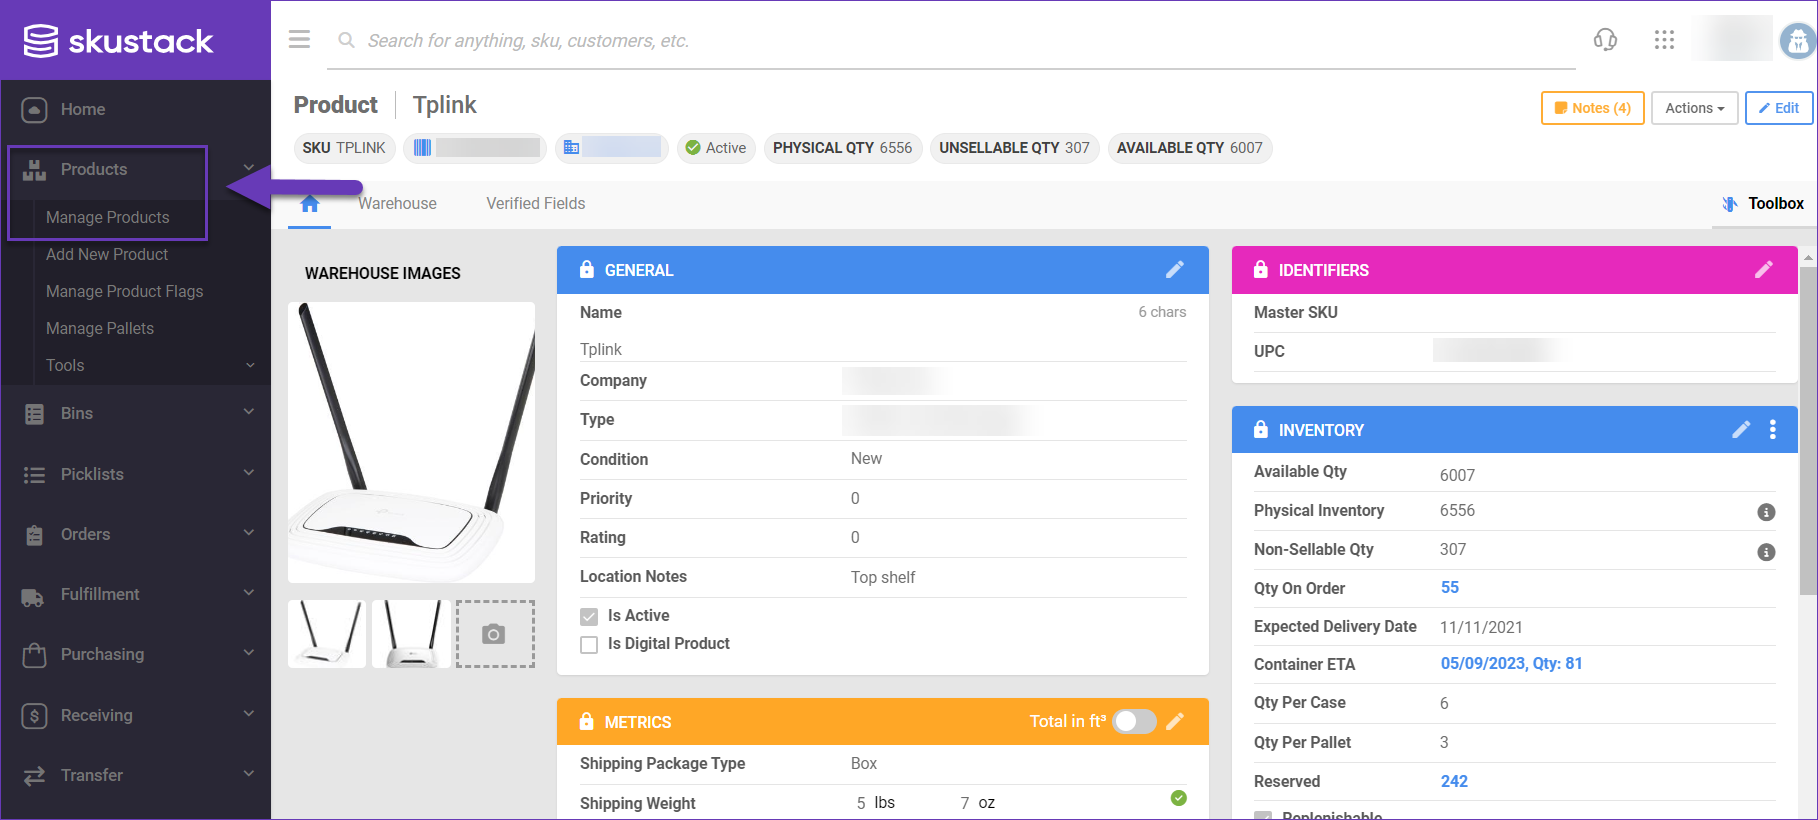
- Click on the Edit icon in the page top right corner, or on the one in the Metrics panel.
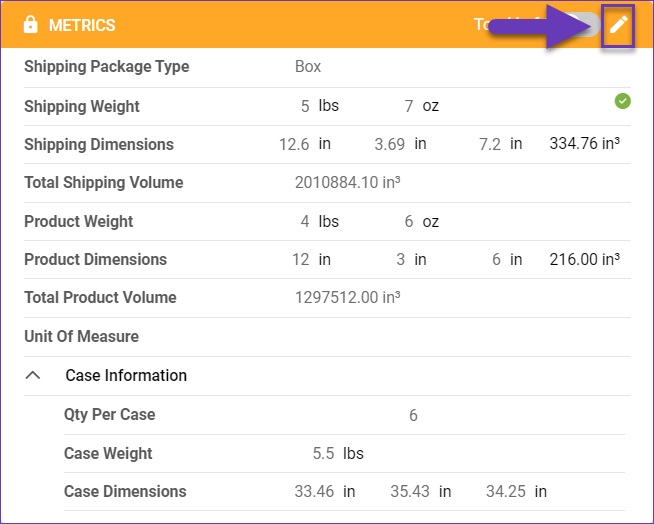
- To view the metrics in cubic feet, click the Total in ft3 toggle.
- Enter the required dimension type weight and dimensions.
- Once done, click Save. A success message will appear when the change is completed.
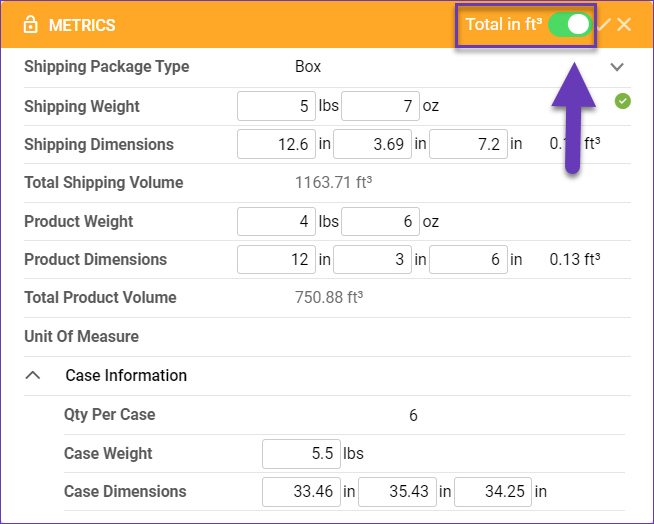
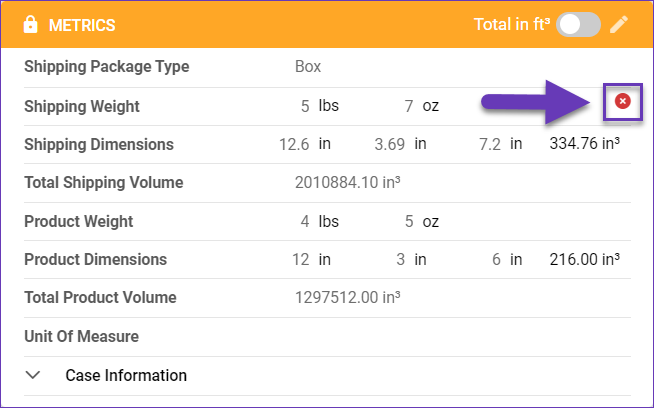
Verify Dimensions
With the 4D Scale Integration with Skustack, you can verify an item’s dimensions by pulling its real-time scale measurements directly into Sellercloud. You also have the option to verify shipping weight manually. Whenever a product’s dimension is verified, a green checkbox is visible next to the respective measurement on the Product Details Page.
To verify shipping weight manually:
- Click on the verification indicator.
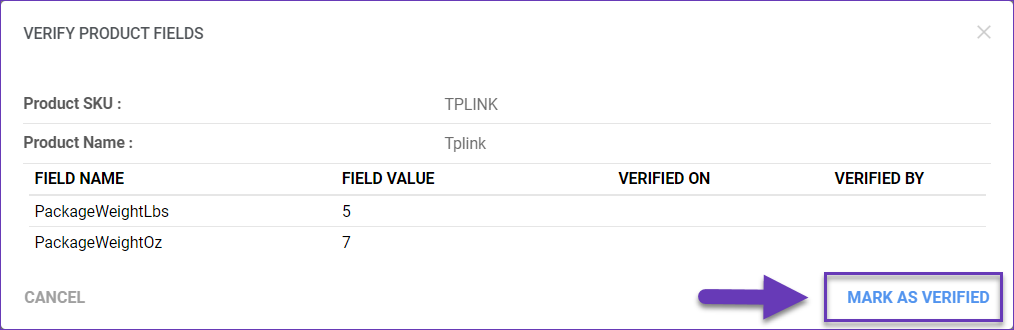
- A popup with the following Verify Product Fields will appear:
- Field Name – The verified field name.
- Field Value – The corresponding measurement.
- Verified On – The date on which the verification occurred.
- Verified By – The email address of the user who verified the field.
- To verify the displayed values, click on Mark as Verified.
Remove Verification
In case you need to remove the verification flag, you can simply click on the Mark as Not-Verified option at the bottom right corner of the Verify Product Fields popup.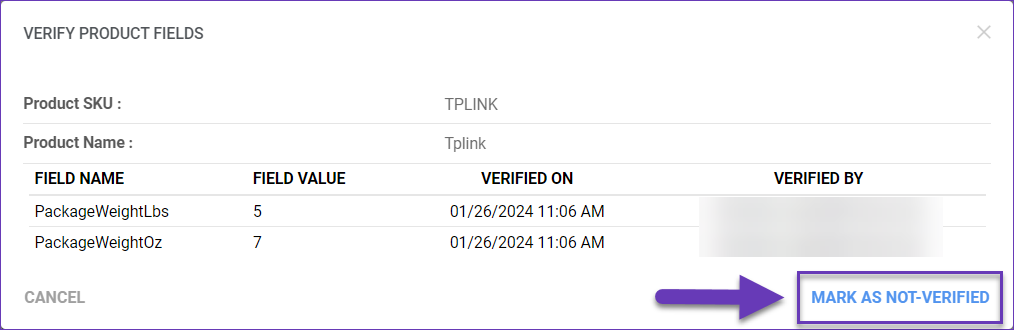
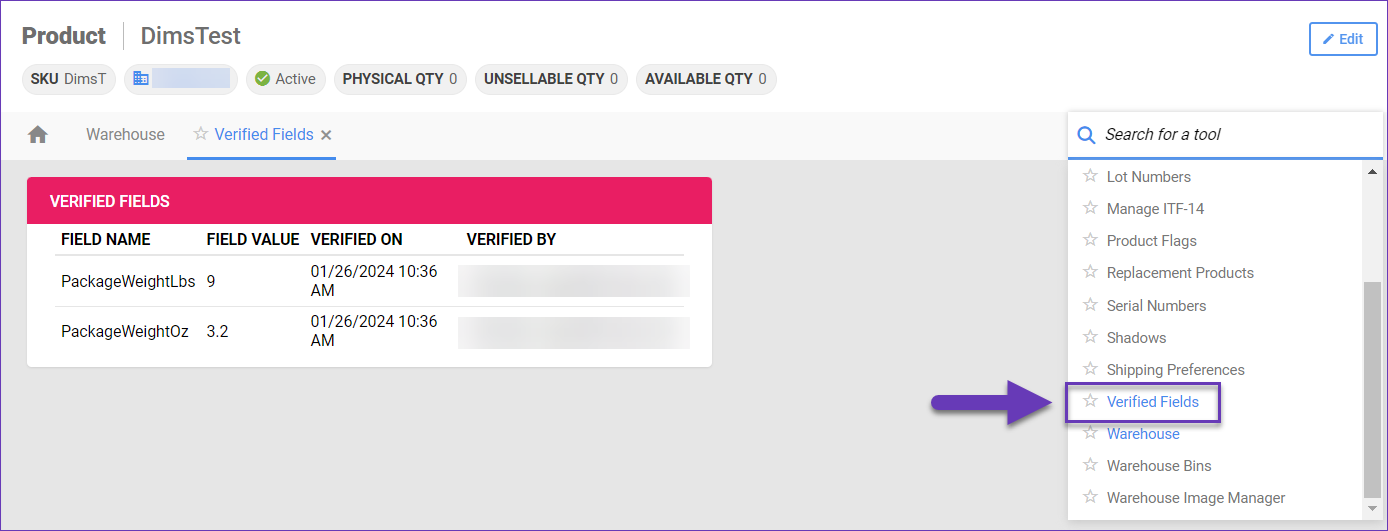
Verified Fields
The product’s verified dimensions can be found on its Verified Fields page:
- Navigate to Products > Manage Products and open the desired product.
- From the Toolbox, select Verified Fields.