
Overview
FBA 2D Barcodes are essential for the Amazon 2D workflow and ensure that products are accurately tracked and inventoried within their fulfillment centers. These barcodes enable you to embed box content details directly into them, eliminating the need to enter product information manually. Upon receipt, Amazon can scan the 2D Barcodes and instantly recognize the contents of the shipment.
You can easily print FBA 2D Barcodes from both the Admin portal and your Skustack app.
Before you print 2D labels, ensure that your Printer Settings are set up for the correct printer.
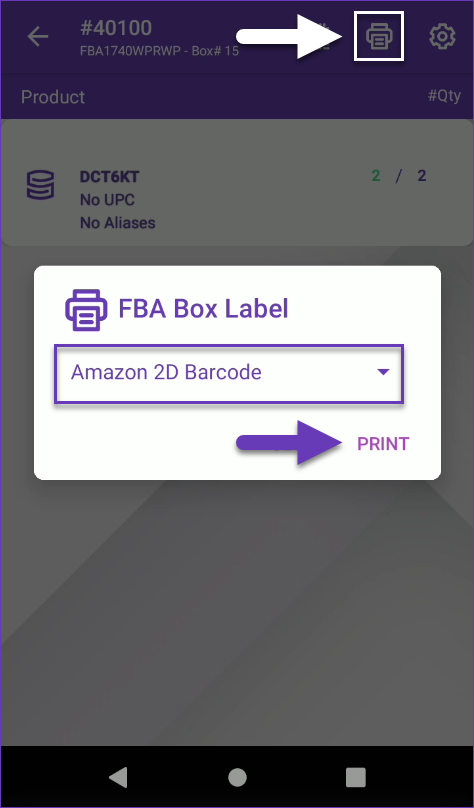
Print FBA 2D Barcodes
To print 2D Barcodes:
- Navigate to the FBAInbound PickList or FBAInbound BoxContent module.
- Select your desired box.
- Tap the Printer icon.
- Select Amazon 2D Barcode from the dropdown list.
- Tap Print.
Skustack printers are generally smaller, and there may be certain printing restrictions due to label size constraints. These restrictions may occur when:
- There are more than three products in the box.
- All three products require expiration dates.
You can also print FBA 2D Barcodes directly from Sellercloud.
Print FBA 2D Barcodes
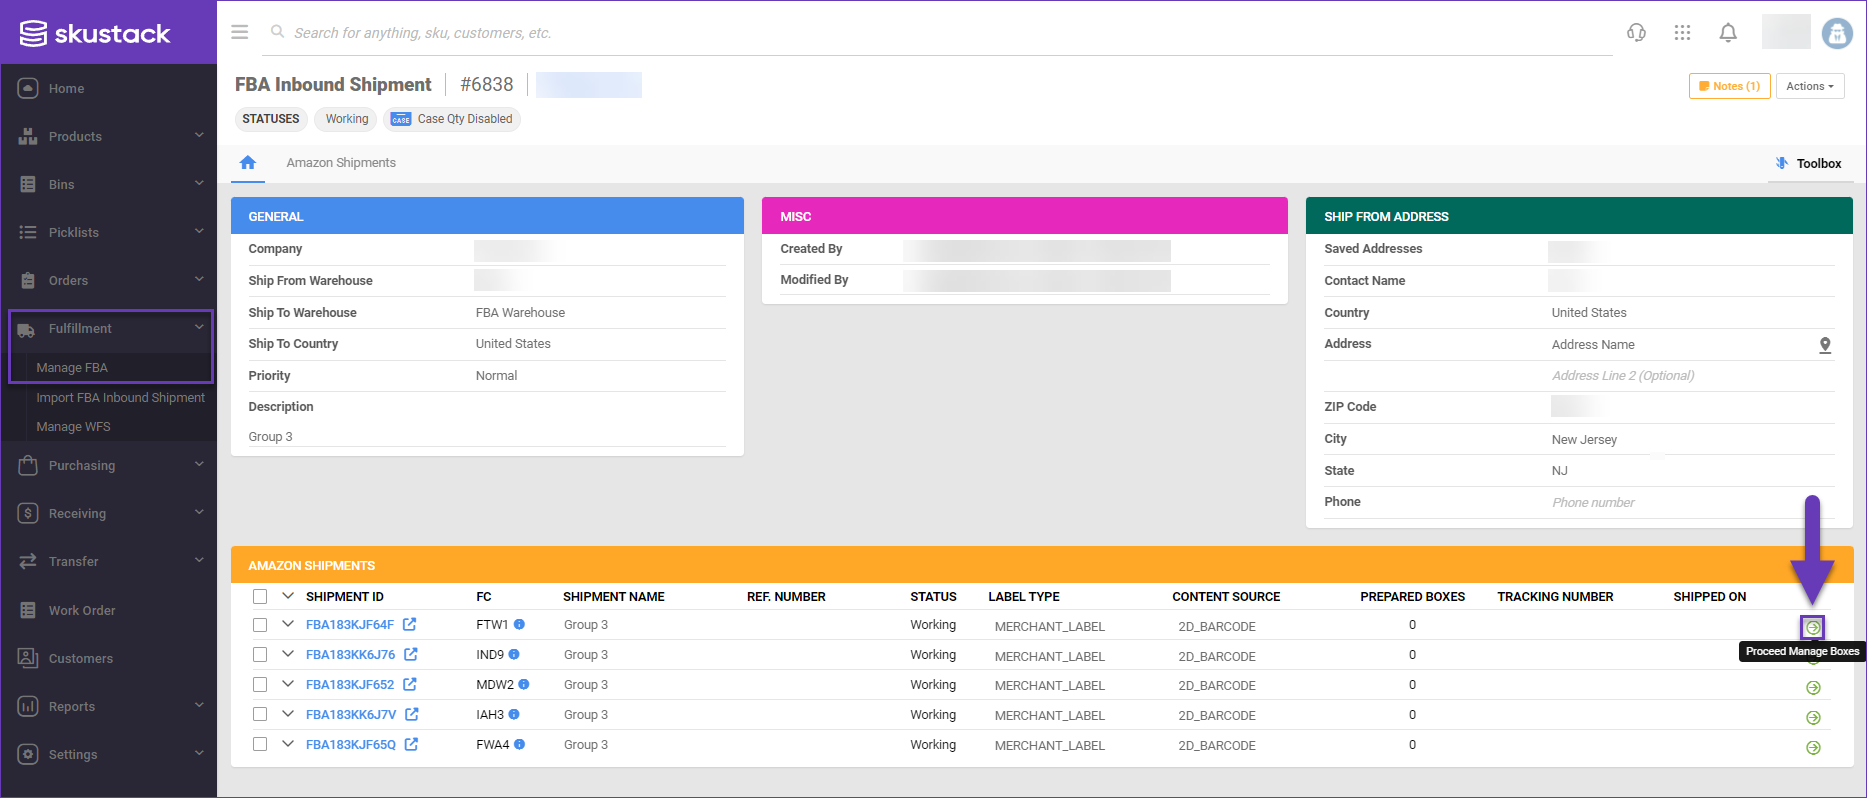
You can easily generate 2D barcode labels for FBA Inbound shipments from your Admin portal:
- Navigate to Fulfillment > Manage FBA and open the desired FBA Inbound Shipment.
- The Amazon Shipments panel displays all related shipments. Click the green arrow on the right of a shipment ID to manage its respective boxes.
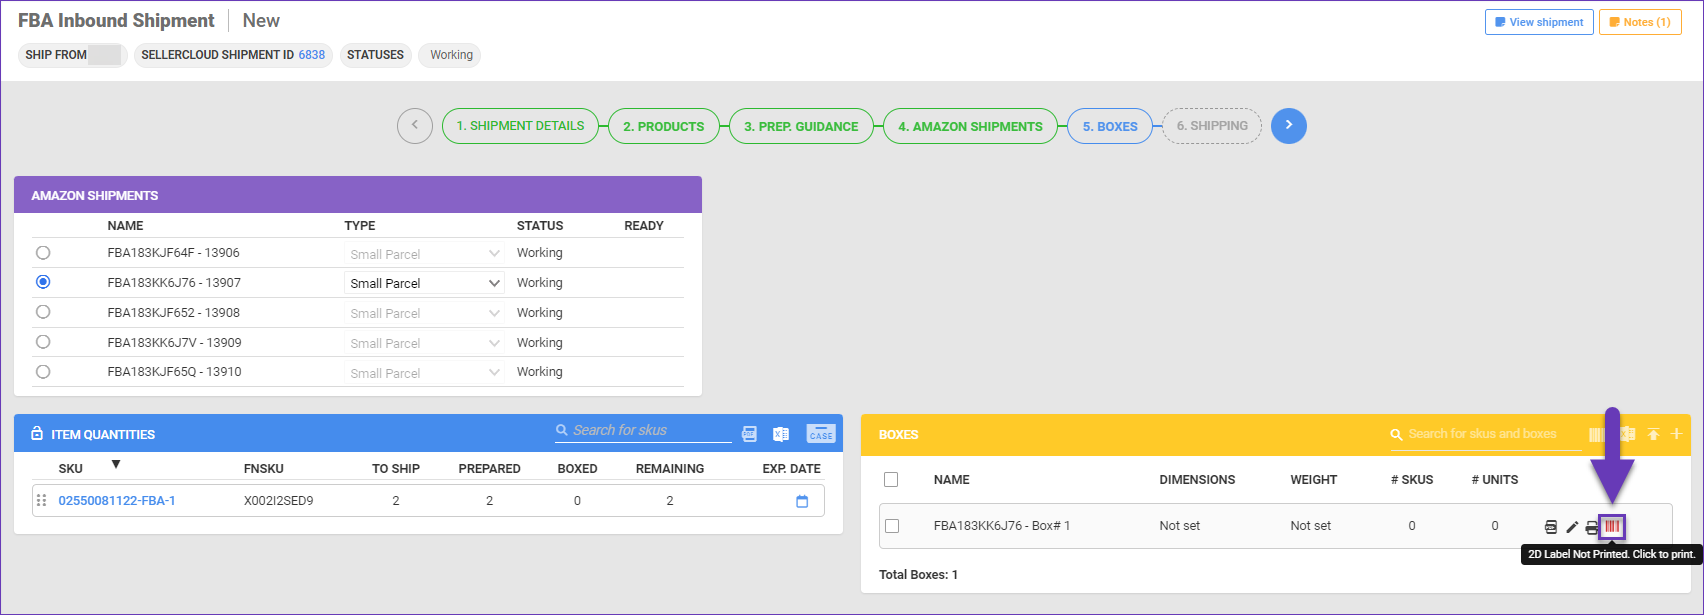
- In the Boxes panel, you’ll find box details, including a barcode icon that visually confirms whether a 2D label has been printed or not – a green barcode verifies a print and red signifies that a label is yet to be issued.
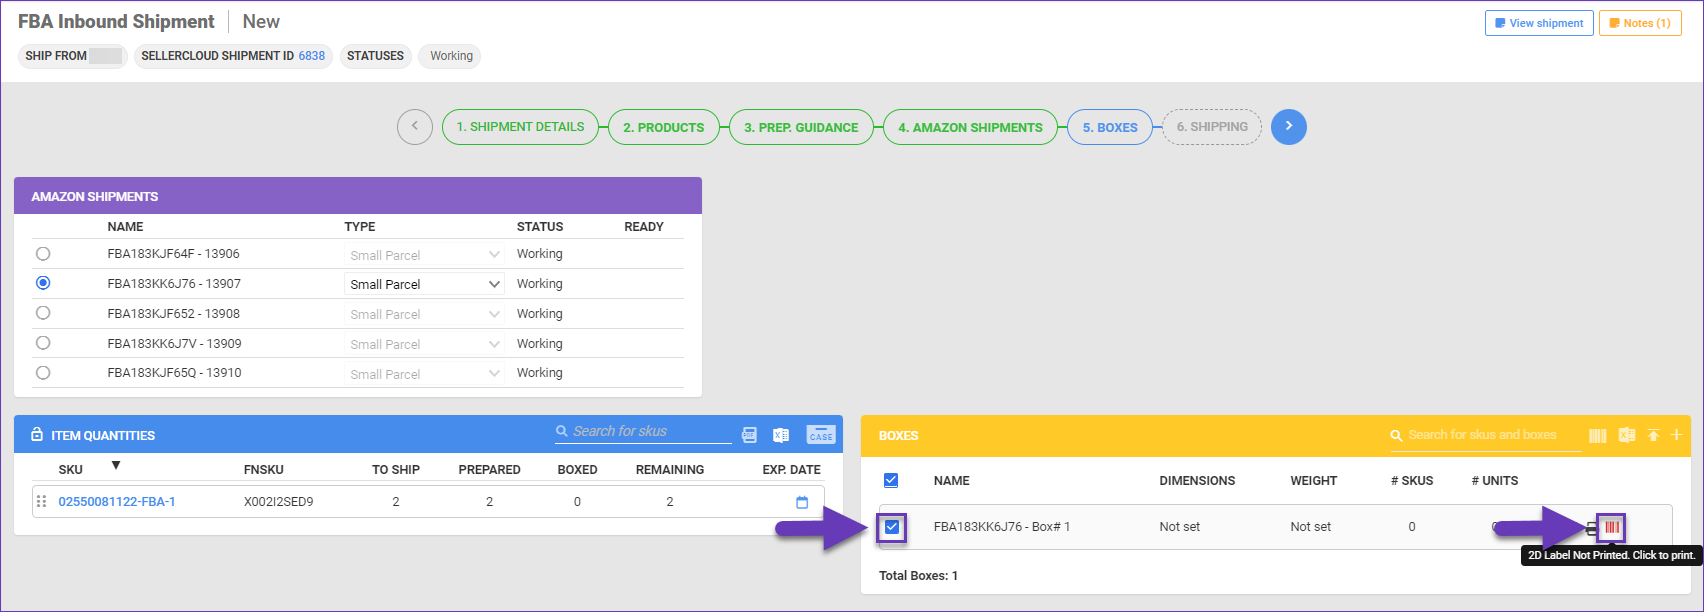
- To print a 2D Label, check the desired box and click its barcode icon. Alternatively, you can utilize the Print 2D label icon.
You can also print FBA 2D Barcodes directly from Sellercloud.