
Overview
In this article, you will learn how to seamlessly register and manage your Skustack devices. Simply open the Skustack app on your device and you will be prompted to register upon login. Once registered, all devices linked to your account will sync with your server in real time, ensuring that everyone is using the most up-to-date information. The Skustack app can be installed on multiple devices, allowing several team members to work on inventory management simultaneously, while the Skustack Admin portal enables you to manage all registered devices and their settings all from a single platform.
Register Your Devices
You can register your device in two ways:
- From the device itself.
- From the Skustack Admin Portal on a computer.
Register from a Device
- Enter your team name and login credentials.
- You’ll be prompted to register your device via the Admin Website.
- If the prompt doesn’t appear, go to Settings > DeviceID and tap the ID to trigger it manually.
- Tap OK — your Device ID will be copied automatically.
- Follow the link provided to the Admin Website.
- Click the + button to add your device.
- Paste your Device ID into the modal and tap Add.
- A confirmation message will appear once the registration is successful.
Register from the Admin Portal (Computer)
- Navigate to the Skustack Admin portal at https://xx.skustack.com (replace “xx” with your server ID or team name).
- Enter your login credentials.
- Select Settings > Devices > Manage Devices.
- Click the + button to add a new device.
- Enter your Device ID (found under Settings > DeviceID in the app).
- Click Add — a confirmation message will appear once the device is registered.

Manage Devices
Control the functionalities that can be accessed and performed by specific users and ensure that each user has the appropriate settings to carry out their designated functions within the warehouse.
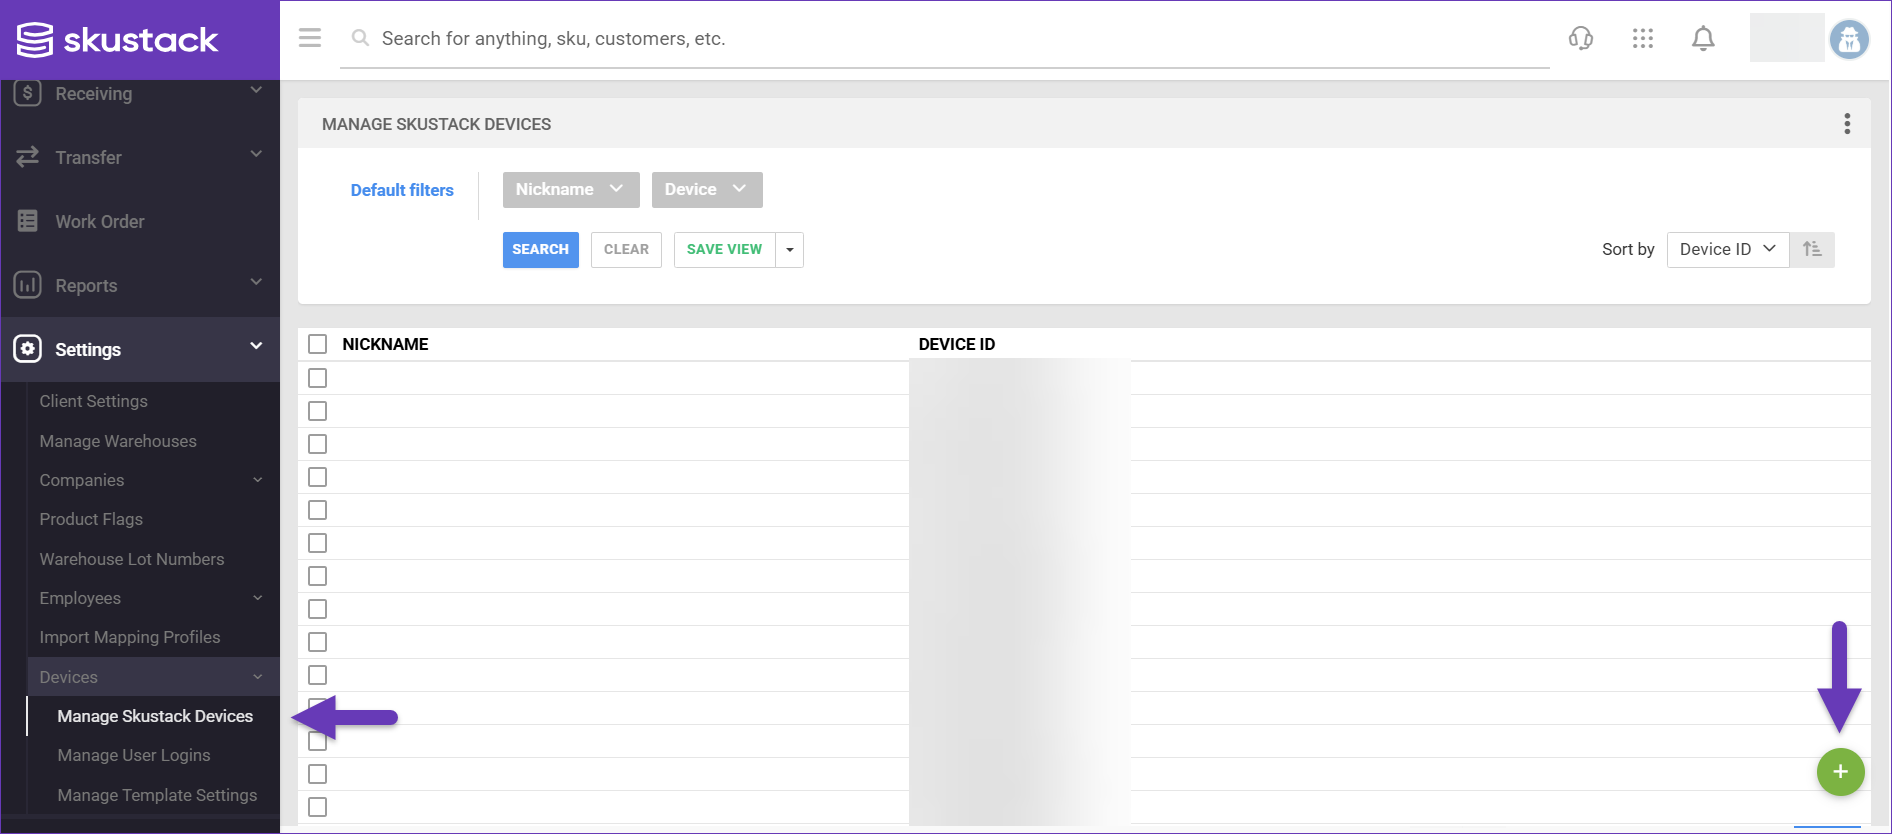
Search Skustack Devices
To search for registered devices:
- Navigate to the Skustack Admin portal at https://xx.skustack.com (replace “xx” with your server ID or team name).
- Enter your login credentials.
- On the left, select Settings > Devices > Manage Devices.
- Configure your Default filters to make sure that the results display exactly what you need.
- Click Search. Each filter you apply gets highlighted. If a filter is gray or not displayed at all, it’s not active.
- To manage the columns in the grid, click the three dots icon on the top right and select Customize Columns. You can:
- Reorder columns by dragging them up or down in the list;
- Hide columns by clicking the Trash icons;
- Add columns by clicking Add column.
- To arrange the data in a different order, use the Sort by menu.
- To save your filtering and sorting options, click Save view, enter a Name, and click Save.

- Select your desired user in the grid and access the Actions menu to either Update Nickname or Logout Device, or click on the User to be directed to the Employee Details page.
Learn more about Employee Management here.
Manage Device Settings
To manage device settings, follow the steps below:
- On the Employee Properties page, go to Toolbox > Device Settings.

- Click Edit to make the necessary adjustments.
- Save.
- as a Custom profile – saves the settings as a unique profile specific to this user.
- as a New Template – saves the profile as a Device Settings Template which can be assigned to multiple users.

By configuring templates, you can define a complete set of settings that can be easily applied to any Skustack user, allowing you to automate data population, and enhance overall efficiency.
Manage Template Settings
Templates are typically created when saving an employee’s device settings. Once created and assigned, templates can be viewed, deleted, and managed from the Template Settings page. To do that:
- Navigate to Settings > Devices > Manage Template Settings.

- Select your desired template(s) in the grid and:
- access the Actions menu to Delete Template(s) or
- click on the Template to manage it
- If you have chosen option “b”, you will be directed to the Device Settings Template page.
- Click Edit to make adjustments as needed.
- Save.