
Overview
Skustack’s Warehouse Event Tracking tool is a time management solution that allows you to record the duration of routine employee activities and evaluate labor costs associated with overtime or other related factors. With this feature you can prepare sets of custom events that can be scanned by your staff to track the span of different tasks and duties, such as PO receival, order picking, shifts and breaks length, etc. The Event Tracking records can provide valuable insights into workforce productivity (per day, employee, event type, etc.) and operational efficiency, allowing you to make informed decisions and strategically allocate resources within your warehouse.
Create your events and print their QR codes in the Admin portal in a few simple steps, and scan them with your Skustack device to record your daily warehouse activities.
Scan Warehouse Event
To track the duration of a routine warehouse activity and to add a related note, you need to scan the event’s start and end point barcodes. You have two options to scan an event through your Skustack device:
- Via the Menu – Open the Menu and tap on Scan Warehouse Event.
- Via the Settings – Navigate to the Settings and tap on Scan Warehouse Event.
Once you scan the required QR barcode, a green message will validate the successful log of the warehouse event. When the activity that you’re tracking is complete, simply scan the event’s end QR code.
Warehouse Event Notes
Event Notes could be particularly useful to record activity specifics and potential scanning discrepancies. For example, if an employee forgets to scan an event, they can add a note from their device with the correct duration and/or other important details. A manager can then review the information and adjust it from the Skustack Admin portal.
Warehouse Event Tracking
Whenever a Skustack user scans an event’s QR code, a new log is created. To explore existing logs with your device:
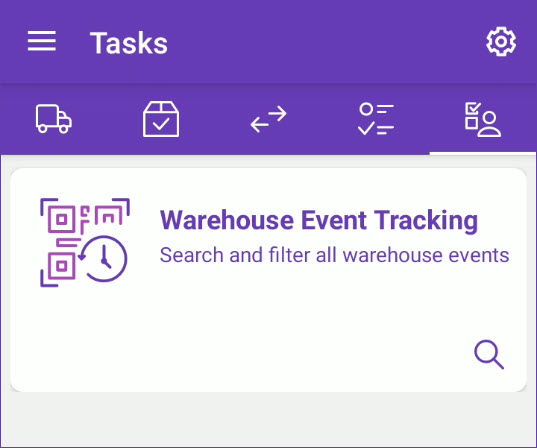
- Navigate to the Tasks module and tap on Warehouse Event Tracking.
- Tap on the magnifying glass and select a Search Mode:
- Search All – This mode searches for all events within the warehouse.
- Search By Warehouse Event ID – Use this mode to find logs of a specific event type, by its ID.
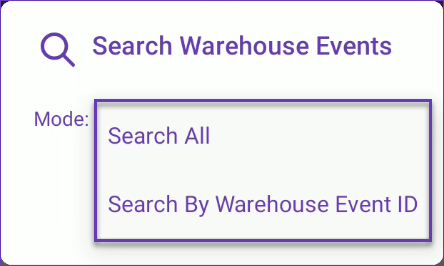
- Tap Go.
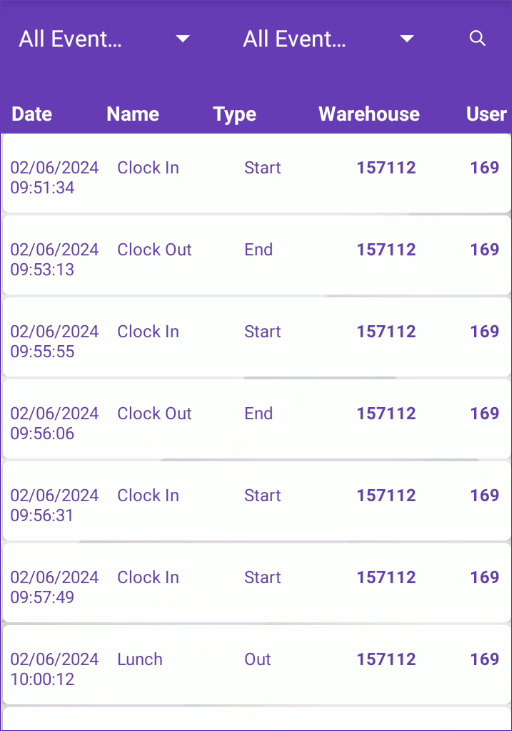
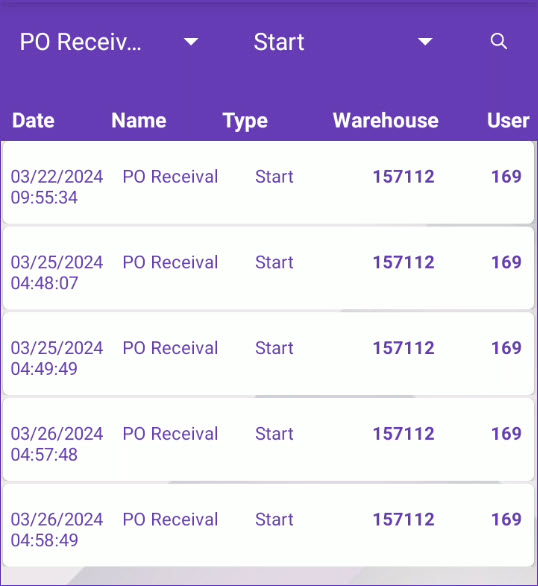
- A list of logs will be displayed on your screen. The following event details are available:
- Date – The date and time of the event.
- Name – The unique event name, as seen in the Skustack Admin portal.
- Type – Either beginning (Start/In) or ending (End/Out) type of event log.
- Warehouse – The warehouse where the event took place.
- User – The employee who triggered the event.
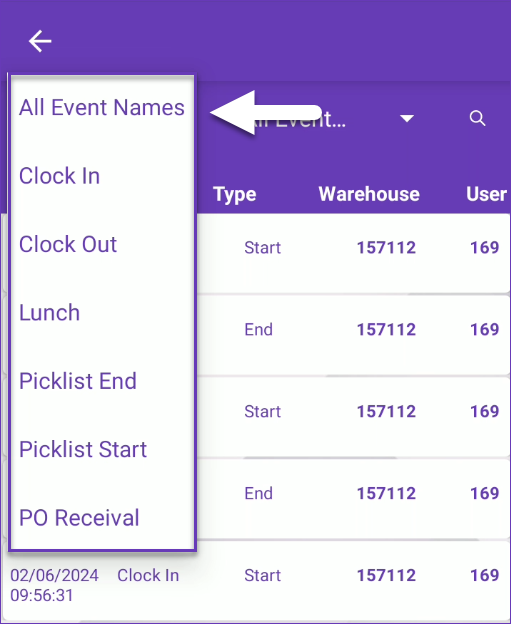
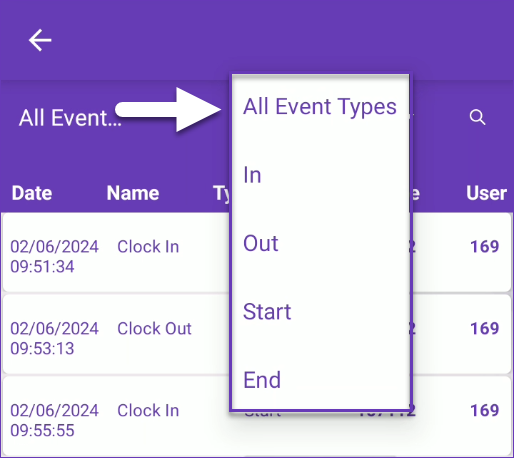
- Use the available filters to narrow down the list of logs:
-
- All Event Names – To view entries of a specific event, tap on this dropdown and choose from the list of event names.
-
- All Event Types – Use this dropdown to filter logs by the event log type – either beginning (Start and In) or ending (End and Out).
-
- Once the desired filters are selected, tap on the search icon.

- The results will be displayed on your screen.
Create Warehouse Events
Every warehouse workflow and routine that has a start and end point and involves your workforce can be tracked via a set of Warehouse Events. To create a new event:
- Navigate to the Skustack Admin portal at https://xx.skustack.com (replace “xx” with your server ID or team name).
- Enter your login credentials.
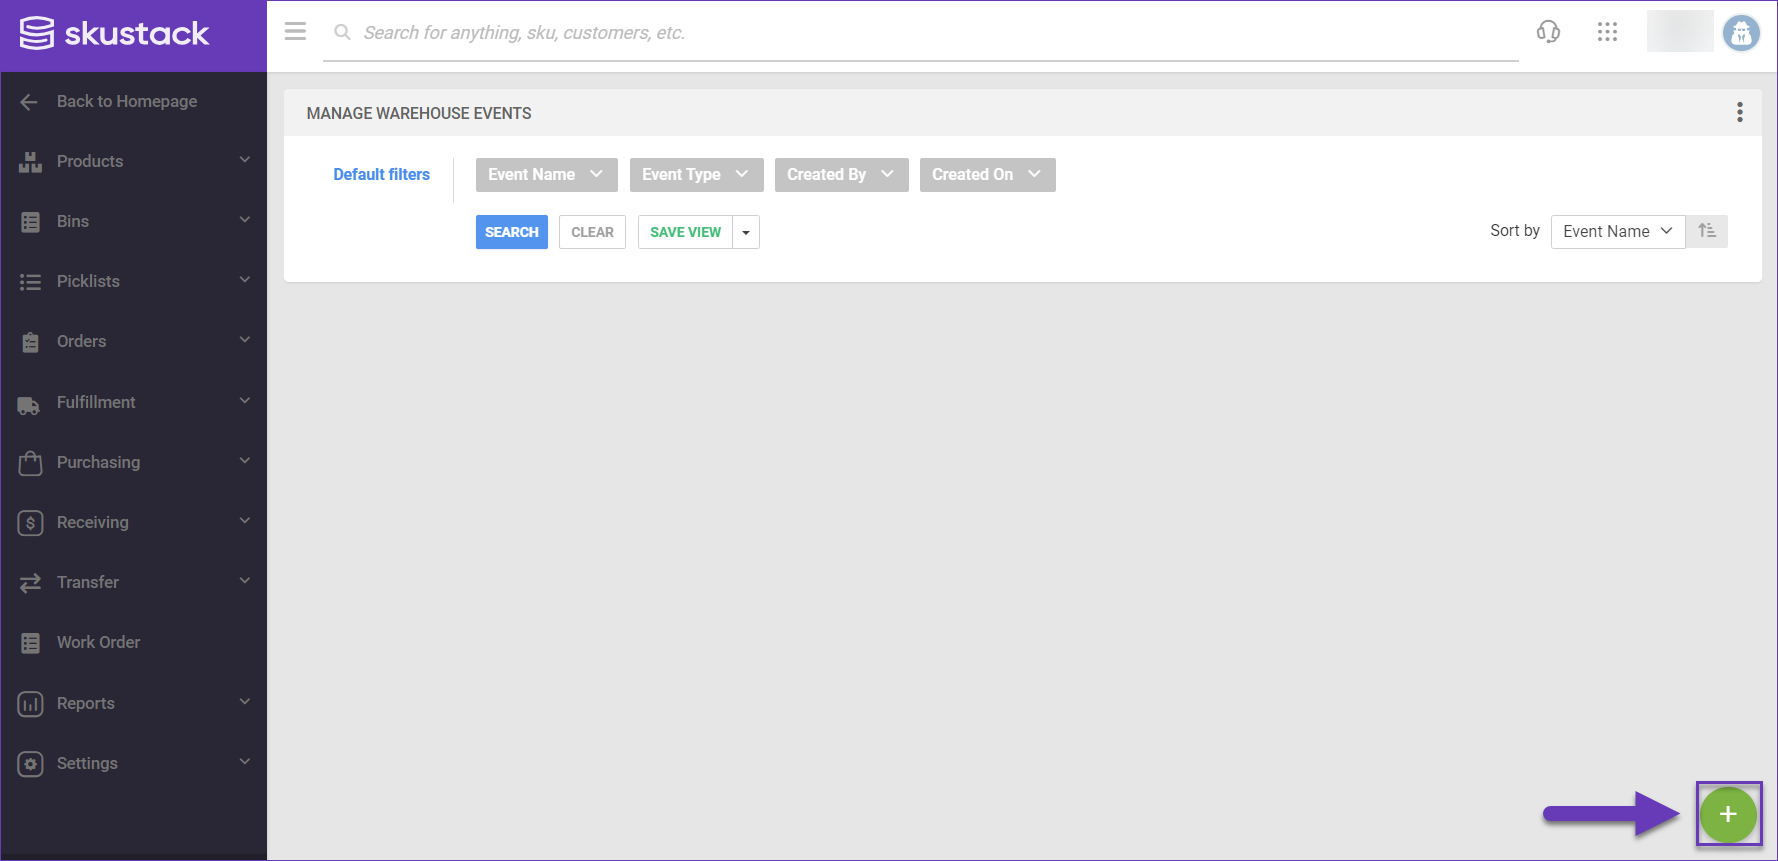
- On the left, select Settings > Manage Warehouse Events.
- Click on the green + icon in the bottom right corner of your screen.
- Enter an Event Name.
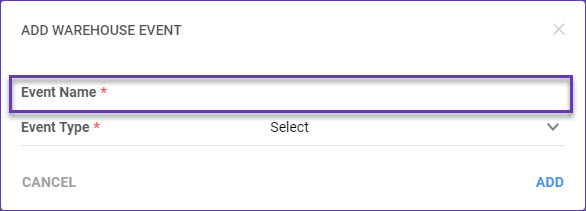
- Select an Event Type from the dropdown menu:
- Start/In – Types used to start the timetracking of the warehouse events.
- End/Out – Types used to record the end point of the warehouse events.
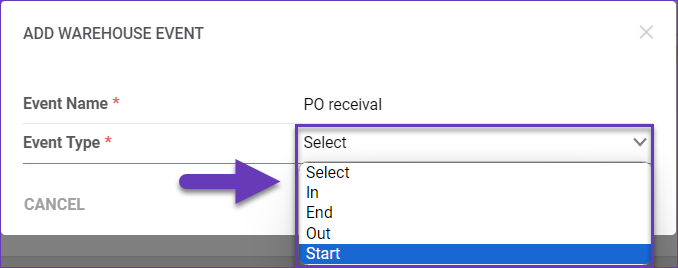
- Click Add.
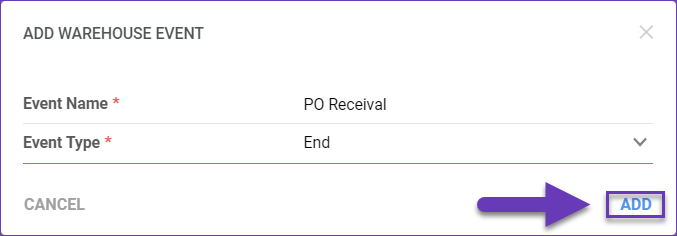
The new event will be added to your list. Repeat this process to create an event set with a start and end point and proceed to print their QR codes.
Print Event QR Codes
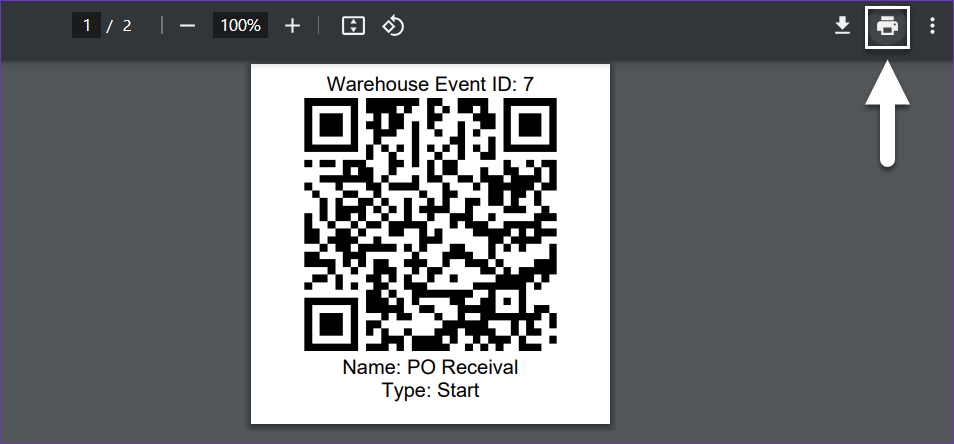
Once an event is created, you can print a PDF that can be placed in a convenient location, as per the event’s purpose. To print QR Codes:
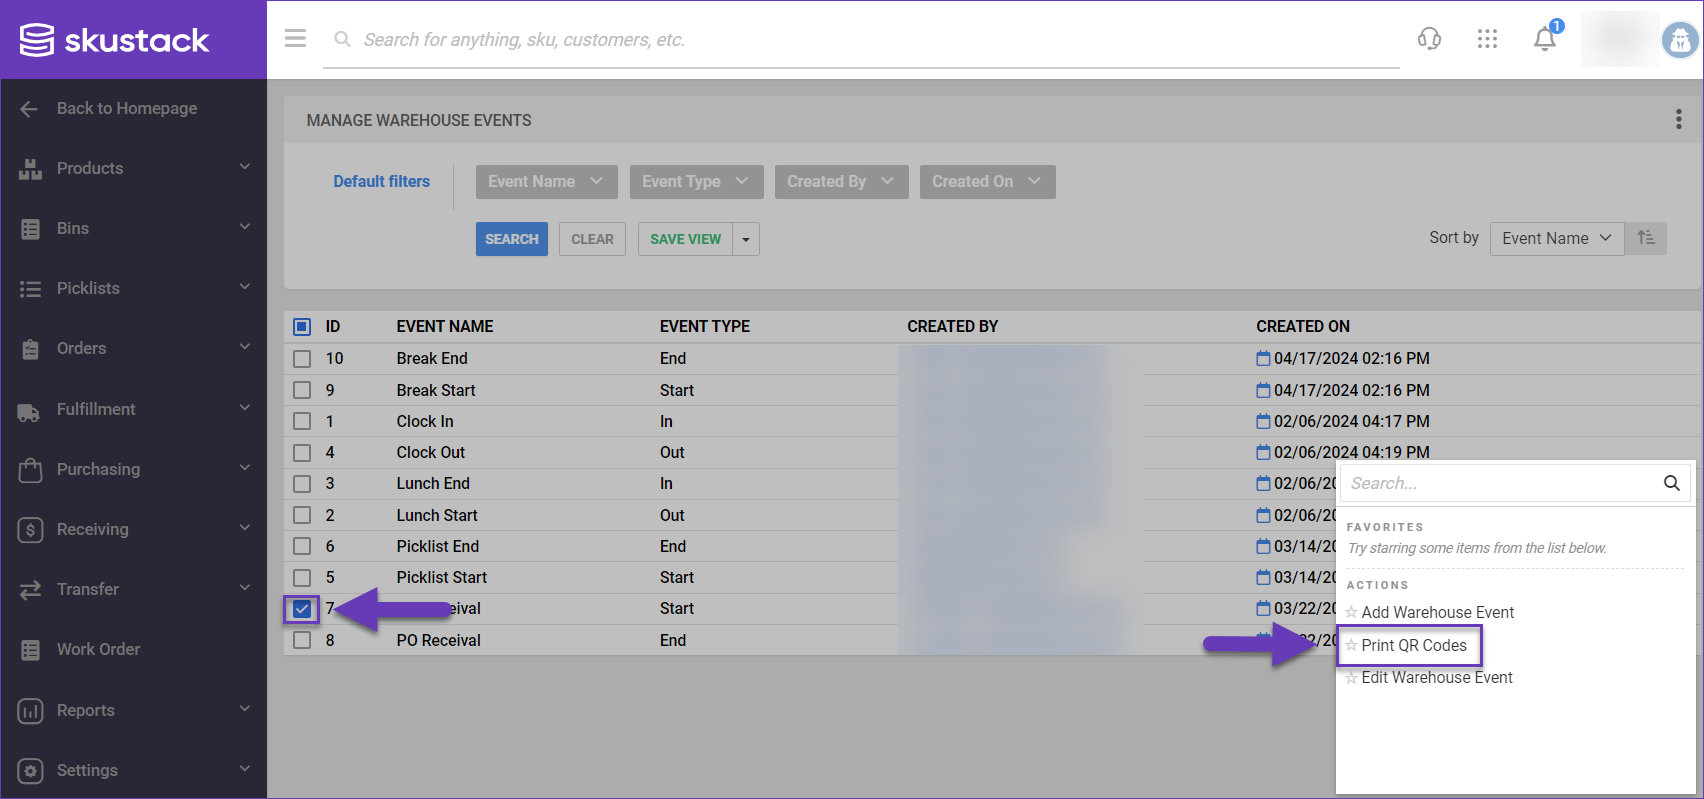
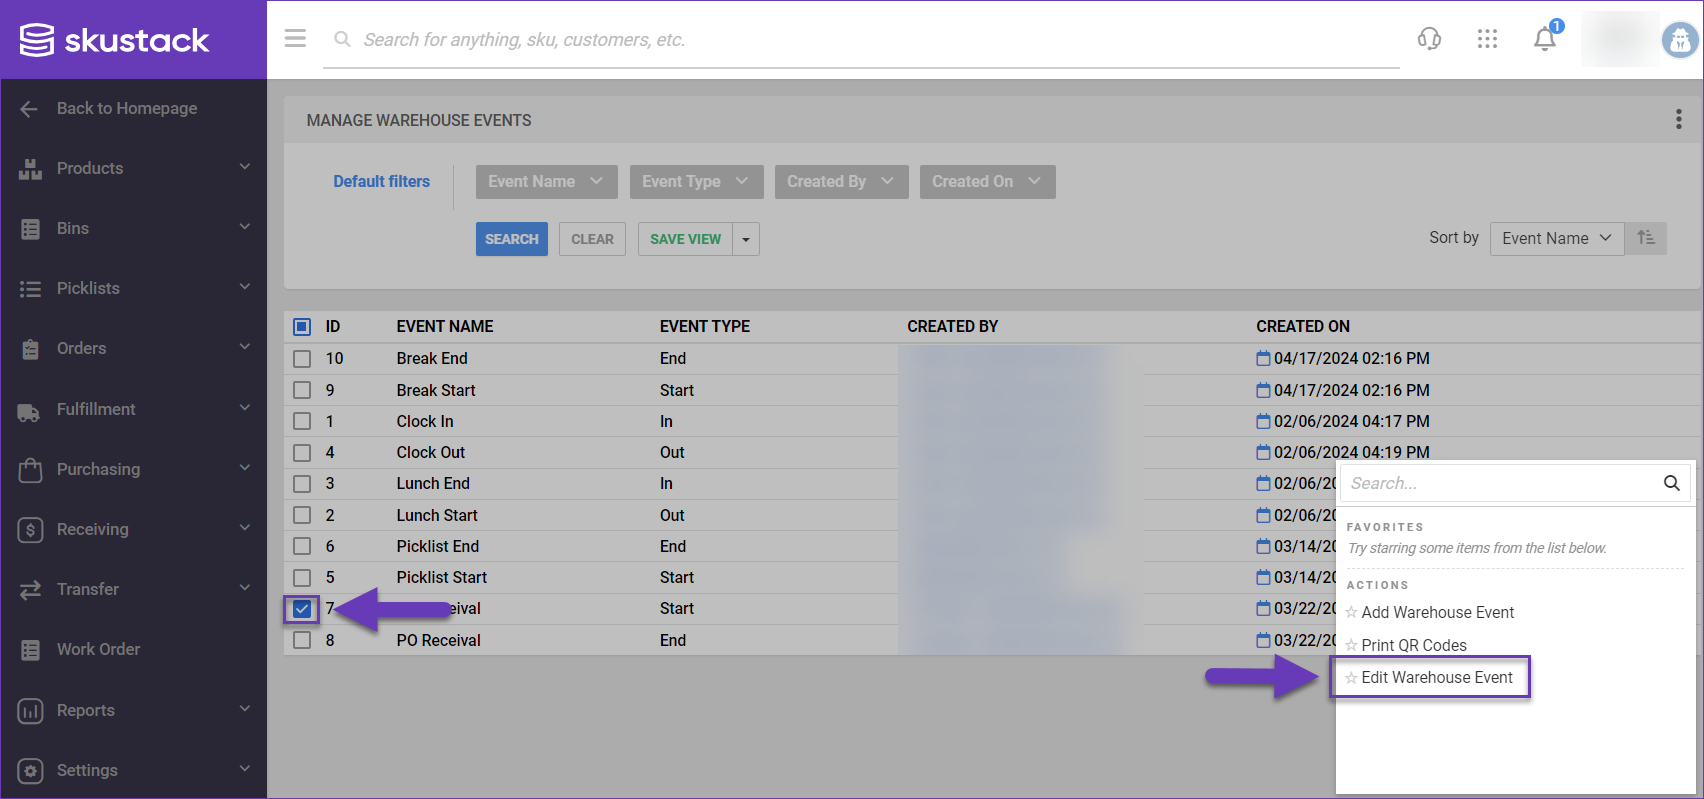
- Navigate to Settings > Manage Warehouse Events.
- Select the desired event/s from the grid and access the Actions menu.
- Click Print QR Codes.
- Choose a location on your computer to download the QR codes in a PDF format.
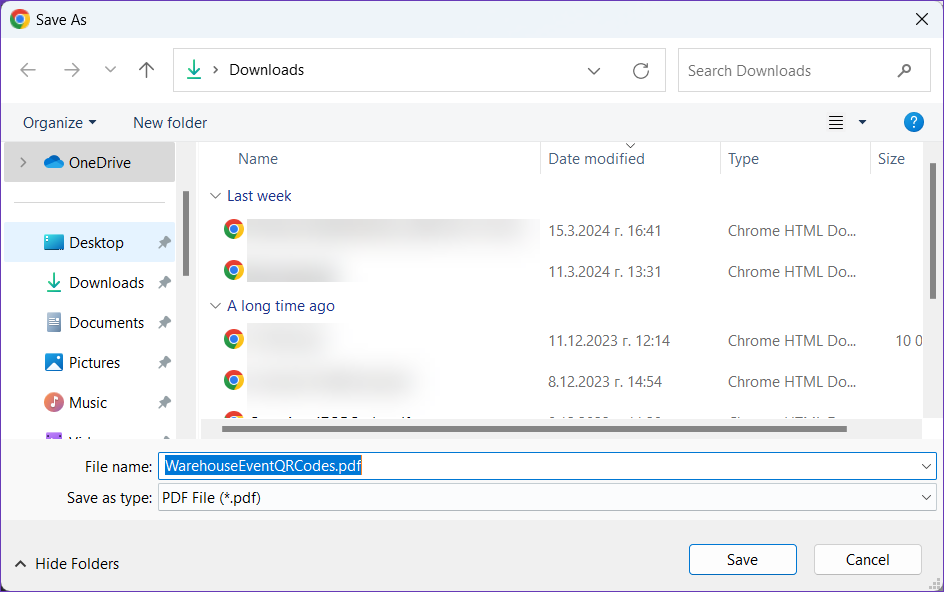
- Once downloaded, you can print the event’s code, using a printer of your choice.
Edit Warehouse Events
If necessary, you can easily edit a warehouse event:
- Navigate to Settings > Manage Warehouse Events.
- Select the desired event from the grid and access the Actions menu.
- Click on Edit Warehouse Event.
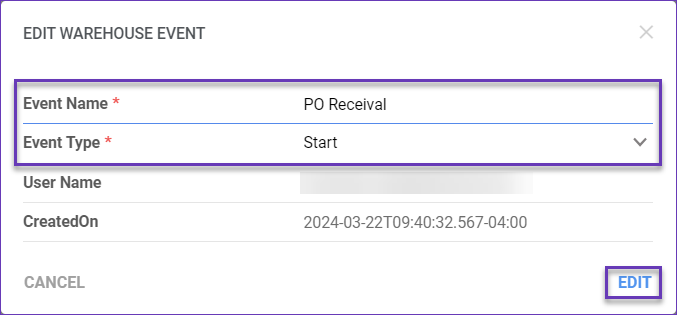
- Update the required information and click Edit.
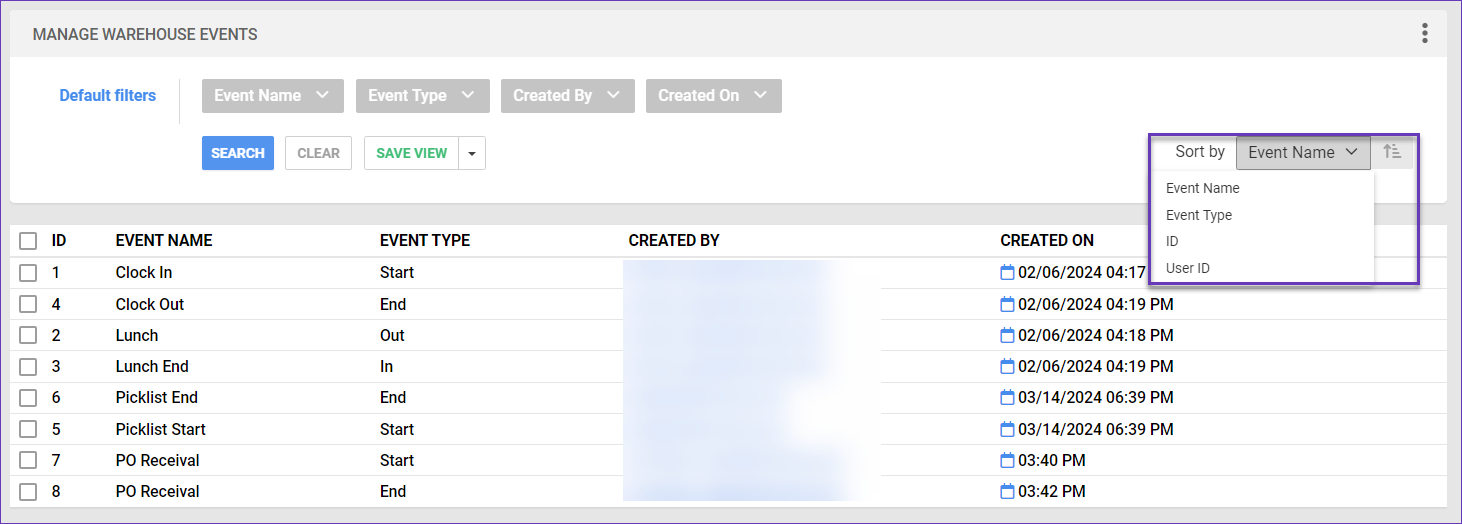
Search Warehouse Events
You can find existing events, by searching via the available filters on the Manage Warehouse Events page:
- Event Name
- Event Type
- Created By
- Created On
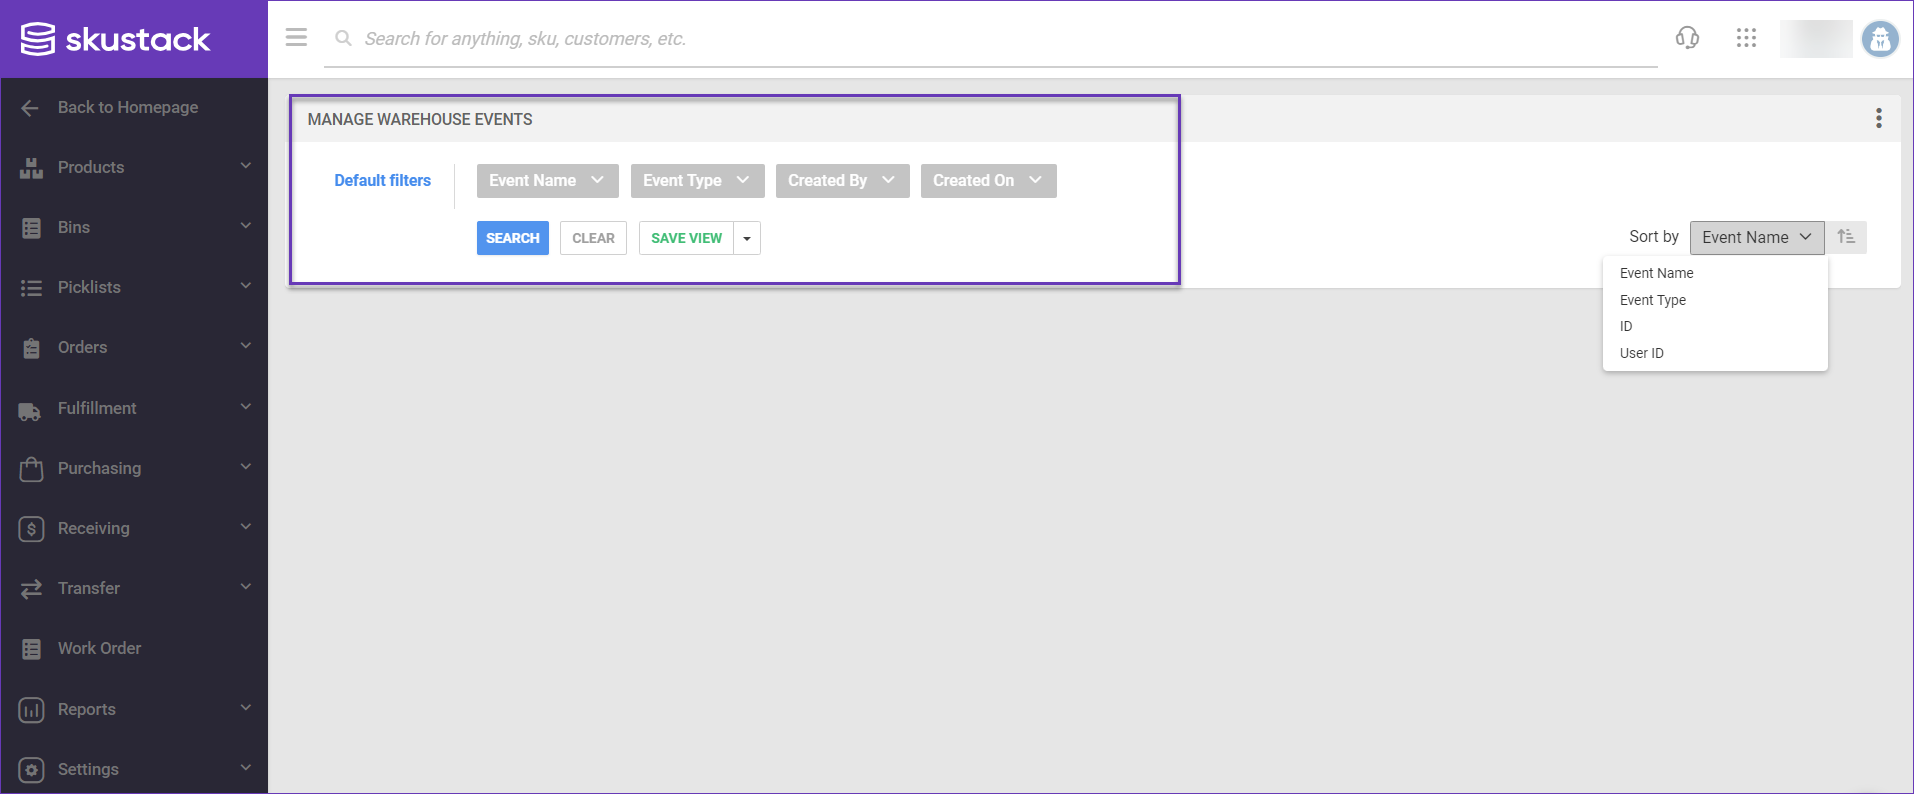
The results contain the same information as the above filters and can be easily organized via the Sort By options:
- Event Name
- Event Type
- ID
- User ID
Warehouse Events History
Whenever a Skustack user scans an event’s QR code, a new log is created on the Warehouse Events History page. To view the list of your Warehouse Events, navigate to Settings and select Warehouse Events History.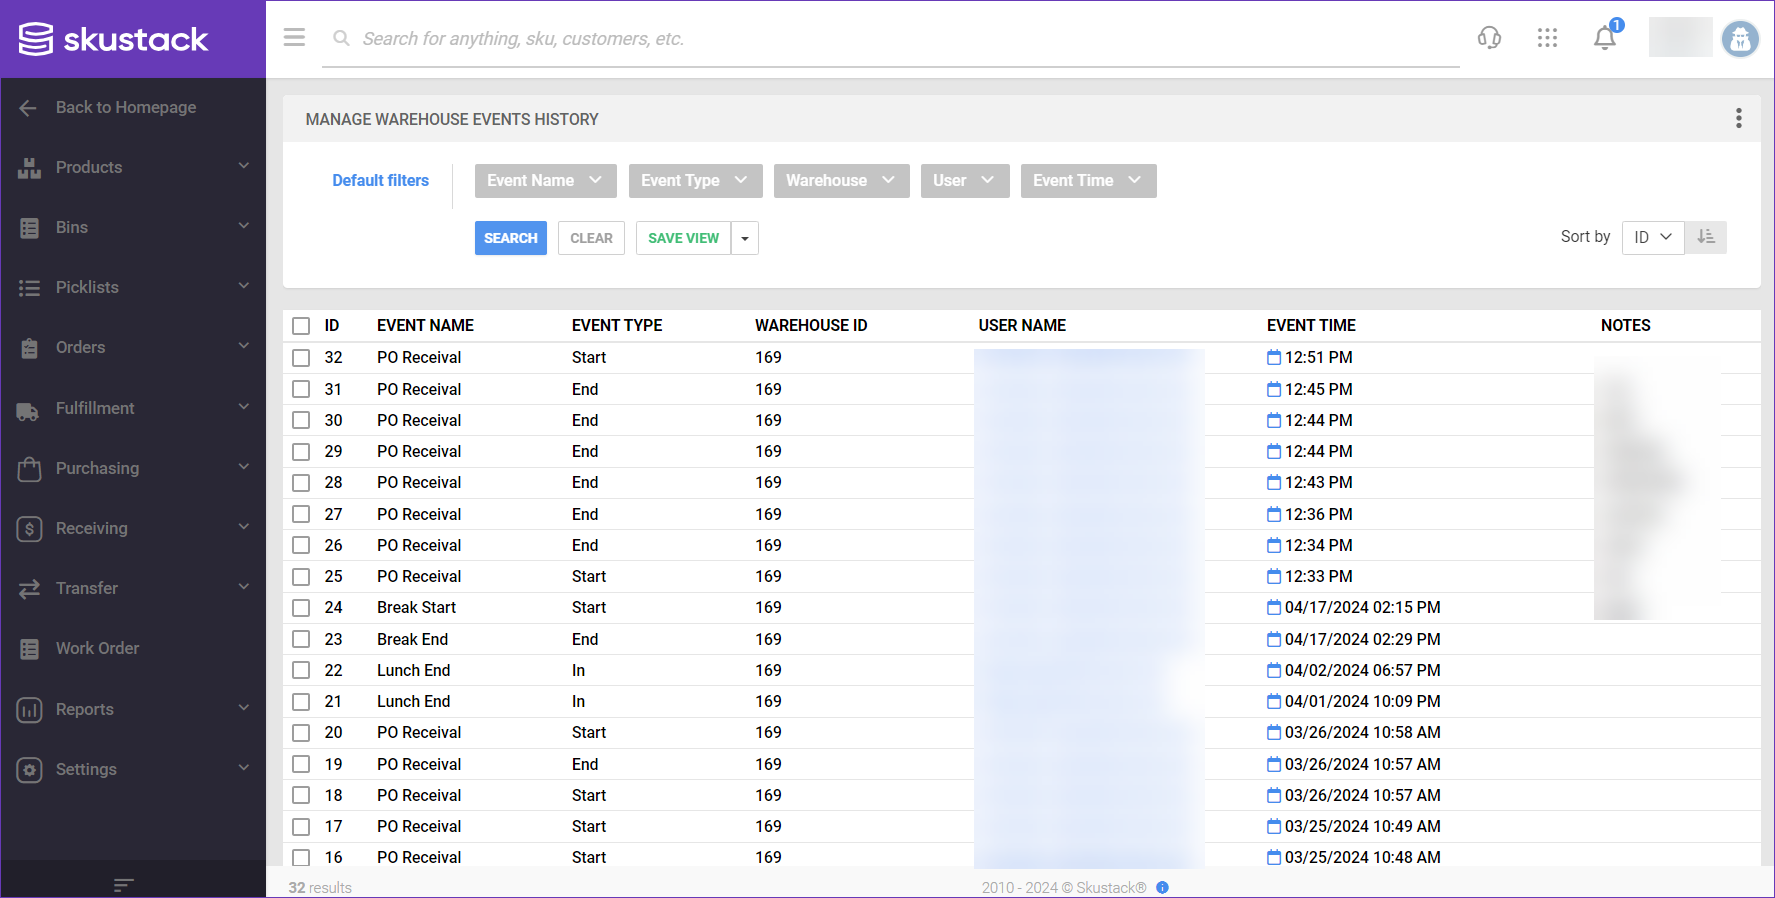
The information here can be organized with the available filters:
- Event Name – Use this option to display all logs for a specific event.
- Event Type – With this filter you can see all events by type.
- Warehouse – Use the dropdown to narrow the list of events by warehouse.
- User – This filter enables you to check event logs per user.
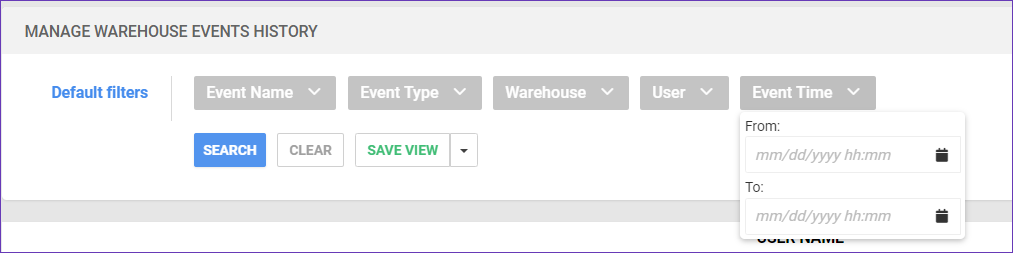
- Event Time – Choose a From and To dates to display all events for a specific time frame.
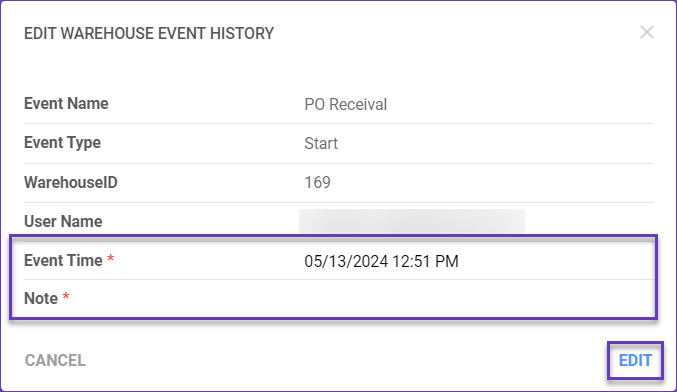
Edit Events History
In certain situations, historical logs may require duration and specifics adjustments. To achieve such changes, you can edit the Event Time and Note:
- Navigate to Settings > Manage Warehouse Events History.
- Select the desired event from the grid, access the Actions menu and click Edit.
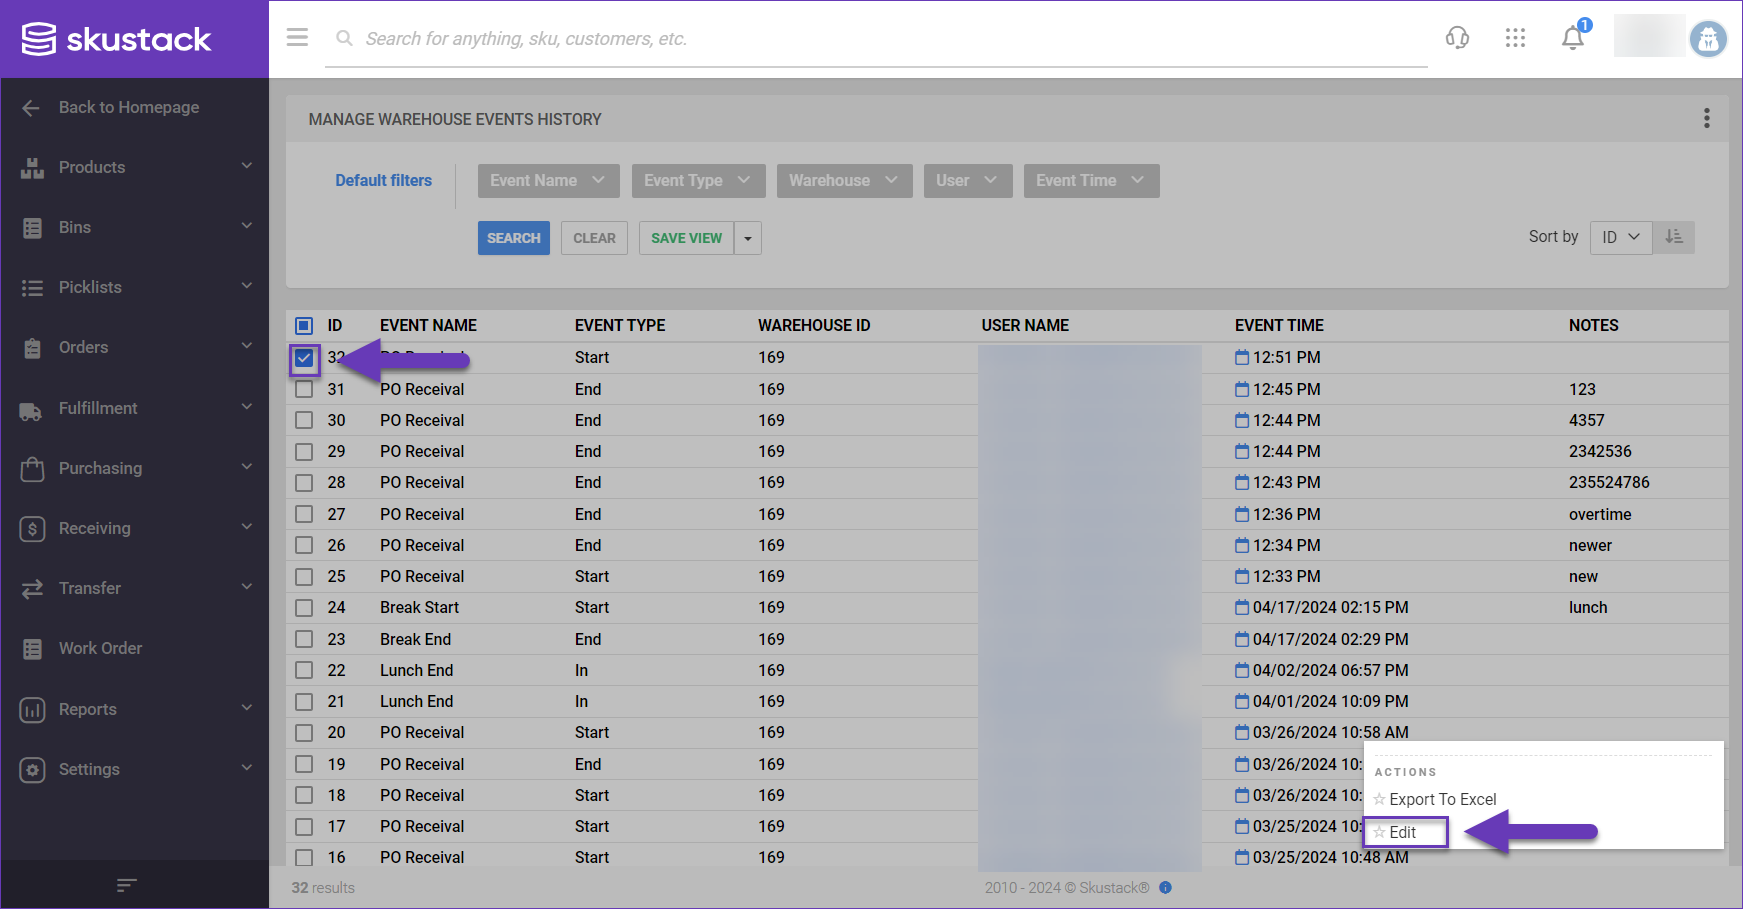
- Update the Event Time and/or Note, as required and click Edit.
Export Events History
For internal business purposes, such as payroll and accounting, you can export your events records in an Excel file:
- Navigate to Settings > Manage Warehouse Events History.
- Select the desired events from the grid, access the Actions menu and click Export To Excel.
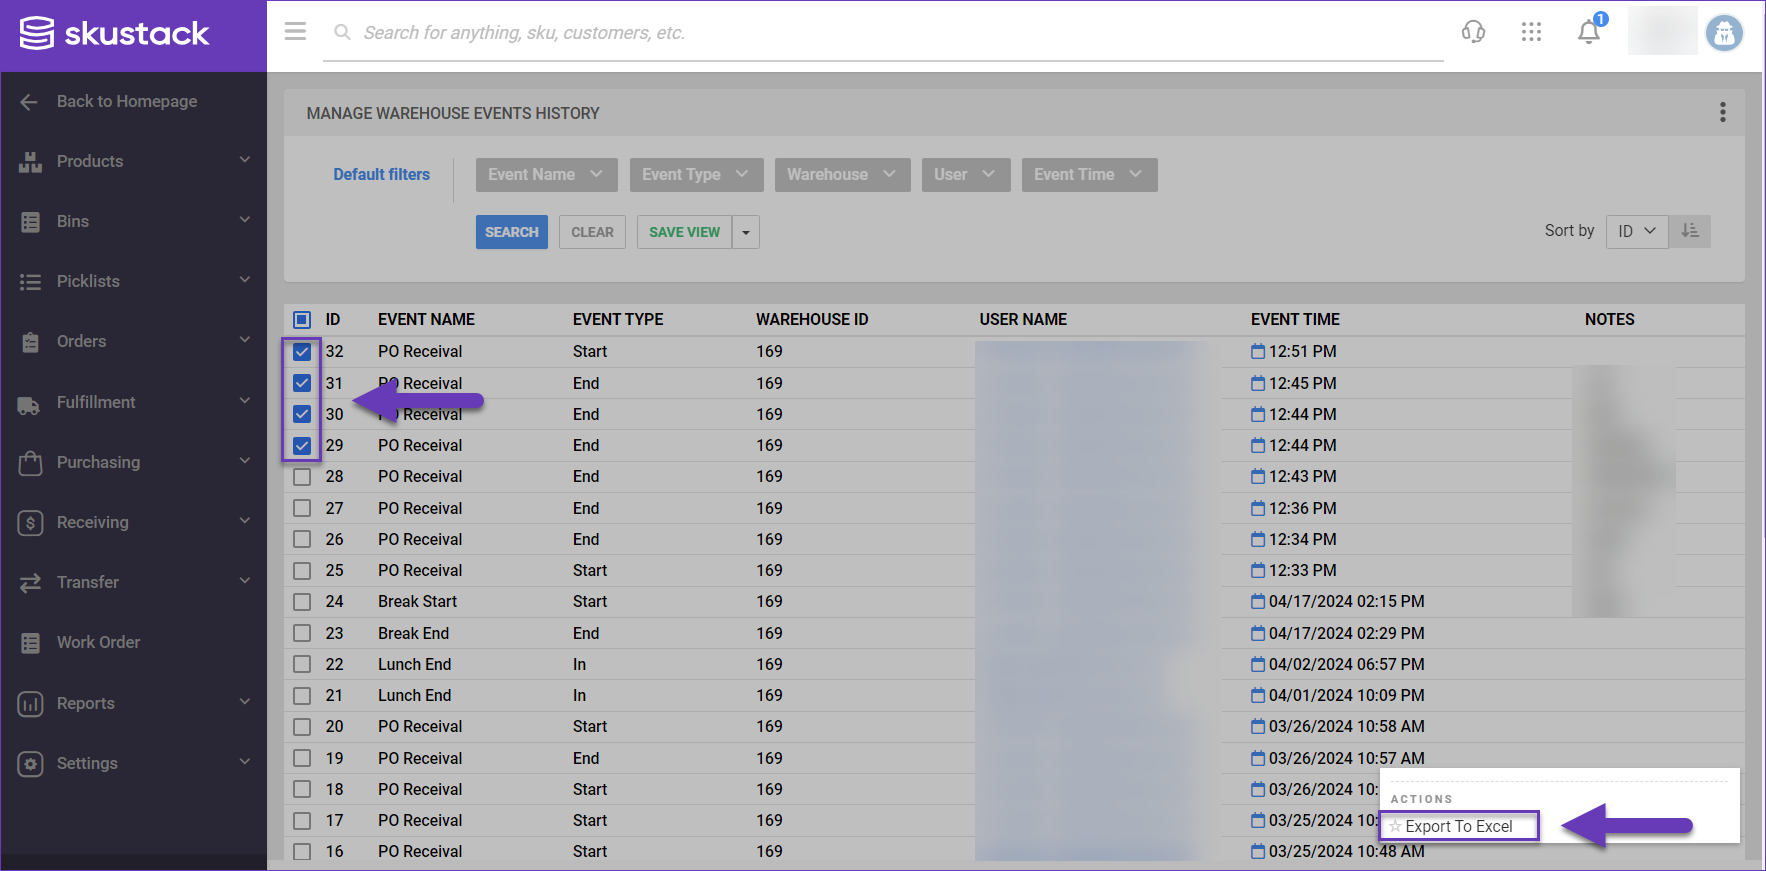
- Choose a location on your computer and Save the export.
- The downloaded file will contain the following details:
- Event ID
- Event Name
- Event Type
- Warehouse ID
- User Name
- Event Time
- Notes
![]()