Overview
In the Skustack Admin, companies represent business entities that interact with the platform. Typically, each company corresponds to a unique business entity. The distinct separation is essential for efficient inventory management, order organization, accounting, third-party logistics, and scalability.
Manage a Company
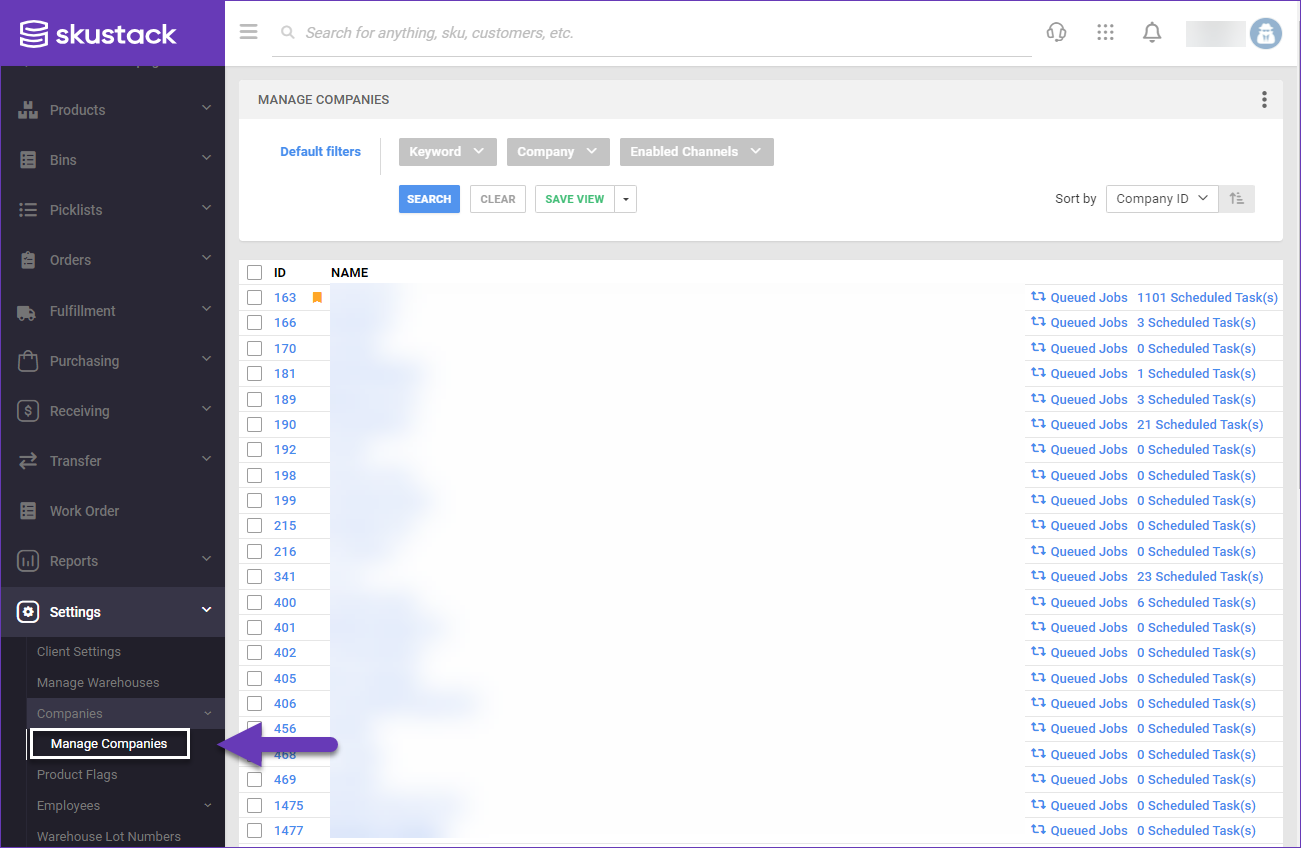
Information about your companies and their details can be found on the Manage Companies page. You can access this page from the main dashboard in two different ways:
- Navigate to Settings > Companies > Manage Companies.
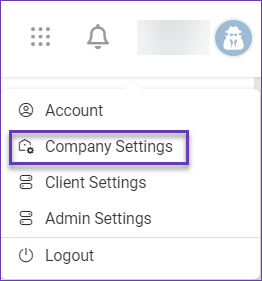
- Click on your account’s name in the upper right-hand corner and select Company Settings.
On the Manage Companies page, you can view a list of your companies and a brief snapshot of each one. The displayed columns are Company ID, Name, Queued jobs, and Scheduled tasks.
Company Details
By default, your Company Address is the Ship From address on orders and invoices and the default Ship To address on your Purchase Orders.
To configure your Company Address and other related details:
- Select your company from the list.
- Click the Edit icon in the upper right-hand corner of the page to edit both panels or the Pencil icon to edit a specific panel.
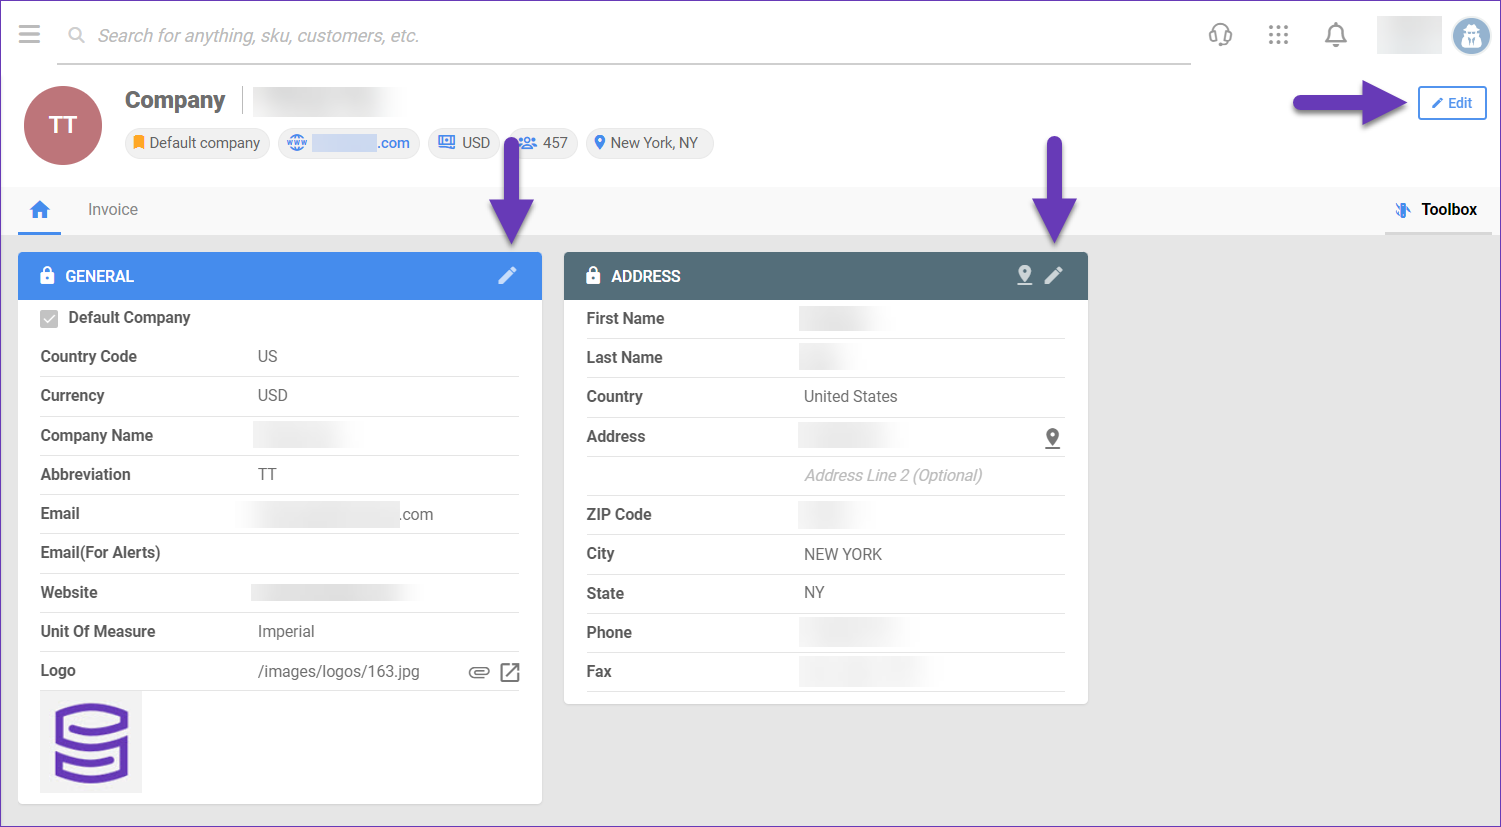
- Enter the required information.
- To configure this entity as your Default Company, check the respective box in the General panel.
- Once done, click Save.
Company Settings
Manage and edit additional operational information, including invoice settings, from the company’s Toolbox menu.
- Go to Settings > Companies > Manage Companies > Select your company.
- Go to Toolbox and scroll to see all settings that are related to that company. Refer to the table below for a definition of each setting.
| Setting | Description |
| AddressBook | Create different entries in your Address Book, which can be retrieved for use on the Ship To address on Purchase Orders, as well as the Ship From address for FBA Shipments. |
| Change Log | View all changes made on a company level and the user that made each change. |
| Invoice Settings | Change the appearance of your invoices based on your preferences by utilizing the options provided on this page or use a custom-built plugin. |
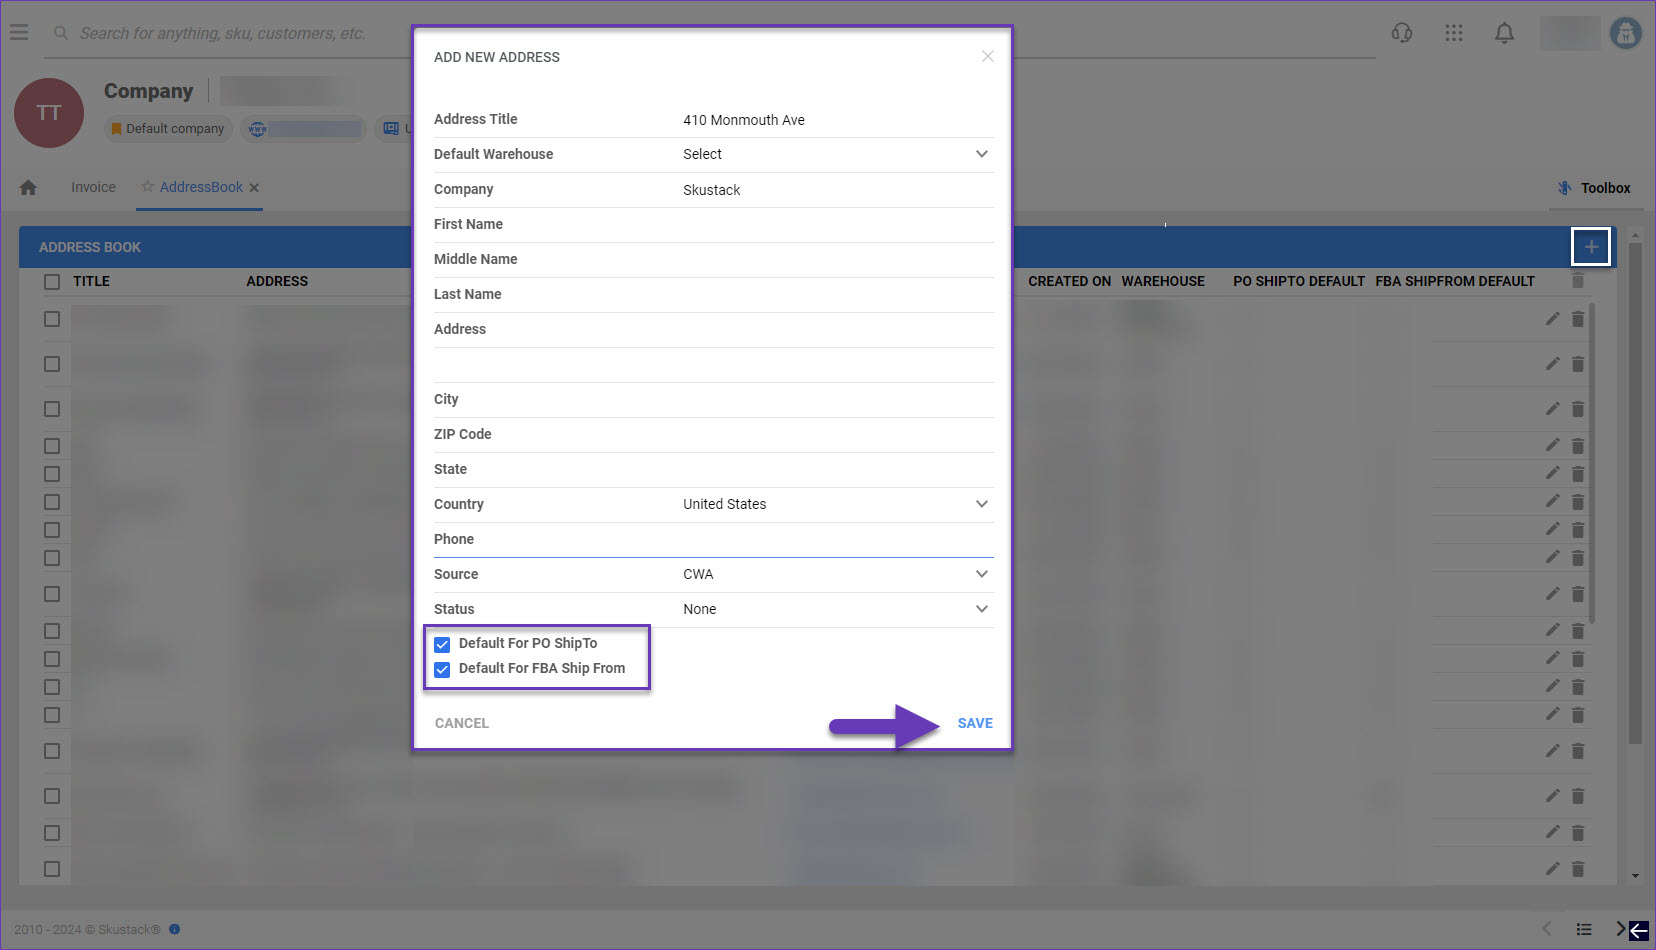
Address Book
Create different entries in your Address Book, which can be retrieved for use on the Ship To address on Purchase Orders, as well as the Ship From address for FBA Shipments.
To create an entry in your Address Book:
- Navigate to Toolbox > AddressBook and click on the + icon to add a new address.
- Enter your address information and click Save.
Change Log
You can easily monitor any changes made to the company settings by accessing the Change Log. This log shows all changes made on a company level and which user made the change. To view the company’s Change Log:
- Navigate to Toolbox > Change Log.
- Configure the filters as needed and click Show Log. The following filter options are available:
- Show Log – Show only specific types of logged events.
- View Full Log – View all logged events.
- eBay Site – Select an eBay site.
- Changed By – The person who made the change.
- Application Name – This option shows the IDs for each application used to make changes. For example, it will tell you if a user has signed in and made a change manually from a browser or if something else triggered it, such as a scheduled task.
- Property Name – Select a specific setting name. Only settings that have been updated recently will appear.
- Log Date – A date range with events to show.
- Sort By – Change the way the data is sorted (either by Log Date, Changed By, or Application).

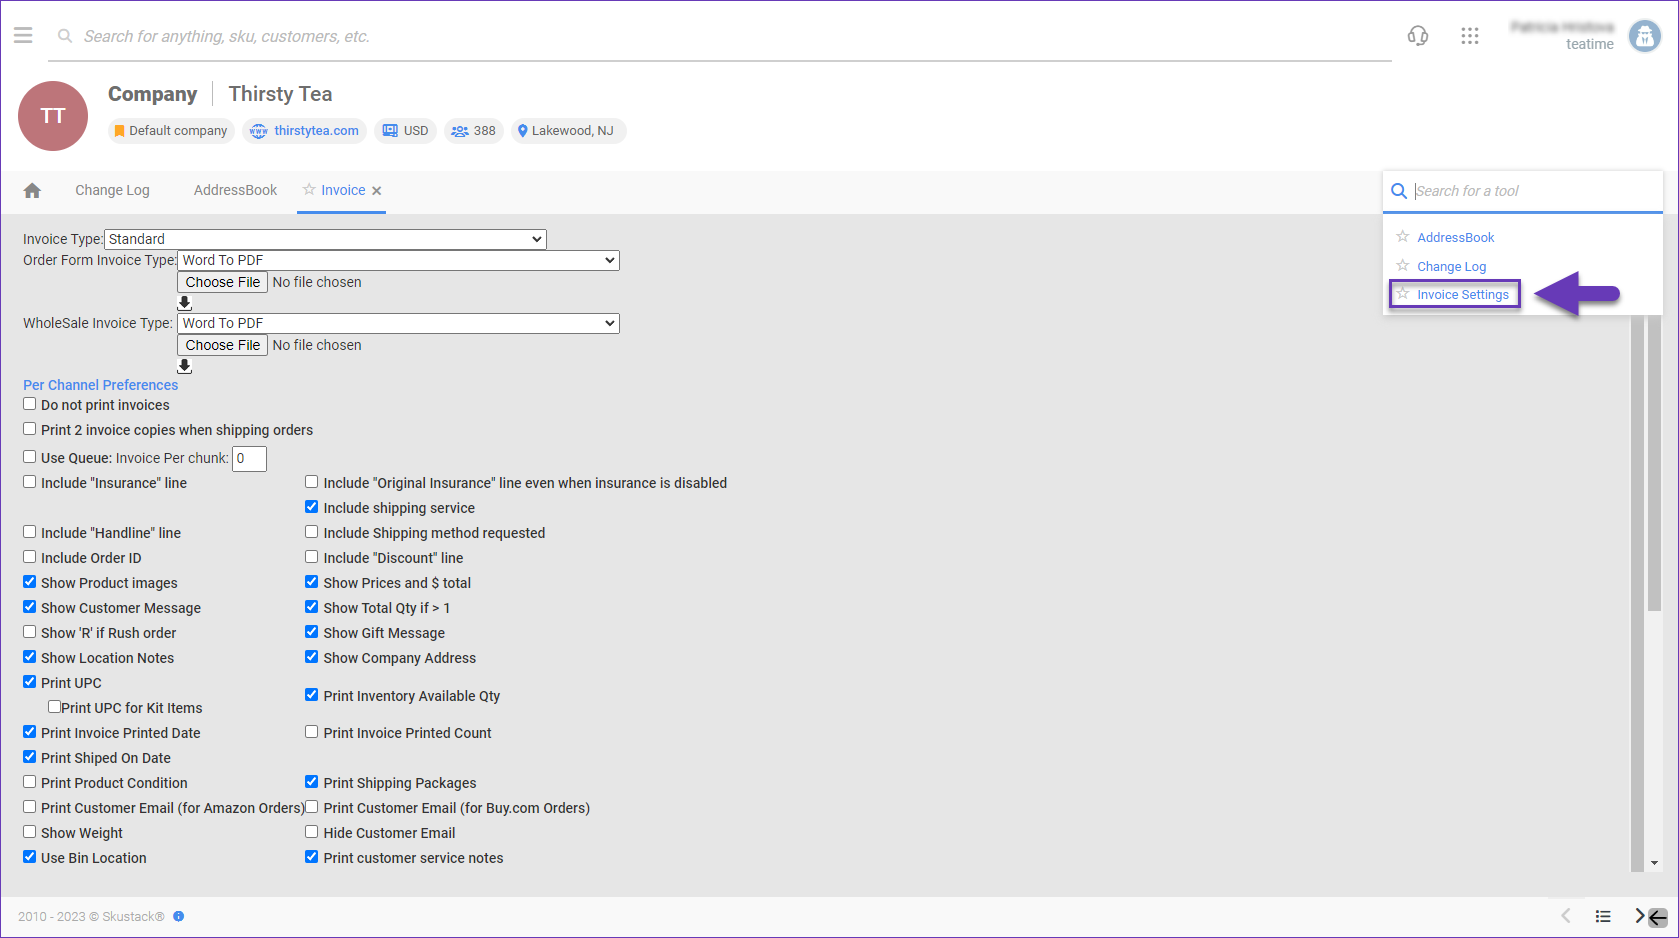
Invoice Settings
Choose an invoice of a standard type for your orders or use a customized plugin. The Invoice settings are configured on a company level and allow you to show or hide Product and Order Information.
To specify which data is displayed on an Order’s Invoice:
- Navigate to Toolbox > Invoice Settings.
- In the Invoice Type field, select the desired invoice type. The default invoice type is Standard.
- Select or deselect settings in order to display or hide parameters on the invoice.
- Enter an Order Number at the bottom of the page to Preview the changes if needed.
- Click Save.