Overview
The User Activity Report is an effective solution for analyzing the performance of your warehouse workforce. It allows you to export detailed insights into the various activities performed by your employees, capturing duration metrics that reflect your team’s productivity and efficiency.
Manage User Activity Reports
To view and export your User Activity records:
- Navigate to the Skustack Admin portal at https://xx.skustack.com (replace “xx” with your server ID or team name).
- Enter your login credentials.
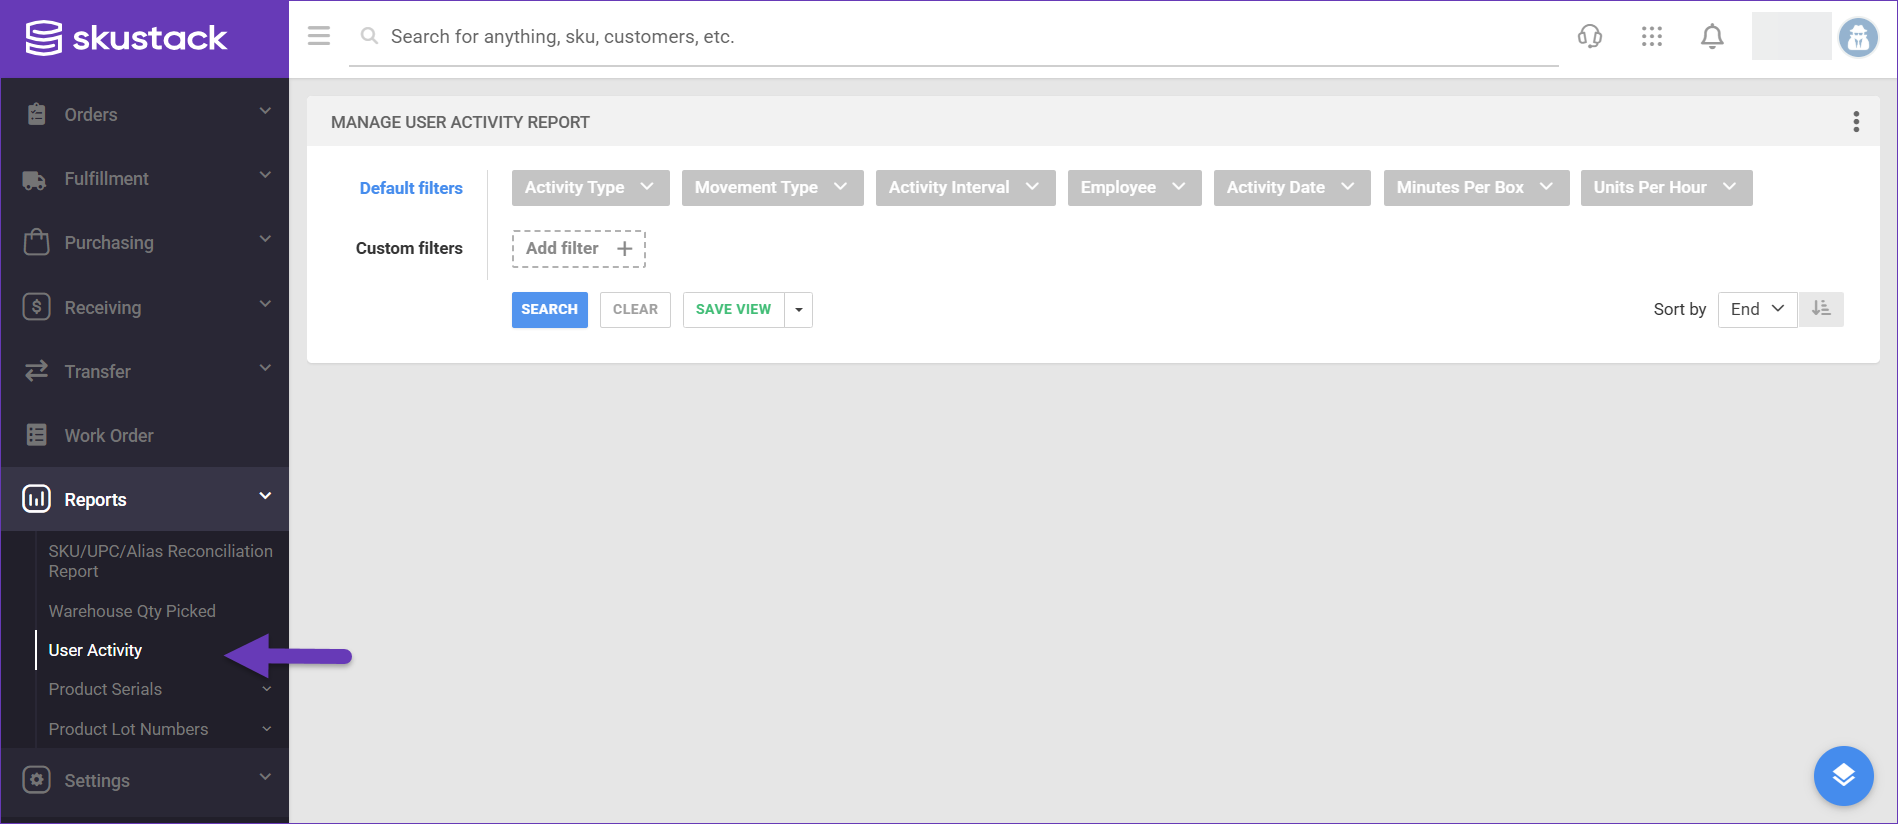
- On the left, select Reports > User Activity.

- Configure your Default filters to make sure that the results display exactly what you need:
- Activity Type – Choose the type of activity to display: Adjusting, Picking, Receiving, Shipping, or Transferring.
- Movement Type – Filter from the available options:
- Credit Memo Picked
- Credit Memo Unpicked
- FBA Pick
- FBA Unpick
- Kit Assembly
- Kit Disassembly
- Kit Prepare
- Kit Unprepare
- Order Picked
- Order Unpicked
- Restock Pick
- Restock Unpick
- Vendor Central Shipment Shipped
- Vendor Central Shipment Unshipped
- WFS Picked
- WFS Unpicked
- WITR Picked
- WITR Unpick
- Activity Interval – Either Day, Month, or Year.
- Employee – Choose the users for whom the report is relevant.
- Activity Date – A date range for your report.
- Minutes Per Box – Filter the data by the time spent per box.
- Units Per Hour – Select a range of processed units per hour.
- Reference ID, First Name, and Last Name custom filters can be added through the Add filter button.
- Click Search. Each filter you apply gets highlighted. If a filter is gray or not displayed at all, it’s not active.
- To manage the columns in the grid, click the three dots icon at the top right and select Customize Columns. You can:
- Reorder columns by dragging them up or down in the list.
- Hide columns by clicking the Trash icon.
- Add columns by clicking Add column.
- Use the Sort by menu to arrange the data in a different order.
- To save your filtering and sorting options, click Save view, enter a Name, and click Save.
- To export the filtered information, open the Actions menu and select Export To Excel.

