
Overview
Skustack’s Visualize is a premium feature that offers spatial intelligence to help you manage your bin-enabled warehouses more efficiently. With this tool, you can create and operate with a digital representation of your warehouse layout, allowing you to optimize inventory organization, explore bin contents, search for existing products and picklists, and more.
Key Terms
- Floor – If your storage facility is multi-level, you can use this term to define each floor.
- Area – A designated zone or sector within a storage facility or building for specific purposes.
- Aisle – A passage between your warehouse shelves or racks.
- Rack – A shelving framework or structure with bin compartments used for storage.
- Bay – A division or a section within a rack/shelving system.
- Column – A positional coordinate in a vertical line.
- Row – A positional coordinate in a horizontal line.
- Level – A specific horizontal layer within a rack or shelving system. Each level can hold multiple shelves.
- Group – An organizational group of bins without a specific shelving system.
- Bin – A small container or storage unit within a shelf or bay, used to hold and organize individual items.
Visualize Your Warehouse
To manage a warehouse in the Visualize tab, you should first establish its layout in the system. This can be done by assigning a naming convention to at least one storage element in the Warehouse Planner and configuring its corresponding location. To achieve this:
- Navigate to the Skustack Lens portal at https://lens.skustack.com.
- Enter your team name and login credentials.
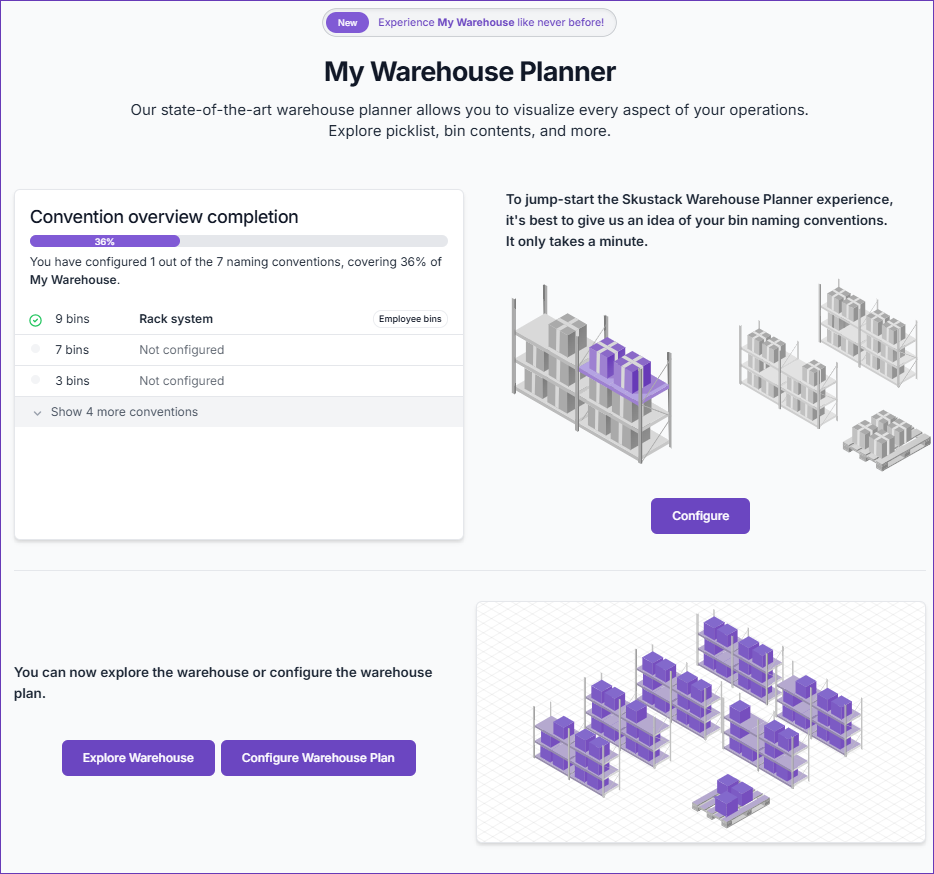
- Select Visualize. A list of your bin-enabled warehouses will be displayed.
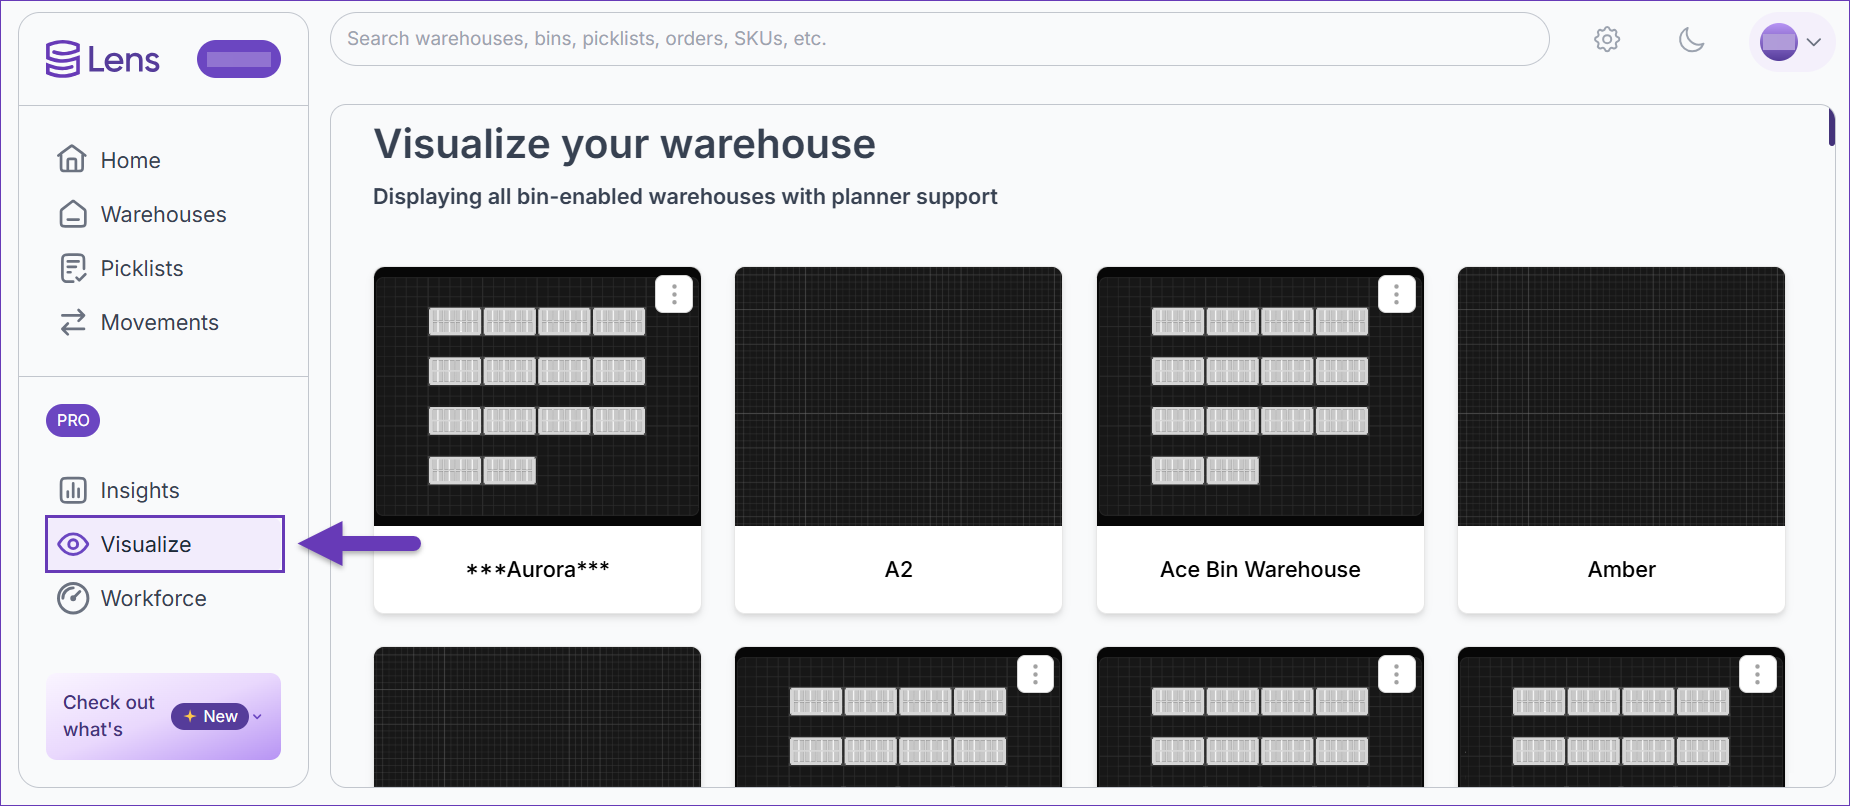
- Select the desired warehouse and you’ll see the number of bins and their naming progress in the Convention overview completion panel.
- Click Configure to proceed.
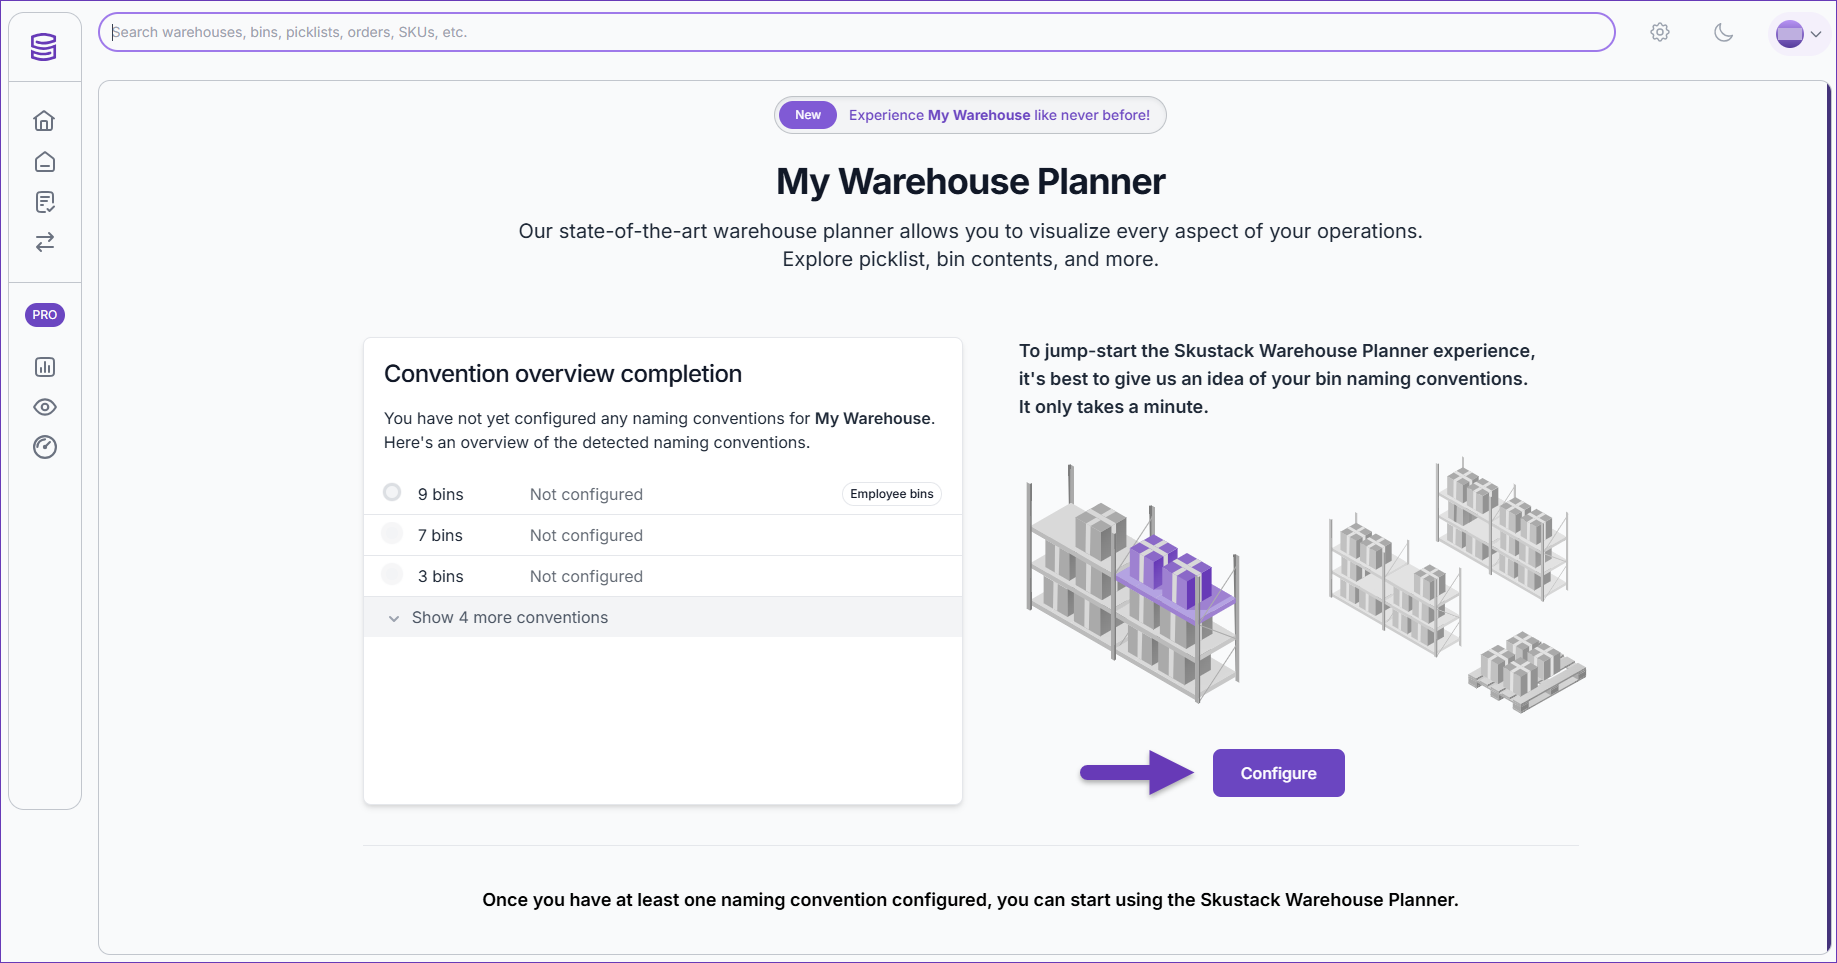
- Your warehouse’s most common bin names will appear automatically. A percentage value on the left will indicate how many of your warehouse bins have these common naming conventions.

- Choose the group type of the displayed bins:
- Shelving unit or Racking system – Select this type if your warehouse is organized via shelves and racks. The available naming conventions are:
- Floor
- Area
- Aisle
- Rack – A mandatory element for this group type.
- Bay
- Column
- Row
- Level
- Bin
- Custom or Unstructured – Choose for custom bin management. The available naming conventions are:
- Floor
- Area
- Group
- Bin
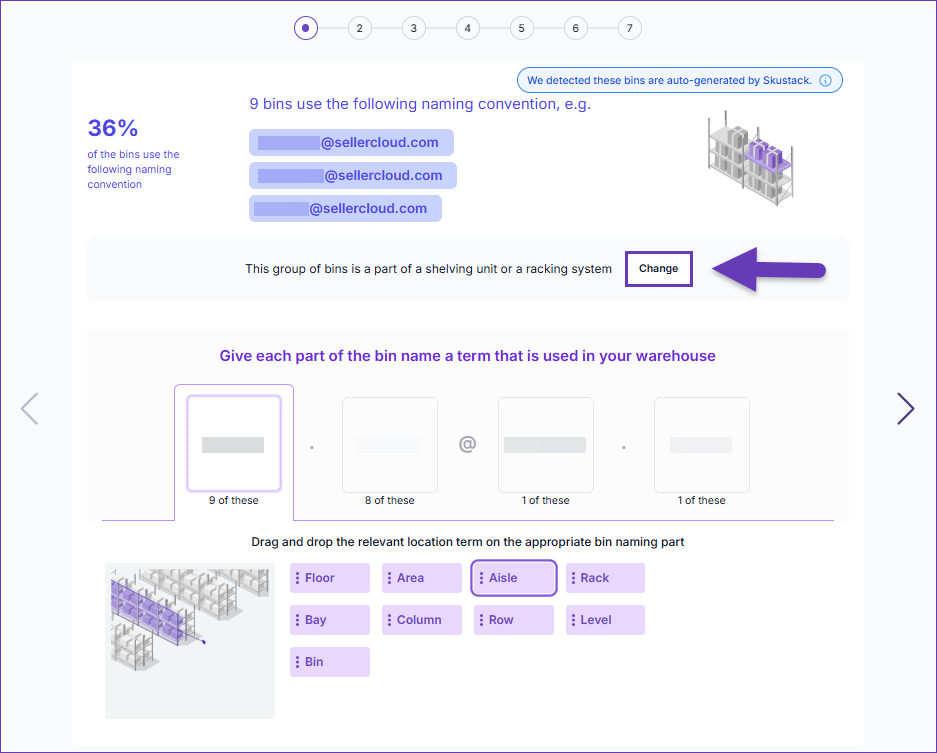 The group type can be changed as needed from the Change button.
 - Shelving unit or Racking system – Select this type if your warehouse is organized via shelves and racks. The available naming conventions are:
- Give each part of the bin name a term that is consistently used in your warehouse by dragging and dropping the relevant term in the corresponding field.
- Once done, click Save. If you wish to clear the selection, click the Reset button.
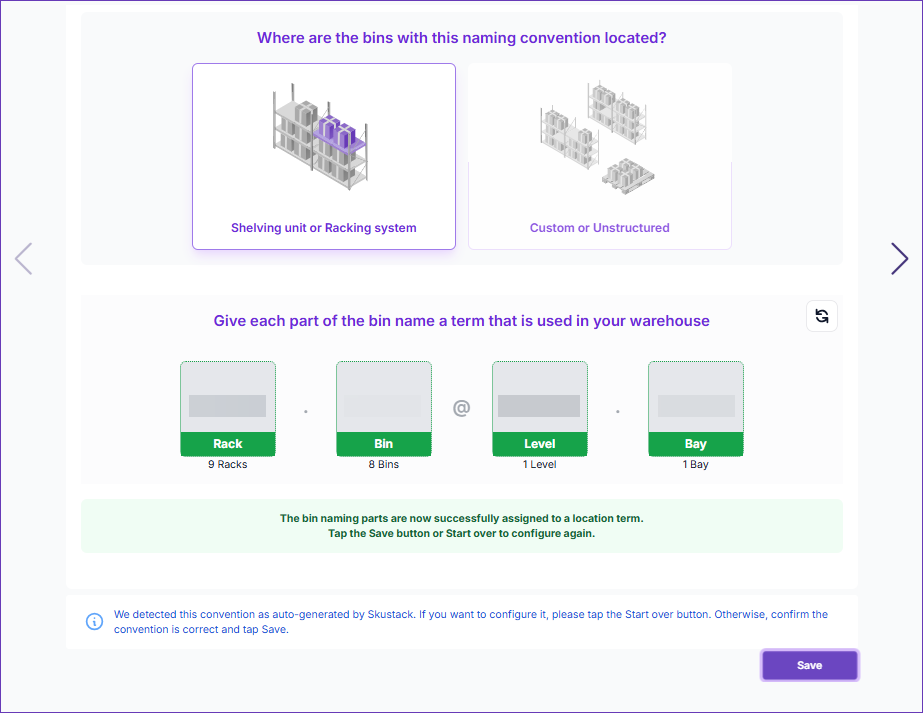
- The naming progress will be reflected in the Convention overview completion panel.
- Once the inventory location terms are selected, you can set up the layout of your virtual warehouse, by clicking the Configure Warehouse Plan button.
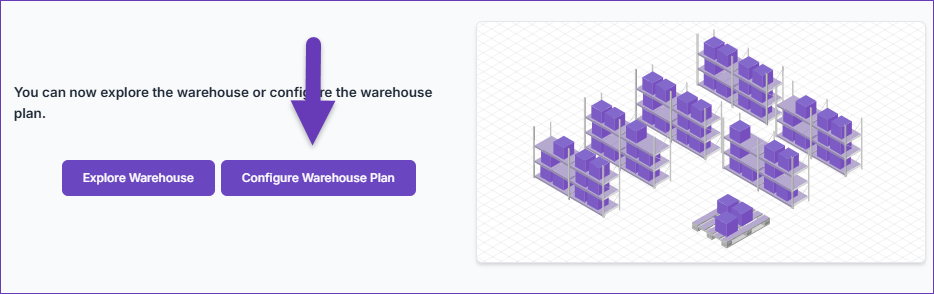
- The layout planner will load automatically on the Elements tab, which contains the location terms that you’ve chosen earlier and your warehouse Regions.
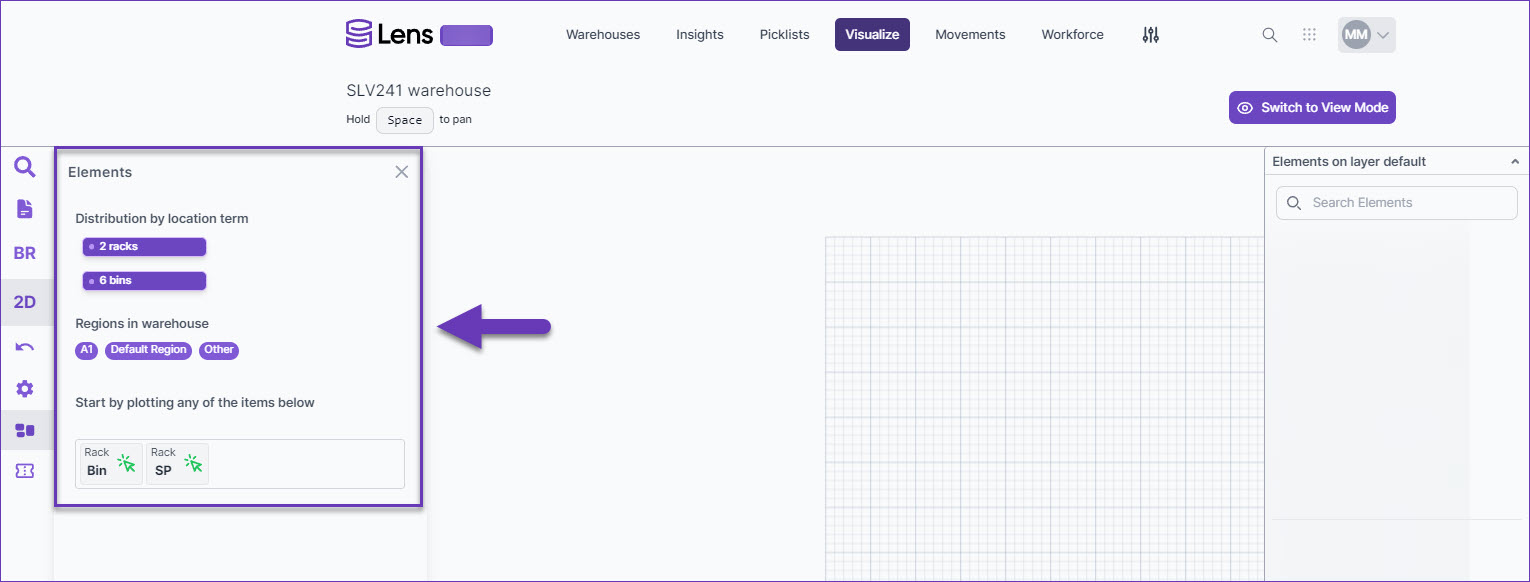
- Click on a Region to organize its corresponding locations.
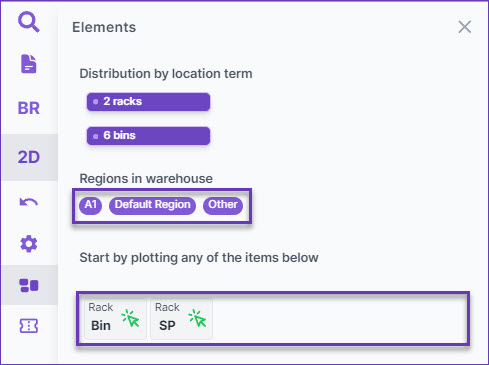
- Click on a location term, then drag and drop it onto the planner according to your warehouse layout scheme.
Configure Warehouse Plan
The visualization of your warehouse plan can be updated at any time, by clicking on the Configure Warehouse Plan button.
By default, the warehouse Elements will load on your screen. Refer to the menu on the left to view all options:
- Search
- Picklists
- Bins Report
- 2D View
- Undo
- Configure project
- Elements
- Convention wizard
Search
The Search feature enables you to seek for Bins, SKUs and Barcodes within your digital warehouse:
- Choose the required search type – Bins , Barcode or SKUs.
- Populate the details of the item that you’re looking for and click Search
- Your planner will lead you to the result’s placement in your virtual layout and will list the locations’ identifiers in a tab on the left of the layout. SKU searches will also load the product’s thumbnail. Explore the storing rack details, by clicking the go to rack shortcut. To view all storing bins associated with the result, click on the bin dropdown.
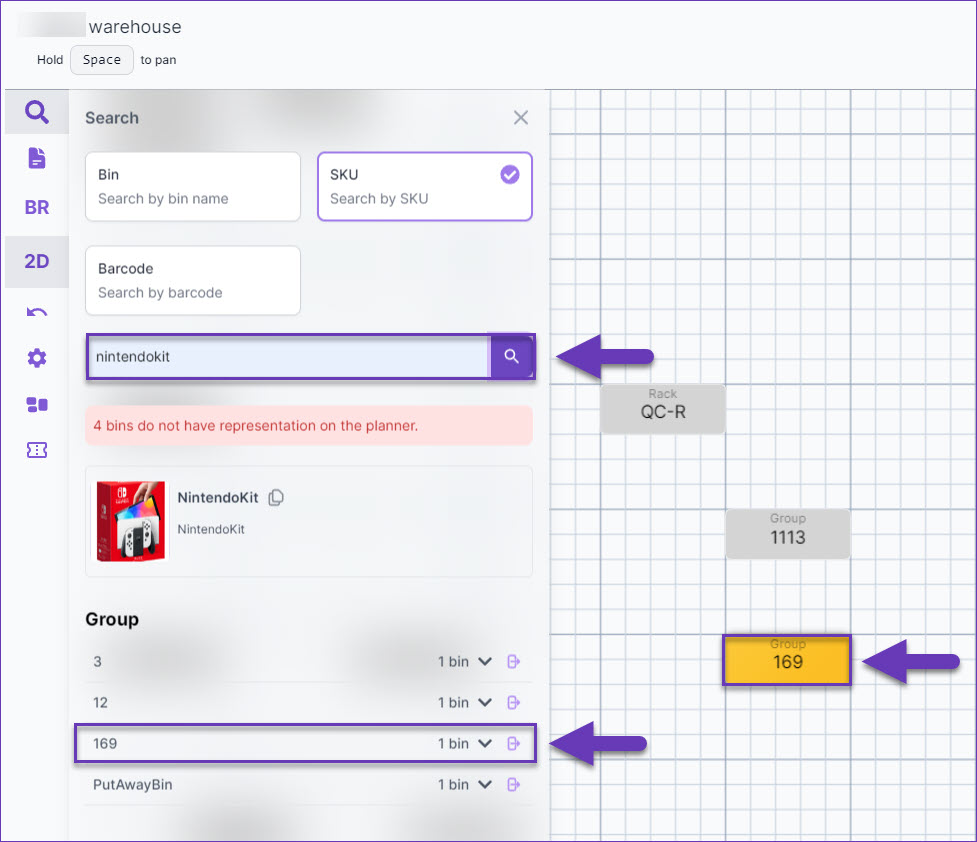 A warning message will indicate if search results can be found in bins that are not represented in the warehouse planner.
 - When you select a location, its storage elements will appear in a slide-out panel on the right. By default, these elements are listed in ascending alphabetical order. If needed, you can change the order to descending by clicking the A-Z↑ button. Additionally, you can hide levels that do not contain bins by clicking the Hide Levels Without Bins button. The number of hidden rows will be shown at the top and the levels can be redisplayed by clicking the Show levels without bins indicator.
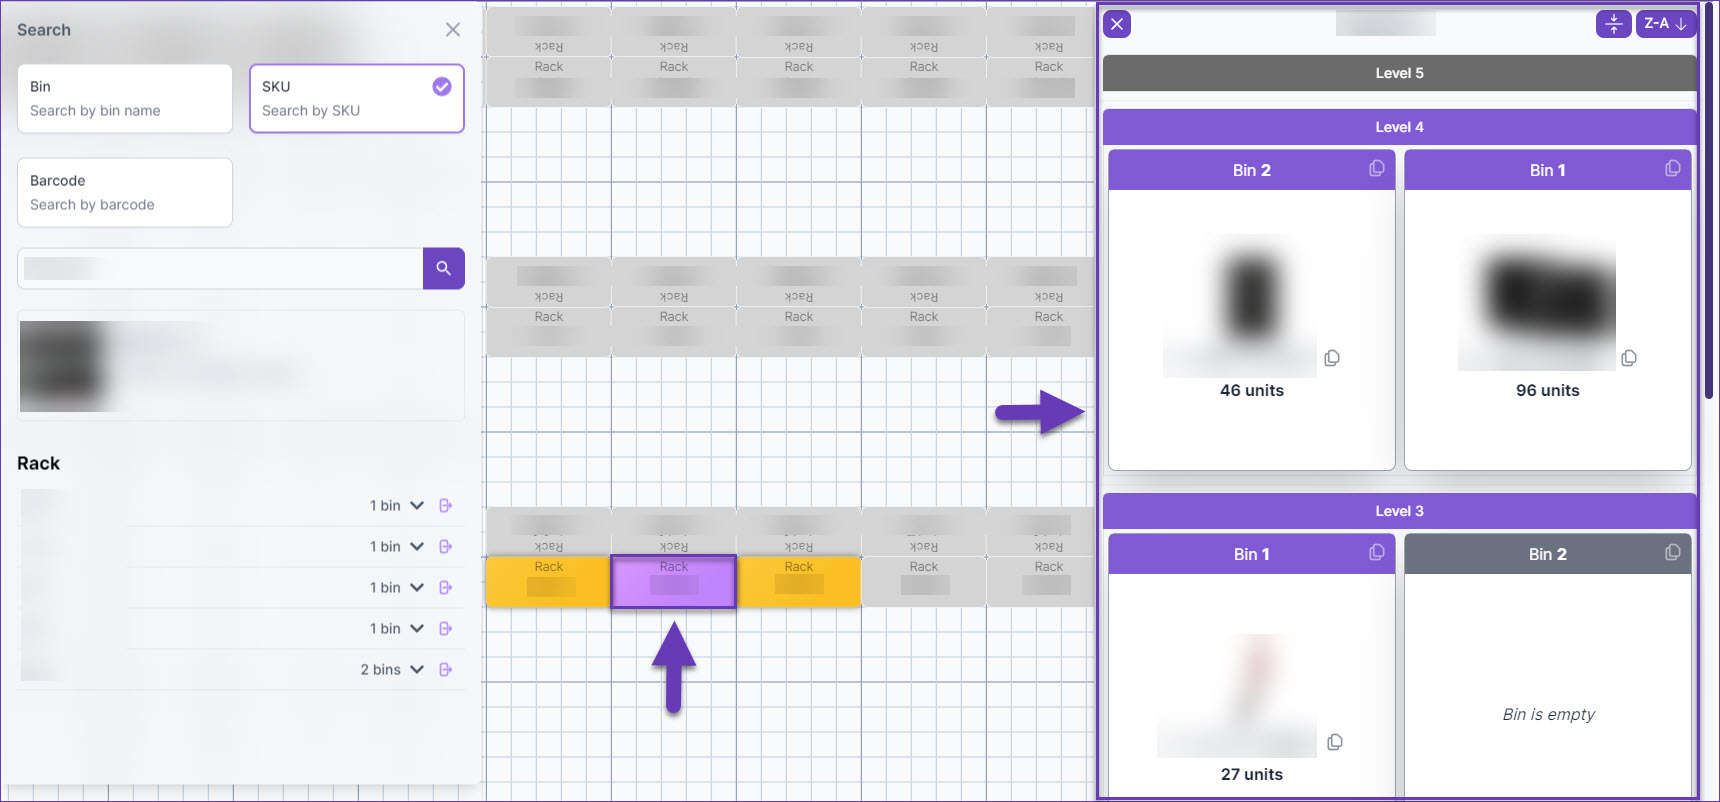 To resize the slide-out panel, simply click on the panel’s left border and move it to the desired width. The selected size will be automatically applied to all element panels.
 - Click on a bin to explore its contents and movements.
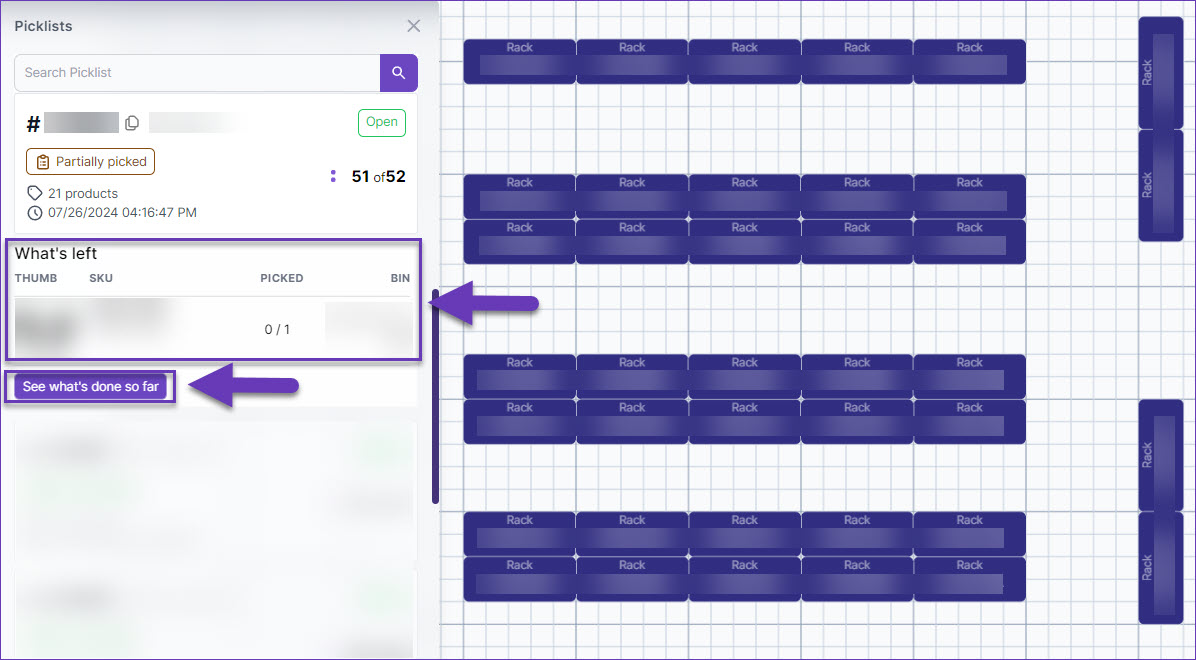
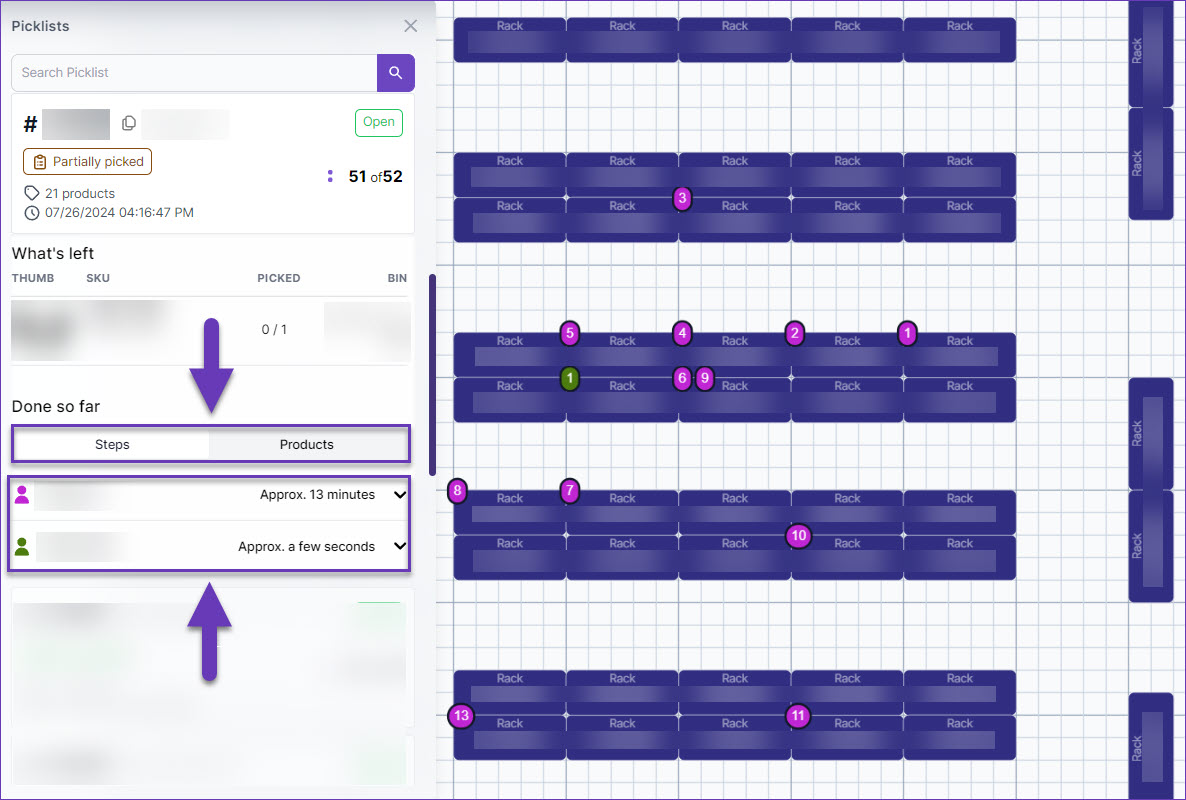
Picklists
Visualize has another search option, with which you can find warehouse picklists, their corresponding products and bins, progress status, movements, remaining steps, and user details. Simply click on the Picklist icon and the planner will automatically display a list of the 15 most recent picklists. You can use the Open and Closed buttons to filter the results by their status. If you’re looking for a specific picklist, just enter its ID and click the magnifying glass. The planner will then show you the picklist details and the location of its products in your virtual layout.  A warning message will be displayed if the selected picklist belongs to a different warehouse. Click Go to Warehouse to navigate to the correct warehouse.

Click on the desired picklist to view its details. The displayed information varies based on the picking stage. For example, picklists with status Partially Picked allow you to easily track what has been processed and identify the remaining steps.
Bins Report
In the Bins Report section, you can easily identify all empty bins within your warehouse.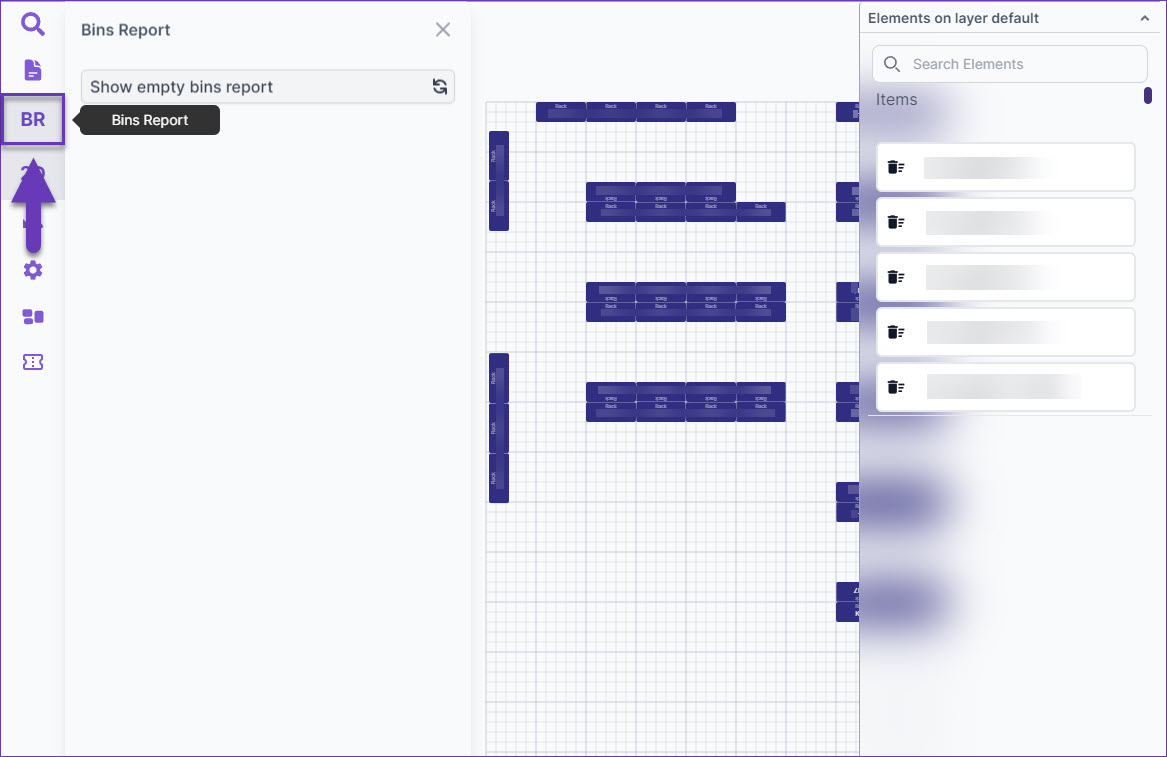
To show all empty bins, simply click on the Load icon.
Racks and Groups that contain empty bins will be listed alphabetically on your left and highlighted in the planner’s grid.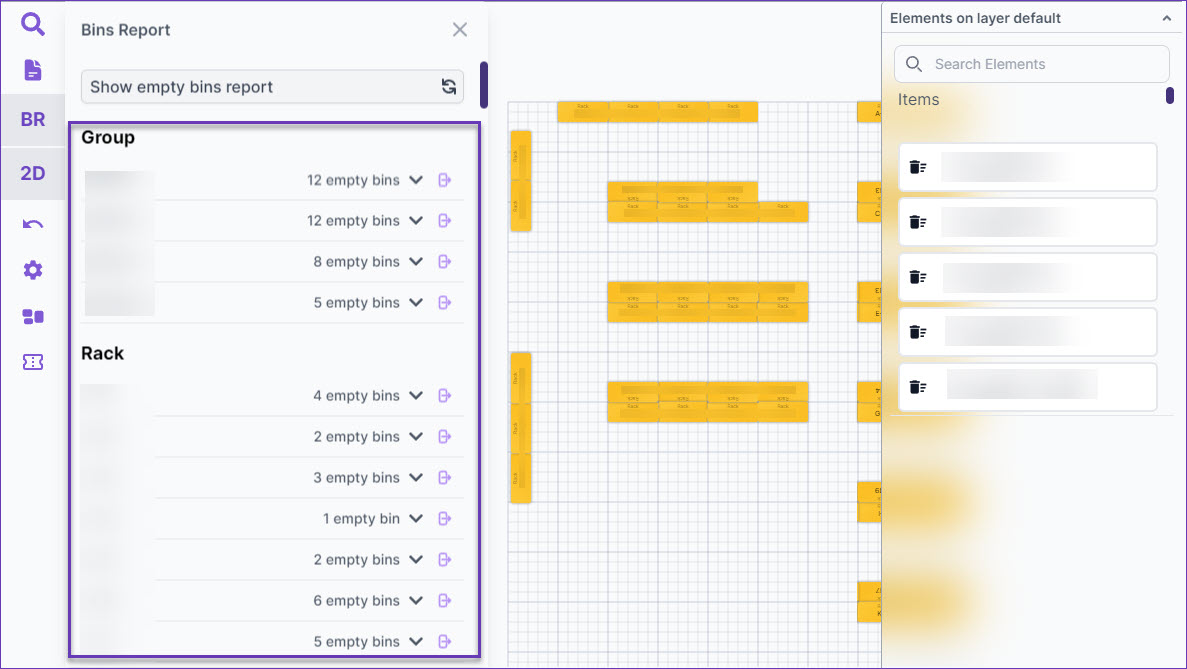
Next to each Rack/Group name, you’ll find the number of empty bins it contains. Click the arrow, to view the list of empty bins. To explore the specific rack/group details, click the go to rack shortcut. Selecting a bin ID will open a slide-out panel displaying its contents. You can also copy a bin name via the icon next to its ID. 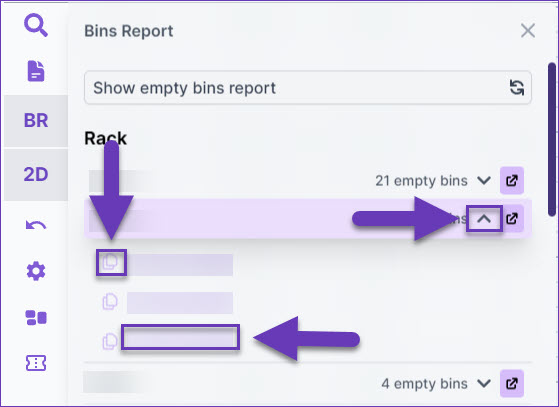
2D View and Undo
2D View and Undo are convenient shortcuts to two basic functionalities in Visualize:
- 2D View – Click on this icon to display a two-dimensional model of your warehouse.
- Undo – Click on this shortcut, or press Ctrl + Z to reverse an action.
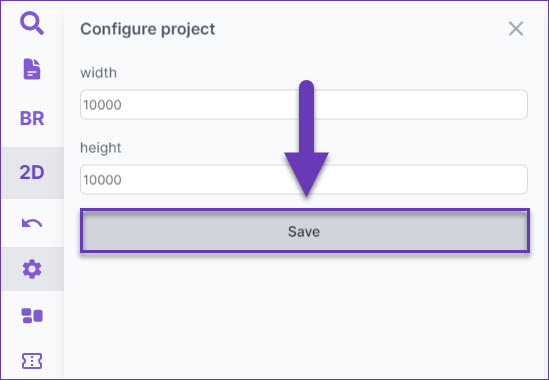
Configure project
The grid in your virtual floor plan can be adjusted in the Configure project tab:
- Open Configure projects.
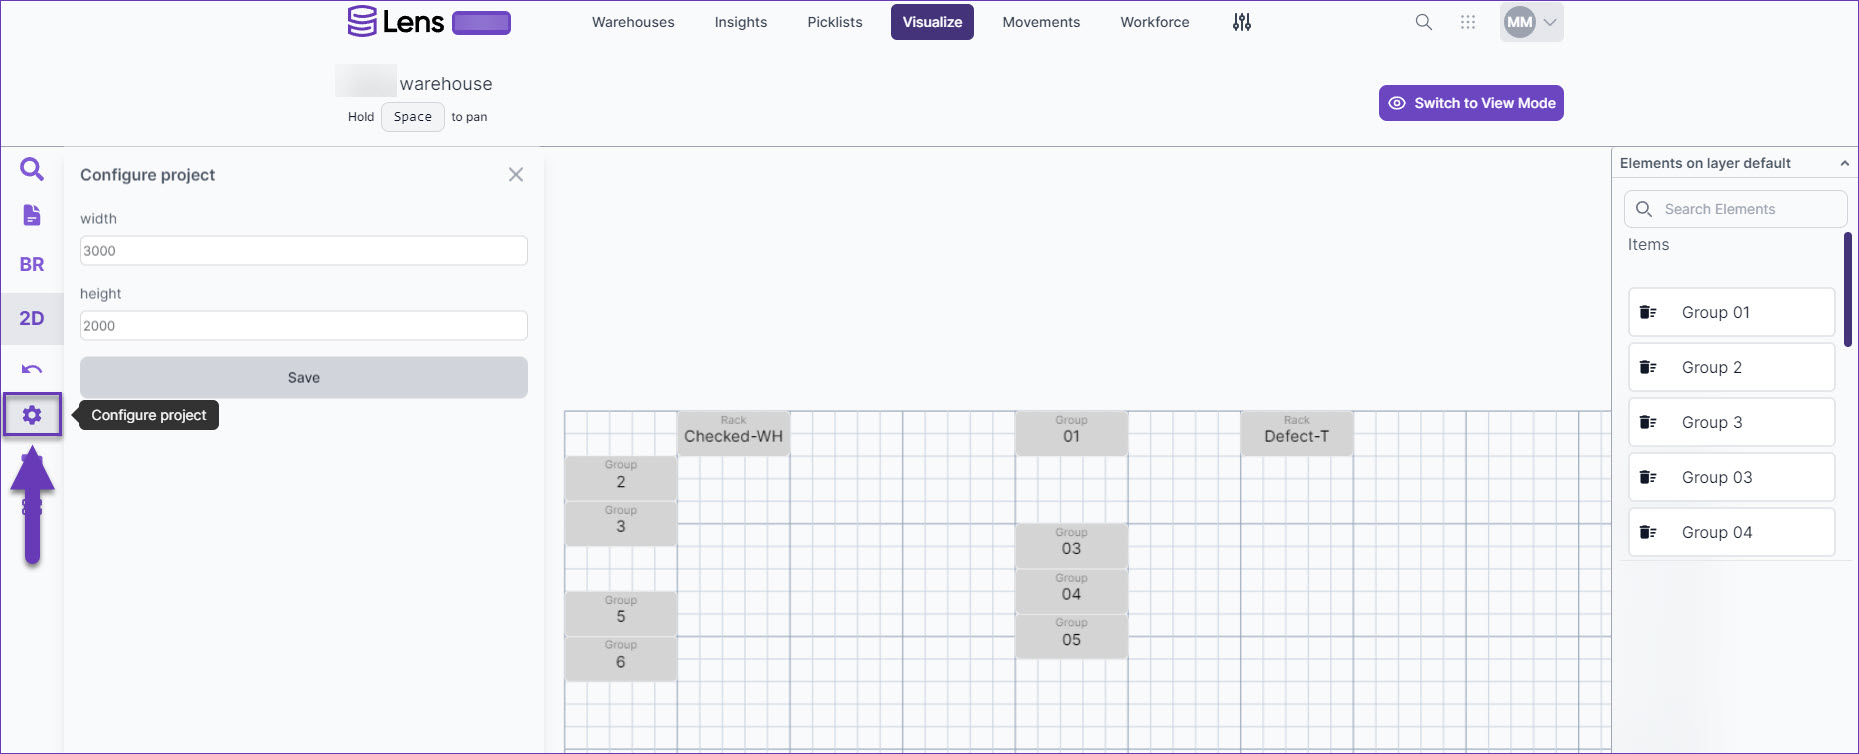
- Add your project configuration’s width and height and confirm each new value, by clicking the verification icon next to it.
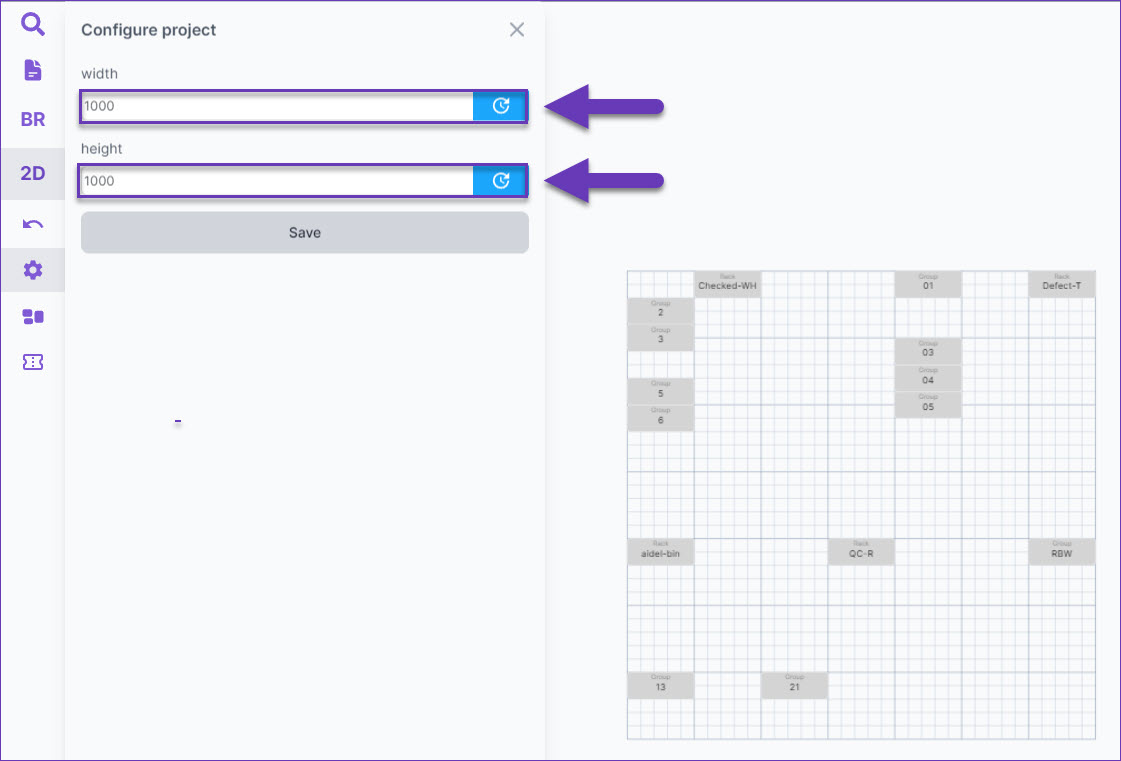
- Click Save and the project grid will update automatically.
Elements
The layout of your virtual warehouse can be managed in the Elements tab.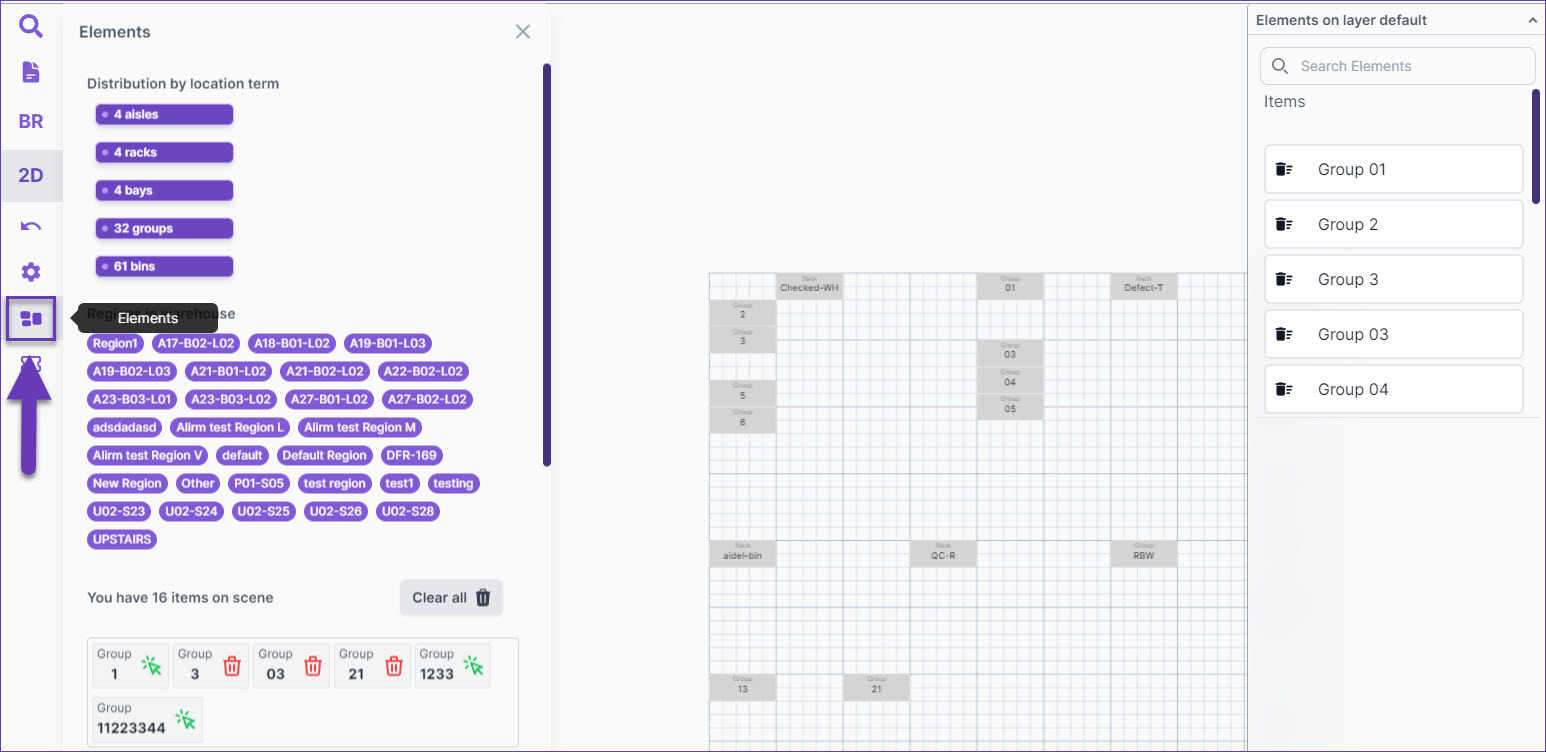
Here you can find your preconfigured storage terms and their distribution details, all warehouse regions and unconfigured warehouse bins, and a planning grid, in which you can situate the available storage elements.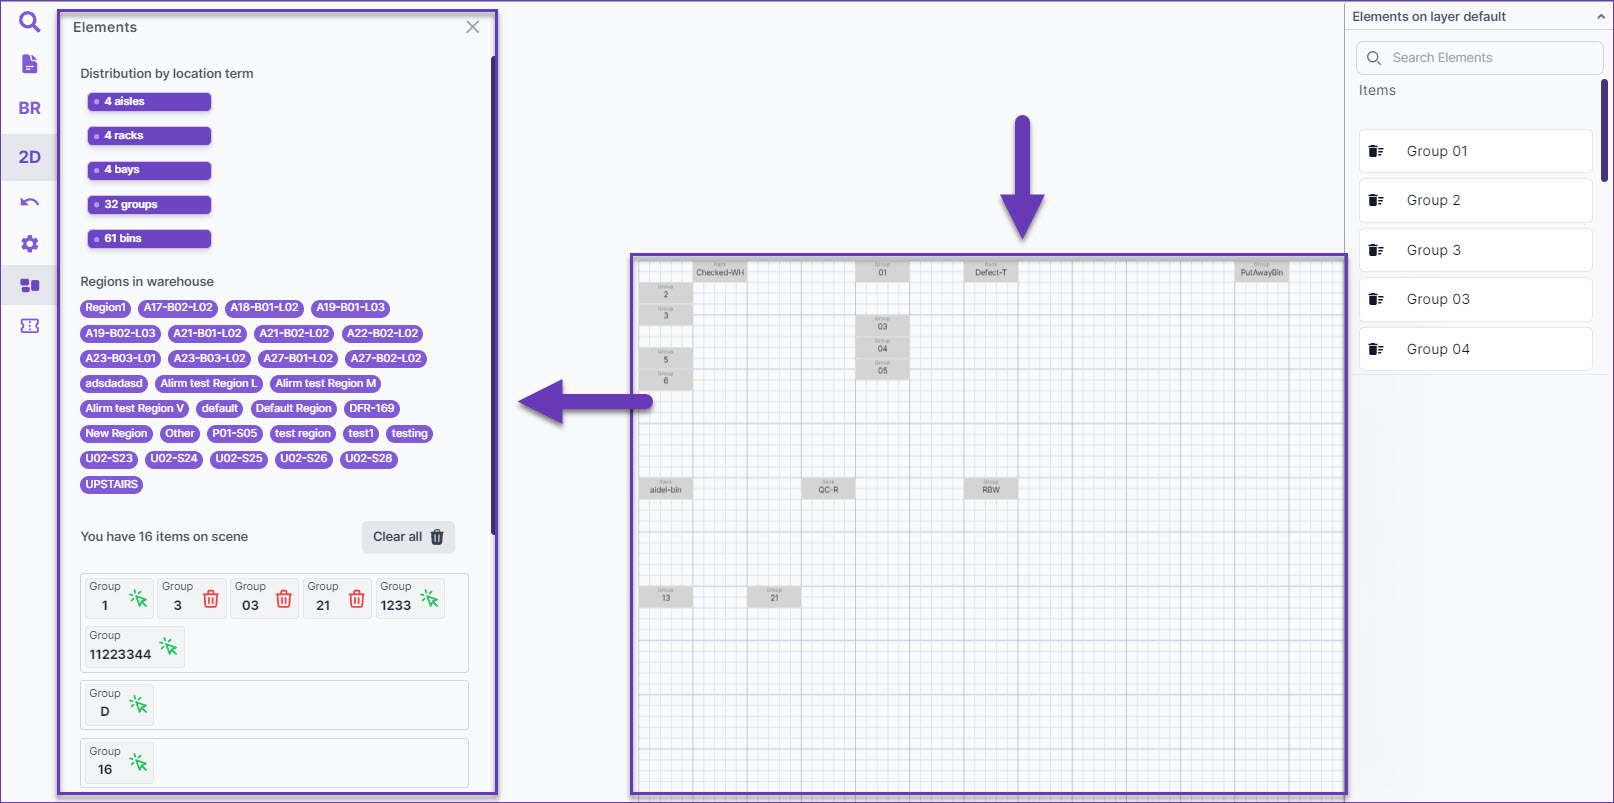
You may narrow down the list of elements, by selecting a specific warehouse region. To place a storage component on the grid, simply click on it and drag it to the desired location.
You can remove all placed elements from the grid, by clicking the Clear all button.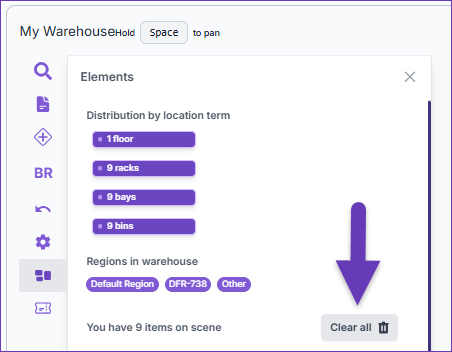
Convention wizard
The naming convention of your storage components can be adjusted at any point, by clicking the Convention wizard icon.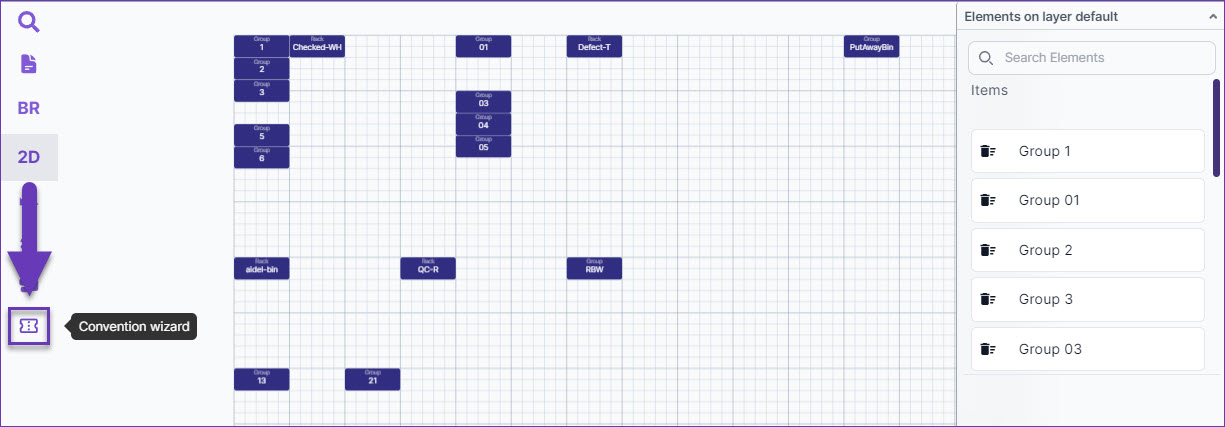
Refer to the steps in the Visualize Warehouse section for further guidance.
Explore Warehouse
Warehouses with configured locations can be easily inspected by pressing the Explore Warehouse button or by switching to View Mode.
This section enables you to seamlessly navigate through your virtual warehouse without the option to edit its layout. Most of the features here are also available in the Configure Warehouse Plan section:
- Search
- Picklists
- Bins Report
- 2D View
- Convention wizard
The View Mode is particularly useful to visualize the contents of your bins and their remaining capacities. To do so:
- Navigate to the desired warehouse planner and click on the storage location that you’re interested in.
- All bins in the selected location will be displayed in a slide-out on your right. By default, these bins are listed in ascending alphabetical order. If needed, you can change the order to descending by clicking the A-Z↑ button. Additionally, you can hide levels that do not contain bins by clicking the Hide Levels Without Bins button. The number of hidden rows will be shown at the top and the levels can be redisplayed by clicking the Show levels without bins indicator.
- Select a bin and use the arrows to view its contents. Each bin card contains the following information:
- The name of the bin and a shortcut to copy it.
- The amount of different products held in the bin and their respective quantity.
- Images of the stored items. Use the arrows to swipe between SKUs.
- A progress bar at the bottom of each bin card that indicates its unit capacity and the corresponding utilized storage percentage.
